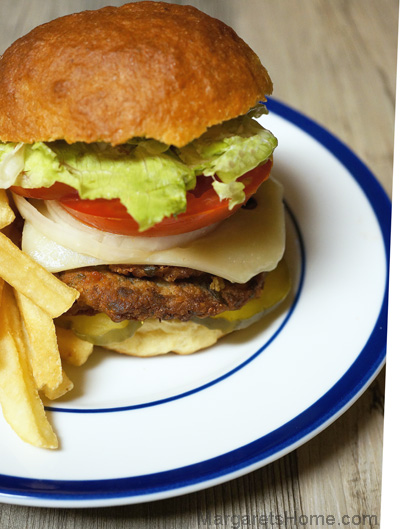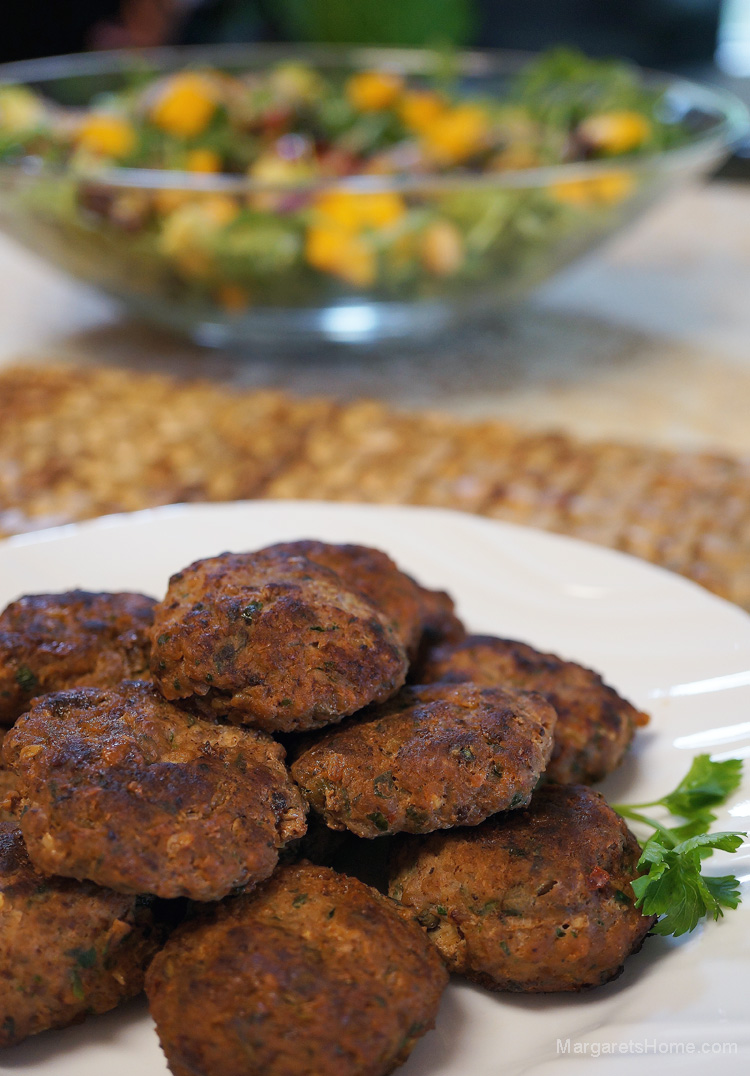
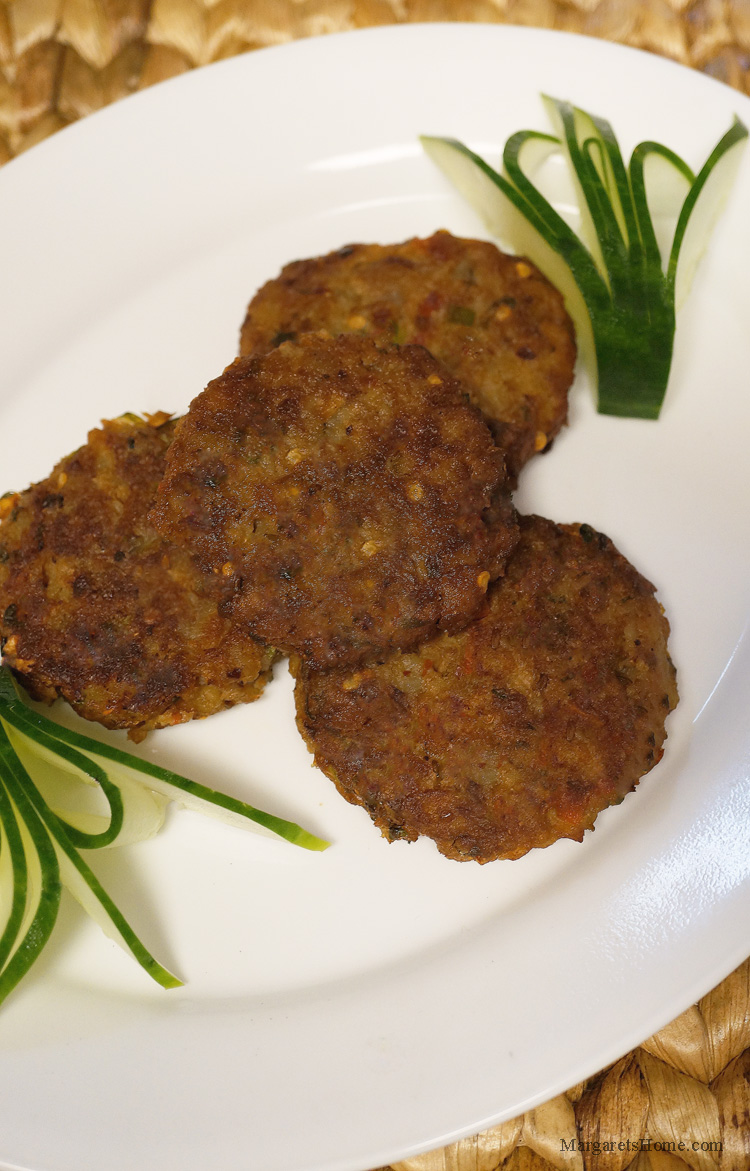
Reposting – Fishless Tuna Cutlets

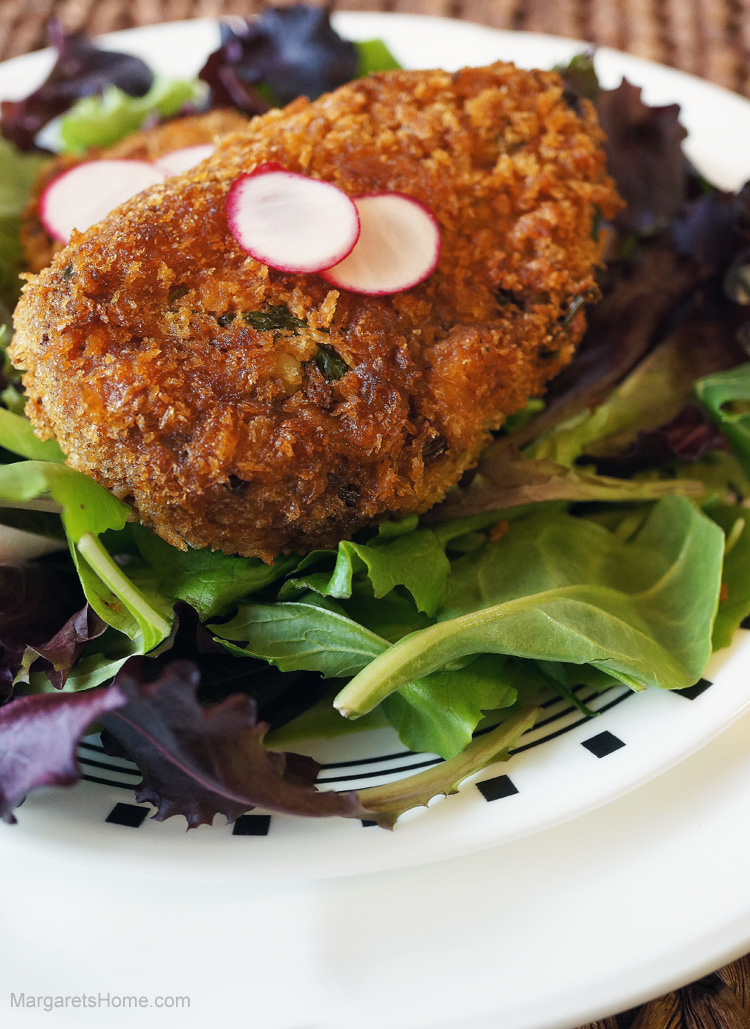
Fishless Tuna Cutlets Fishless Tuna Cutlets
Prep time: 10 minutes
Cooking time: 25 minutes
Makes: 10-15

Ingredients:
3 Yukon gold potatoes, boiled, skins removed, and mashed, (about 3 cups)
2 cans (13oz/369g) Fishless Tuna, well drained
1 green bell pepper, finely chopped
1 small onion, finely chopped, (about ½ cup)
1 Roma tomato, diced
¼ cup finely chopped cilantro
5 mint leaves, finely chopped (optional)
3 green chillies, finely chopped (depending on heat and your preference, optional)
3 teaspoons chilli flakes, (depending on heat and your preference, optional)
½ teaspoon whole cumin seeds
2 teaspoons coriander powder
3 teaspoons dry mango powder, (amchur, optional)
¼ cup Bengal gram flour, (besan)
1 egg, (replace egg with two extra tablespoons of Bengal gram flour for vegetarian/vegan)
salt
Oil for shallow frying

Directions:
Add the potatoes, Fishless Tuna, green bell pepper, onion, tomato, cilantro, mint, green chillies, chili flakes, whole cumin seeds, coriander powder, dry mango powder, Bengal gram flour (besan), egg, and salt into a large bowl. Mix well. Form the cutlets and put them on a small tray.

Place a medium-sized non-stick frying pan over medium heat and add oil for shallow frying. Add a few cutlets at a time. If you over crowd the pan, it will be difficult to turn the cutlets over. Wait until you see the bottom edges of the cutlets turn golden brown in color. Then gently turn them over. Fry the other side until golden. Remove and place on a paper towel lined baking tray.

Notes:
1. Drain the Fishless Tuna and discard the water. Put the tuna in a sieve and press it with a wooden spoon so you can get all the water out before you use it.
2. Have all the ingredients ready before you mix them together, form the cutlets, and shallow fry them. If you mix the ingredients and leave it in the bowl to rest the onion, green pepper, and tomato will give out water which will make it difficult for you to form the cutlets.
3. Fry the cutlets on medium heat until you see the edges on the bottom of the cutlets turn golden brown.
4. If you like tartness, then add the dry mango powder (amchur).
5. Both Bengal gram flour and dry mango powder can be bought from an Indian grocery store.
6. These cutlets freeze well.
7. Replace the egg with two extra tablespoons of Bengal gram flour to make these cutlets vegetarian or vegan.
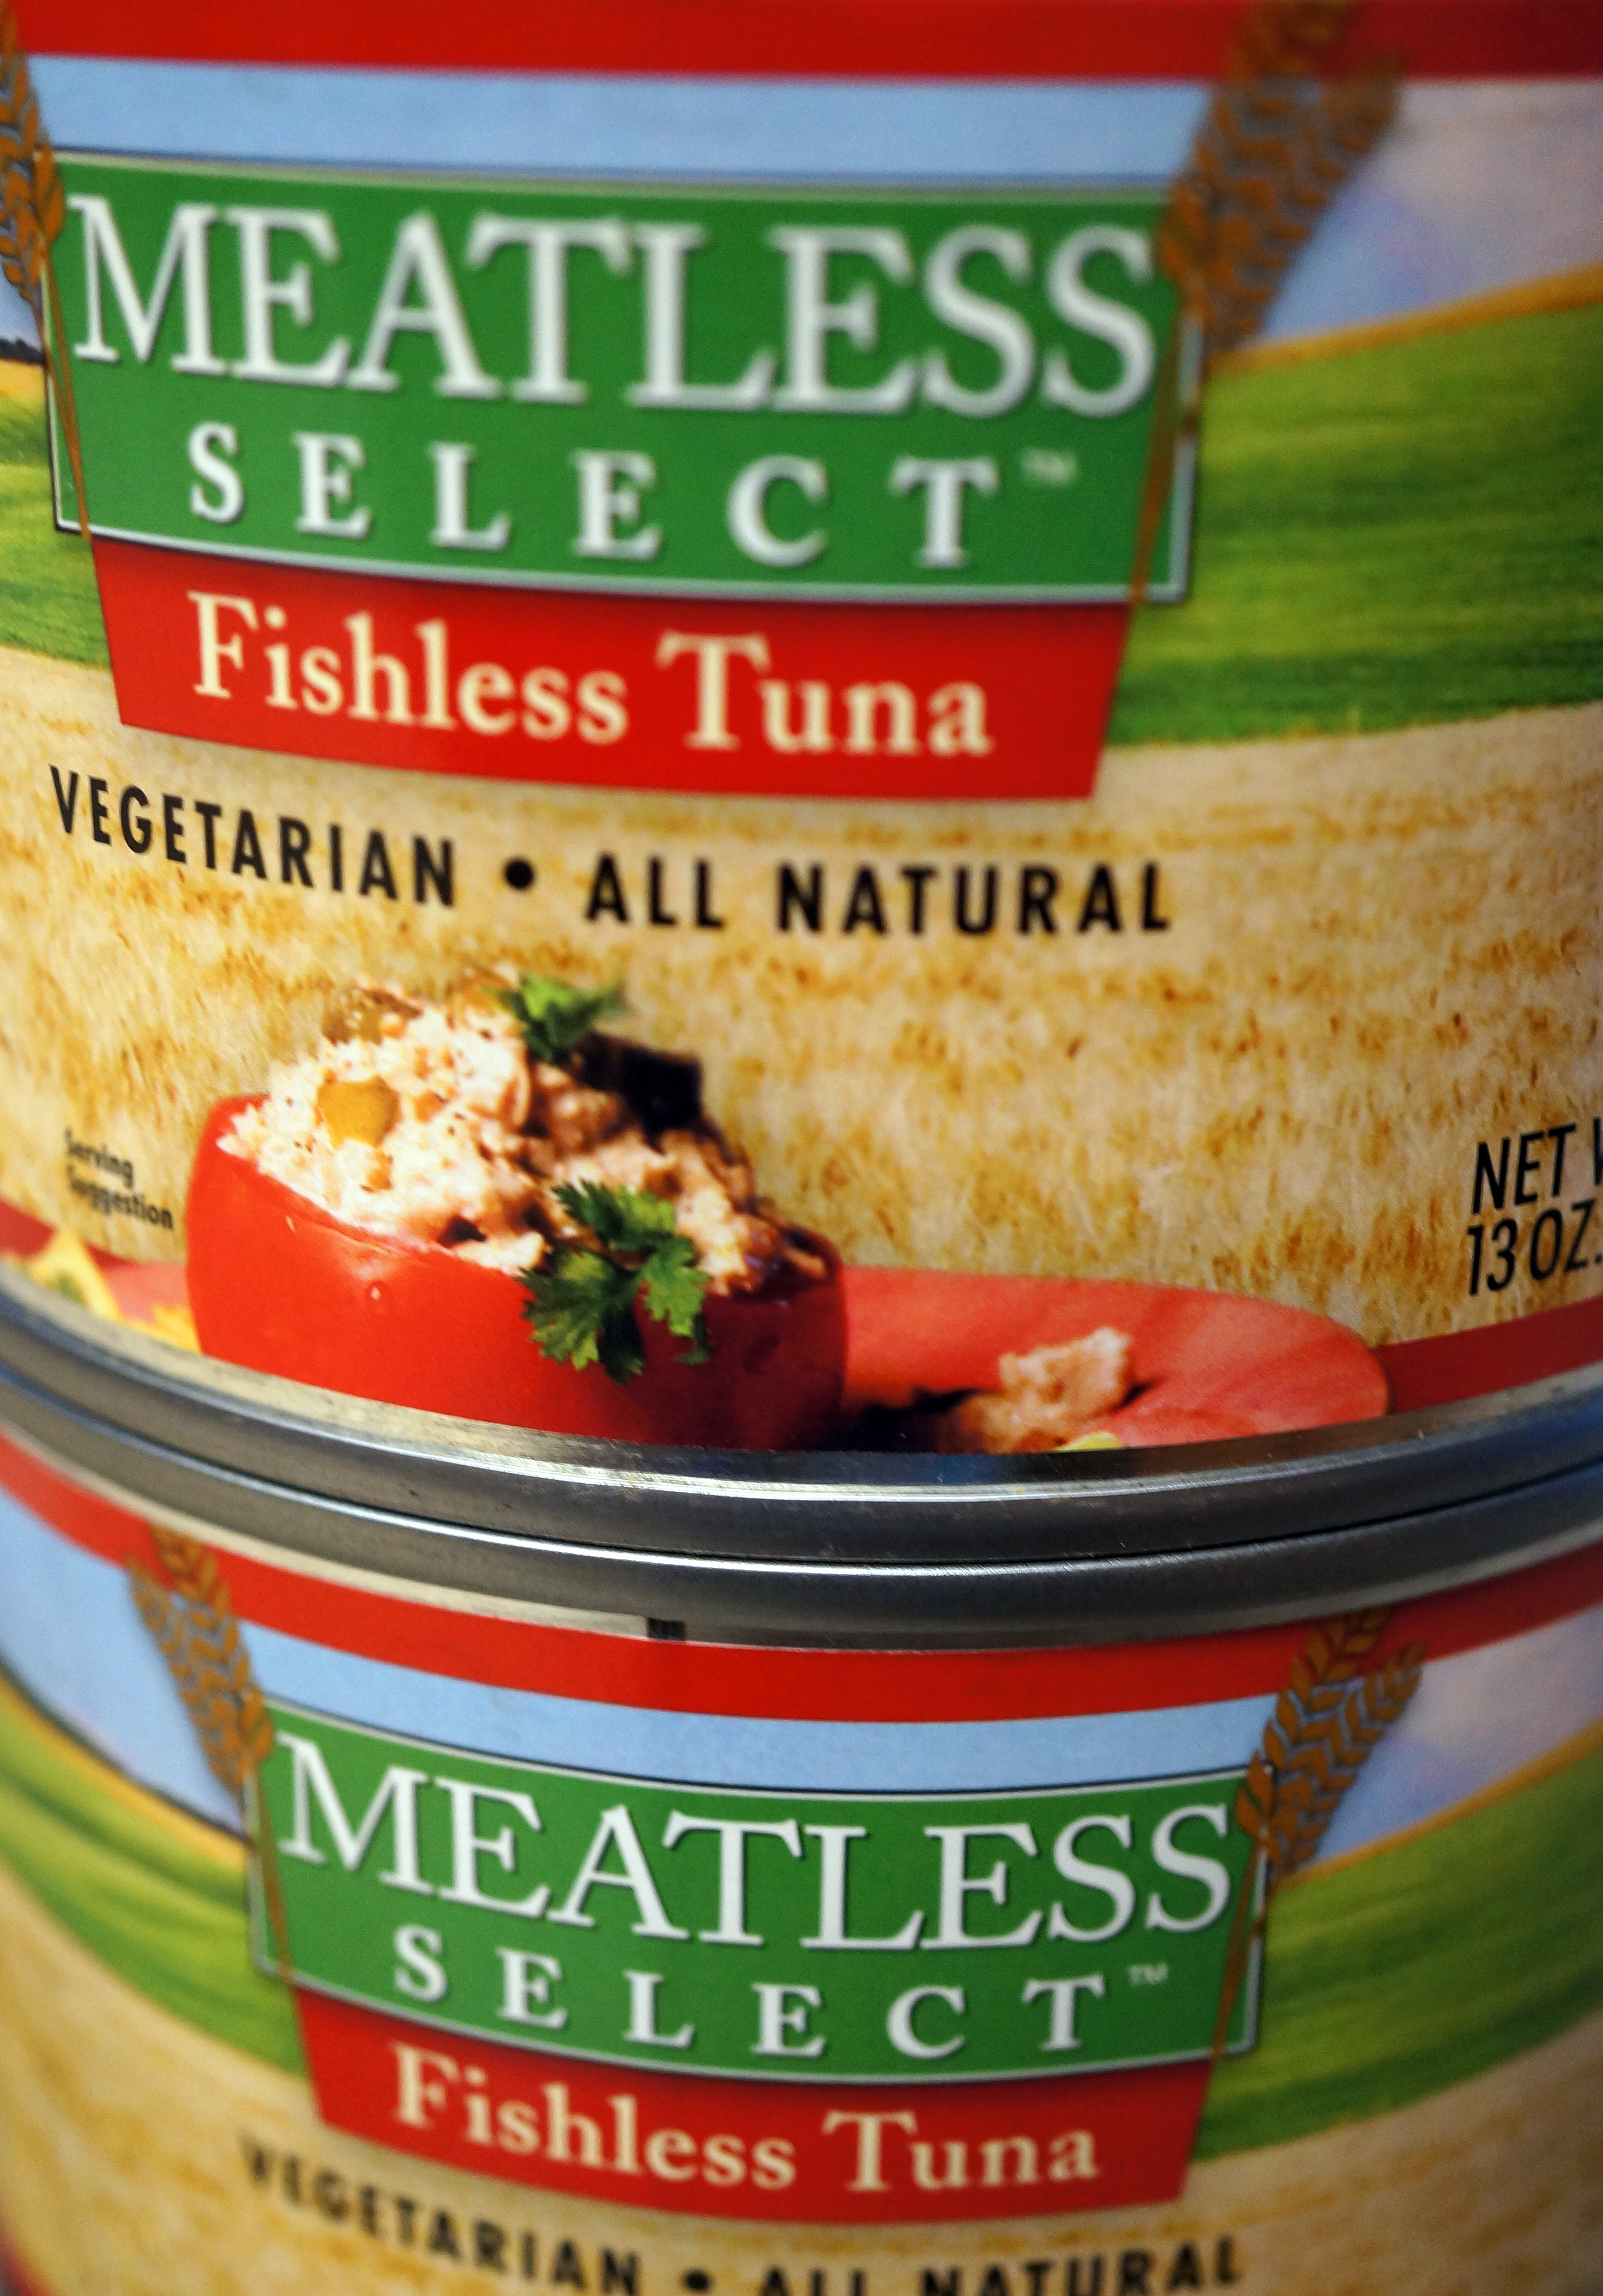
8. Fishless Tuna is a product of Atlantic Natural Foods Meatless Select. The cans are available at the Potomac Adventist Book & Health Food Store in Silver Spring, Maryland.

Fishless Tuna Burger1October 22, 2014 – Attaching a picture of the cans for those that asked. If you don’t have a store that sells this, you can contact the company directly: Atlantic Natural Foods Meatless Select at: http://www.foodprocessing.com/vendors/products/2013/atlantic-natural-vegetarian-proteins/
Fishless Tuna Can Pic

Zucchini and Corn Fritters

Zucchini and Corn Fritters
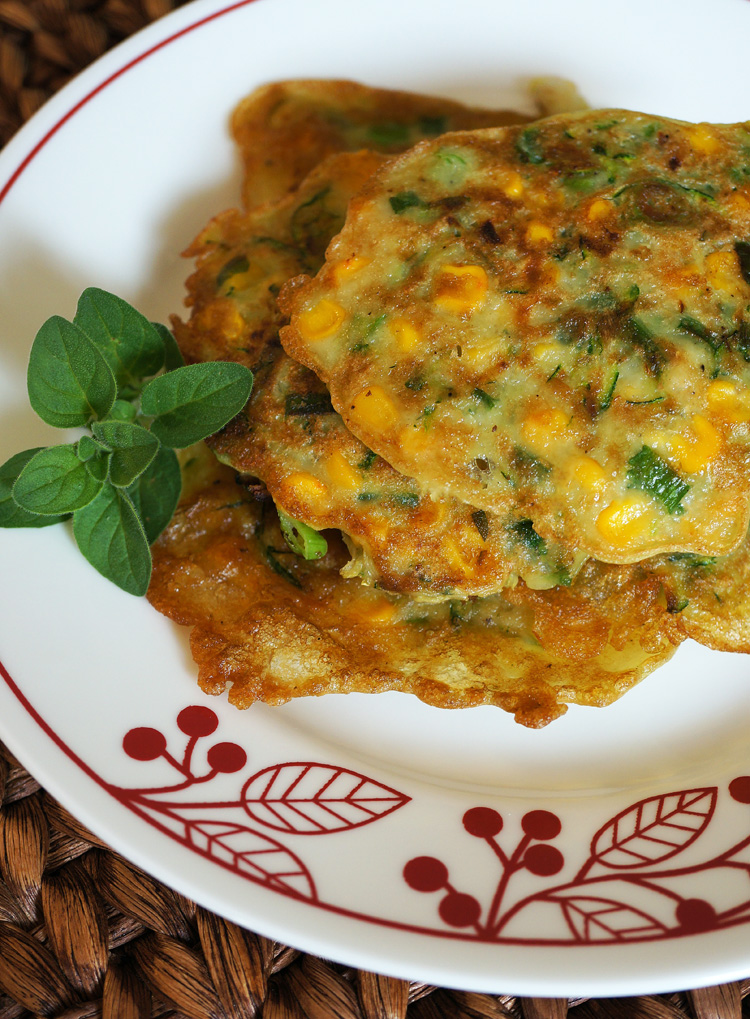
There are several ways to enjoy these zucchini and corn fritters. You can put them in a sandwich, have them as a side dish, or pair them with a spring salad for a lovely, light lunch. You can make these fritters gluten free by using one cup of pure cornstarch instead of the cornstarch and all purpose flour listed in the ingredients. While reading about gluten free, I learned that anything can be contaminated with gluten during processing. If you want to be on the ultra-safe side, it’s always best to buy ingredients that are certified gluten-free.

When I made these fritters the first time, I did not squeeze the excess water from the shredded zucchini and it made my batter too thin. So, use a cheesecloth to squeeze the excess water from the zucchini. Save the liquid. You can always add a tablespoon or two of the zucchini water to make the batter a thick, pouring consistency.

Summer is a great time to experiment with fresh herbs. I used oregano in this recipe but you can use whatever herbs float your boat! Or, Indianize it with cilantro, whole crushed cumin or coriander seeds, and dry chilli flakes.

What are some of your favorites herbs and spices? Do you use herbs like rosemary, thyme, oregano, parsley, basil, and marjoram to give your Indian recipes a new twist? I look forward to your comments on my blog or on my Facebook page.

Zucchini and Corn Fritters
Prep time: 15 minutes
Cooking time: 30 minutes
Makes: 20

2 eggs, slightly beaten
¾ cup Argo cornstarch, (Argo & Bob’s Red Mill are gluten free)
¼ cup all purpose flour
½ teaspoon baking soda
¼ teaspoon pepper
1¼ teaspoons salt, (or to taste)
4 cups shredded zucchini, (squeeze water out)
1½ cups thawed frozen corn
1 cup finely chopped green onions, (white and green parts)
1 tablespoon finely minced fresh oregano leaves
1 tablespoon finely minced jalapeño, (optional, depending on heat and your preference)
5 tablespoons grape seed oil, (or oil of your choice)

In a large bowl add slightly beaten eggs, cornstarch, flour, baking soda, pepper, and salt. Use a cheesecloth to squeeze excess water from the shredded zucchini. Save the liquid. Add zucchini, corn, green onion, oregano, and jalapeño to the rest of the ingredients in the bowl. Mix well to combine. Stir in a tablespoon or two of the zucchini water if the batter is too dry.

Heat a large non-stick frying pan on medium heat. Add a tablespoon of oil for shallow frying and when it shimmers, add half cup of the batter. Gently spread to form a three-inch pancake. Make three more fritters. When the edges start turning light brown, about three minutes, turn over and fry the other side for two minutes. Remove on to a paper towel lined sheet pan. Make the rest of the fritters.

Idli – Rice and Lentil Steamed Cake

Idli2
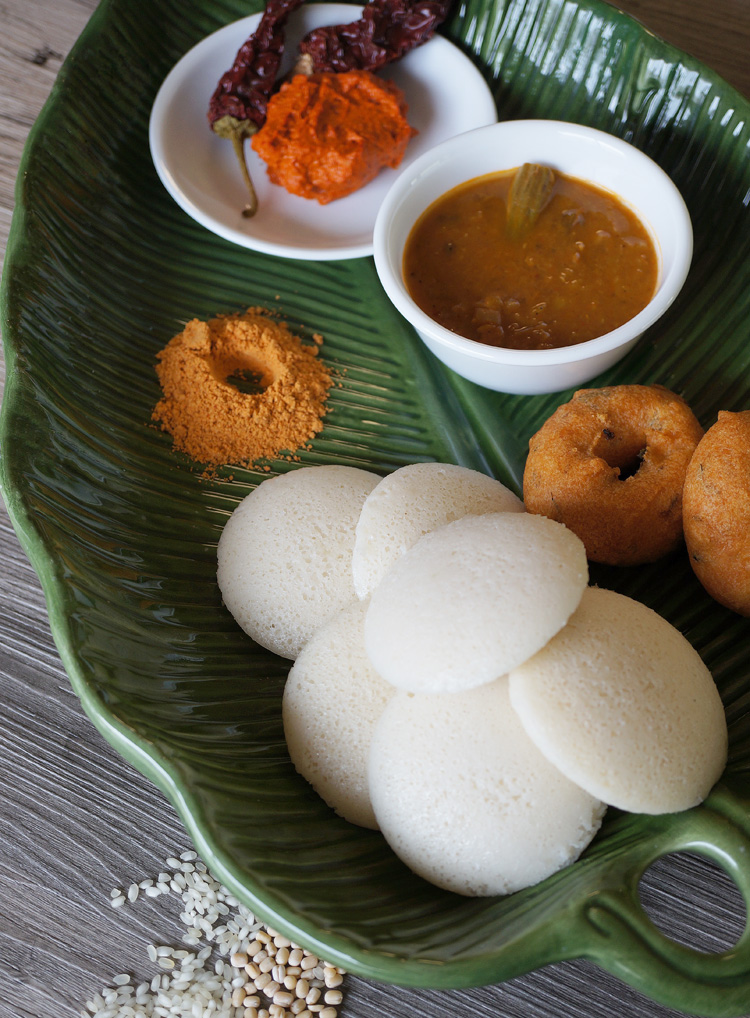
Idlis are traditional South Indian steamed rice cakes that are eaten at breakfast or at tea time. Black lentils and rice are soaked, ground, fermented, poured into idli moulds, steamed, and eaten with sambar and chutney. There are hundreds of variations. Making idlis, when I lived in India, was easy. The climate was conducive to the fermentation process. After moving to the US, I had to learn some new tricks to get the batter to cooperate.

The table top wet grinder that my daughter bought for me as a birthday gift made the grinding process easy (thank you, daughter). Many of my friends still use their trusted mixies (powerful blenders) to do the job. I learned the most important secret to soft, spongy idlis is using the right amount of water while grinding the lentils and rice. So, in my directions below, I’ll go to great lengths to explain the process and to give you the approximate amount of water to be used.

Fermenting the batter in winter is difficult. I turn the oven on and bring the temperature up to 200°F. Then I turn the oven off, wait for about 15 minutes and then put the batter in the oven. I also leave the oven light on to ensure that the oven stays warm. To avoid accidents, I put a sheet tray under the pot just in case the batter overflows. Could I be more optimistic than that?

While experimenting with this recipe, I tested using a teaspoon and a half of fenugreek seeds which I soaked along with the rice to help with the fermentation process, but it changed the color of the idli. So, instead, I recommend using beaten rice (poha), or cooked rice. To get the light sour taste and smell in your idlis, the batter has to ferment well. Using three tablespoons of starter batter also helps to achieve this.

Try my recipe, and I hope your next batch of idlis will turn out perfectly. If you do try my recipe, please post a picture of your results on my Facebook page.

Idli
Prep Time: 8 hours (includes soaking time but does not include time to ferment batter)
Cooking time: 15 minutes
Serves: 8 (makes around 72 small 2.5″ idlis)

Ingredients:
3 cups idli rice
1 cup whole black lentils, (whole urad dal)
½ cup beaten rice, (flattened rice flakes, poha)
3 teaspoons salt
3 teaspoons olive oil or sesame oil, (to grease idli mould)

Directions:
Wash the rice in three changes of water. Place it in a large bowl and add filtered water to cover the rice by about three inches. Set it aside for four hours.

After the rice has soaked for four hours, soak the black lentils. Wash the lentils in three changes of water. Put it into a medium bowl and add filtered water to cover it by about three inches. Soak the beaten rice in a small bowl with one cup of filtered water. Let the rice, lentils, and beaten rice soak for one hour.

I used a table top wet grinder to make the idli batter. Clean the grinder. Drain the black lentils. Make sure that you save the water the lentils were soaking in. Use this water when you grind. I also want to tell you that the amount of water that I suggest works well for me. But it depends on the kind of rice and lentils you will use. It might require a little more or a little less water. But this will give you an idea.

Add the drained lentils and 1 cup of water into the grinder and turn it on. The whole process of grinding the lentils will take about 15 minutes. Let the machine run for five minutes. Scrape the sides and add ½ cup water and grind for another five minutes. You will see the batter turn light, fluffy, and increase in volume. Scrape the sides and add another ½ cup of water – one tablespoon at a time. Grind for five minutes. Turn the machine off and feel the batter. It should be light and when you rub the batter between your finger and thumb, the texture should be smooth and light. You should not feel any coarse grains, and if you put a spoon full into a bowl of water it will float. Remove the lentil batter into a large stainless steel pot.

If there is a little of the lentil batter remaining in the wet grinder, don’t worry. Add the rice and ½ cup water. Then, while the machine is running add another ½ cup of water. Grind for five minutes. Scrape the sides. Drain the beaten rice. Add it to the rice and add ½ cup water and grind for ten minutes. Scrape the sides, add salt, ½ cup water – one tablespoon at a time – and grind for the final ten minutes. Turn off the machine. It will take about 20-25 minutes to grind the rice. The batter can be anywhere from slightly coarse to smooth. Depends on how you like it.

Add the rice batter to the lentil batter in the large pot. The batter will rise during fermentation, so make sure that the pot is only half full of batter. Mix the lentil batter and rice batter with your hand. The warmth of your hand will help speed the fermentation process. If you live in a country where the weather is hot. You can leave your pot on your kitchen counter. However, if it is cold, turn your oven to 200°F. Wait for about 15 minutes. Cover the pot with a lid, set the pot in the oven, and turn the oven light on. The batter will ferment in about 8-10 hours. I leave it overnight and make idlis in the morning for breakfast.

When you are ready to start making idlis, fold the batter using a spatula. Just like you would do with a light, chiffon cake! The rice batter would have fallen to the bottom of the pot and the lentil batter would have risen to the top. Fold them together, gently.

Grease the idli mould with olive oil or sesame oil. Fill the idli mould leaving a little space for the batter to rise. Steam for 12 minutes. I use an idli steamer for this purpose but you can also use your pressure cooker (weight not required). Let the idlis cool down before you remove them with a wet idli spoon or butter knife.

The idlis turn out best on the first day. They freeze well. So you can use the whole batter to make idlis on the first day and then freeze them for use later. I usually make idlis on the first day and then use the remaining batter to make dosas. Store the batter in the refrigerator. Just add a little water to make the batter a pouring consistency before you make dosas.

To reheat idlis put them in a steamer. Or, if you are like me, put three idlis in a small bowl, put three drops of water in the center of each idli and microwave them for 20 seconds. You will have to eat the microwaved idlis right away because they get tough after a while. If you have ideas that could help me make better idlis, let me know. If you have questions for me, I’m only a phone call or email away.
Herbed Turkey Patties

Herbed turkey patties2

Isn’t it wonderful to have friends that readily share their recipes with you? Hannah, is one such friend, and we have a wonderful time cooking together and sharing recipes. Thank you, Hannah, for teaching me how to make these wonderful herbed turkey patties. It was great picking fresh herbs from your garden and using them in the recipe. I was so inspired by your garden, that I’ve started my own little herb garden on my deck.

I’ve modified Hannah’s recipe by changing the shape and served them for breakfast. Its a glorious fusion of herbs and spices – shallots, sage, flat leaf celery, cilantro, thyme, oregano, mint, and chilli flakes. The oyster mushroom sauce added another dimension to the complex flavor in these herbed patties. My family enjoyed every bite.

I made them for breakfast, but you can make them into meatballs as well and serve them for lunch or dinner with spaghetti and marinara sauce. They also serve as great little appetizers. Stick a toothpick into them and serve them with a dipping sauce of your choice. I even enjoyed them as a snack at tea time with sriracha on the side. You can use all the herbs or only those that you prefer. Have fun making this recipe your own.

Herbed Turkey Patties
Prep time: 10 minutes
Cook time: 15 minutes
Makes: 15

Ingredients:
3 tablespoons vegetable oil
1 lb minced turkey
1 tablespoon finely minced shallots
1 tablespoons finely minced sage leaves
1 tablespoon finely minced flat leaf celery
1 tablespoon finely minced cilantro leaves
2 teaspoons finely minced thyme
1 teaspoon finely minced oregano leaves
1 teaspoon finely minced mint leaves
1 teaspoon chilli flakes
2 tablespoons oyster mushroom sauce
1 teaspoon salt, (depending on your preference)

Directions:
In a small bowl, add the minced turkey, shallots, sage, celery leaf, cilantro, thyme, oregano, mint, chilli flakes, oyster mushroom sauce and salt. Mix it well. Wet the palm of your hands and make small lime sized turkey balls and put them on a plate.

Heat a small non-stick frying pan over medium heat. Add 2 teaspoons of oil. Add the turkey balls, as is, or flatten them to about two-inch patties. Put about five at a time in the pan. Keep the heat on medium and fry the patties for two minutes per side or until the patties cook and turn light brown. Remove on to a paper-towel lined plate. Repeat with the rest of the minced turkey mix. If the pan collects a lot of grime, wash and dry it before you fry the final batch of patties. These taste amazing, if you like fresh herbs.

Samosa Chaat

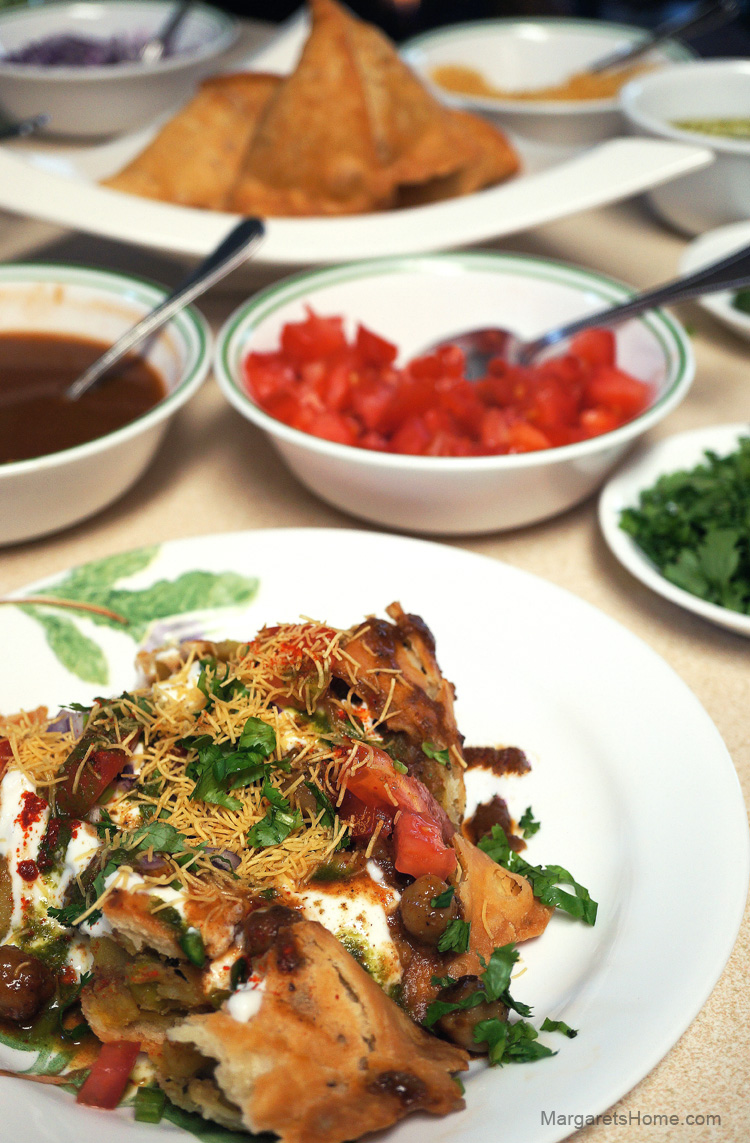
Samosa Chaat3

Just the mention of the word “Chaat” makes my mouth water. Chaat is a word used for many of India’s favorite street foods like bhel puri and paani puri. The last time I was in India I saw a street cart with the sign, “paani puri made with mineral water.” It was nice to see that local vendors are making efforts to make chaat safe for foreigners, or locals-living-abroad, such as myself.

When I was a young girl, during my summer holidays, several schoolmates and I used to go to the Pune Cantonment swimming pool. Right after our swimming session we would stop by the street carts for our fix of samosa chaat, bhel puri, and paani puri. What fun we had! I wonder if anyone of them remembers those days.

On one of our vacations to India my children and I stopped in Mumbai. We went to a restaurant called Status. We heard they were famous for their samosa chaat. We were hungry after a whole morning of shopping. The three of us were ravenous and we ordered a whole bunch of dishes. My son ordered two plates of samosa chaat and the waiter told him that would be too much for the three of us. That one plate along with all the rest of the food that we had ordered would definitely be enough. But my son insisted on two plates. When our food came, we could hardly finish the first plate of samosa chaat. The samosas were humongous! That was a meal in itself. In the background we could hear the waiters whispering to each other with smiles on their faces.

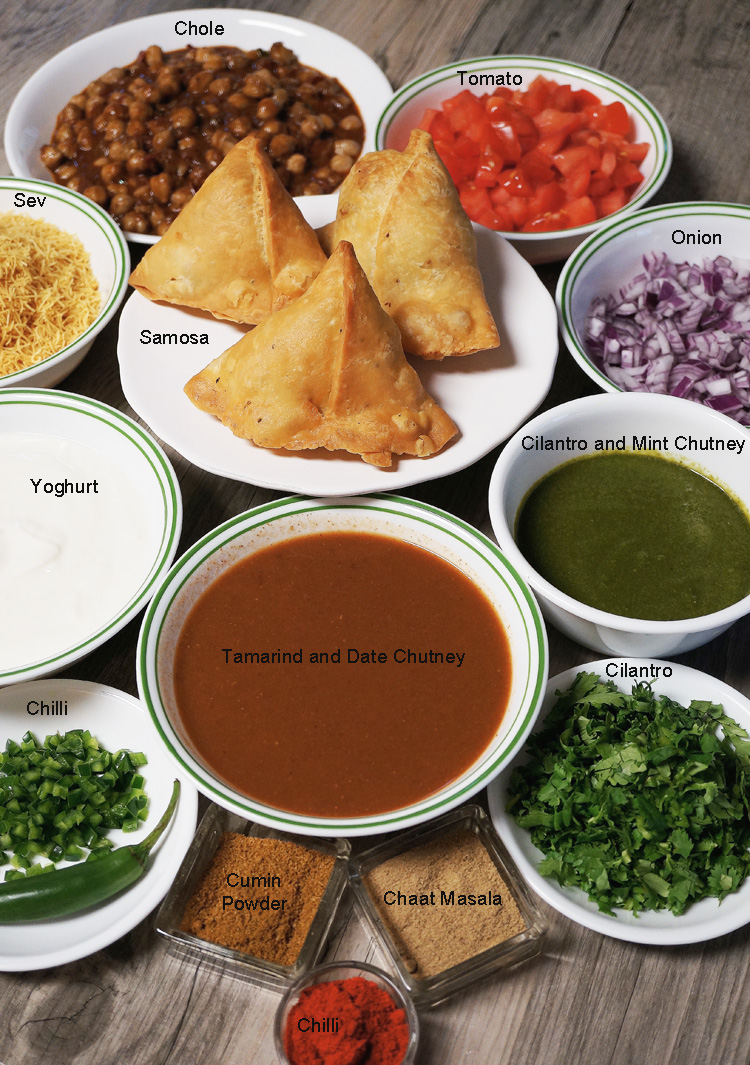
Making samosa chaat at home is a time consuming job, but totally worth it. My friends and family have great fun assembling their own plates of samosa chaat. I made my own samosas but you can buy yours from an Indian store or restaurant. However, it is well worth making the chole, cilantro and mint chutney, and the date and tamarind chutney from scratch as homemade tastes best. So, here is my take on the famous samosa chaat.

If you plan to use dry chickpeas/garbanzo/Kabuli channa follow the Chole recipe from my previous recipe.

Chole – using canned garbanzo beans
Prep time: 10 minutes
Cooking time: 35 minutes
Serves: 6

For the spice mix

Ingredients:
3 tablespoons coriander seeds
4 black cardamoms, peel and use seeds
5 cloves
1-inch piece cinnamon stick
1 teaspoon whole black pepper
1 bay leaf, (tejpatta)
4 whole dry red chillies, (depending on heat and your preference)
2 teaspoons cumin seeds
3 tablespoons pomegranate seeds, (anardana)

Directions:
In a small pan, over low heat, roast the above mentioned ingredients until they smell fragrant and turn a very dark brown. Cool completely and then grind to a powder in a coffee grinder. Set aside.

For the Chole
Ingredients:
3 tablespoons oil
2 cups finely chopped onion
2 tablespoons finely chopped ginger
1 tablespoon finely chopped green chillies, (optional)
1 cup diced tomatoes
2 teaspoons Kashmiri chilli powder
Salt
2 15.5 oz cans of garbanzo beans
3 cups water

Directions:
In a large heavy bottomed saucepan, over medium-high heat, add oil. When the oil begins to shimmer add the onions. When they turn translucent add the ginger and fry for a minute. Add the green chillies and tomatoes. Keep stirring until the tomatoes are well cooked you see the oil separating from the tomato-onion mixture. Add the spice mix, Kashmiri chilli powder, and salt. Fry for 30 seconds.

Add the garbanzo beans along with the liquid in the cans and three cups of water. If you like the chole gravy to be a little thick, use a potato masher to mash a small portion of the garbanzo beans. Bring to a simmer and cook for an additional 30 minutes over medium-low heat, so the flavors can meld. Stir occasionally to make sure that the gravy does not stick to the bottom of the pan. Remove from heat. Serve on top of samosa chaat.

Date and Tamarind Chutney
Prep time: 10 minutes
Cooking time: 10 minutes
Serves: 6

Ingredients:
2 teaspoons cumin seeds
½ teaspoon fennel seeds
1 cup dates, pitted and roughly chopped
½ cup brown sugar
1 cup tamarind extract
3 teaspoons red chilli powder
2 teaspoons ginger powder
3 cups water
2 teaspoons chaat masala
1½ teaspoons black salt

Directions:
Add cumin and fennel seeds to a small non-stick pan. Roast over low heat until fragrant. Cool and grind to a powder.

Add cumin and fennel powder, chopped dates, brown sugar, tamarind pulp, chilli powder, ginger powder, chaat masala, salt and two cups of water to a small saucepan. Place the pan over medium-high heat. Stir and bring to a boil. Turn the heat to medium-low and continue to cook for ten minutes. Cool completely. Add to a blender and process until smooth. Transfer to a bowl. Serve with samosa chaat.

Cilantro and Mint Chutney
Prep time: 5 minutes
Cooking time: 5 minutes
Serves: 6

Ingredients:
1 cup fresh cilantro leaves
½ cup fresh mint leaves
3-4 green chillies, (depending on heat and your preference)
2 tablespoons water
Salt
1/4 tsp sugar
2 tablespoons lemon juice

Directions:
Roughly chop the cilantro, mint, and green chillies. Add to a blender and process until smooth. Use a tablespoon or two of water if necessary. Add black salt and sugar. Blend again and transfer to a bowl. Stir in lemon juice. Serve with samosa chaat

Plating and Garnishing

Ingredients:
12 Samosas, (can be warmed up in an oven at 400 degrees F for 6-8 minutes)
2 cups plain yoghurt, whipped
2 cups fine sev, (can be bought from Indian grocery store)
1 cup finely diced onion
1 cup finely diced tomato
2 tablespoons finely chopped green chillies, (optional)
¼ cup finely chopped cilantro
2 teaspoons roasted and powdered cumin seeds
2 teaspoons chaat masala
2 teaspoons chilli powder

Samosa Chaat4

Directions:
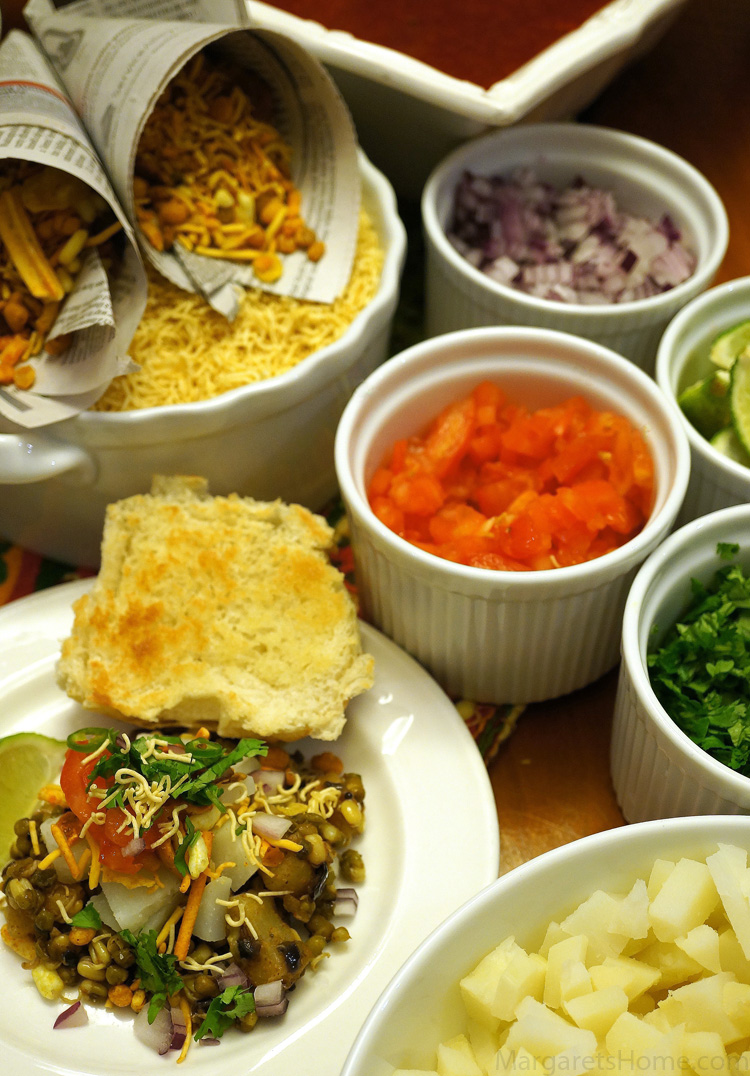
Break two samosas into four or five large chunks and put them on a plate. Pour a large spoonful of chole over them. Scatter a heaped teaspoon of chopped onion and tomato. Add a few bits of green chillies, if you like your chaat to be spicy. Sprinkle with a pinch of cumin, chilli and chaat masala powders. Drizzle a tablespoon of yoghurt, tamarind and date chutney, and cilantro and mint chutney over them. Finally top them off with sev and bits of chopped cilantro. There you have it – one of Indian’s favorite street foods!

Vegetarian Puffs

Vegetarian Puffs1

Some time ago I shared my recipe for Minced Chicken Puffs and many of you told me how much you enjoyed serving these puffs to your friends and family. Some of you asked if I could share a vegetarian version. This recipe is for you.

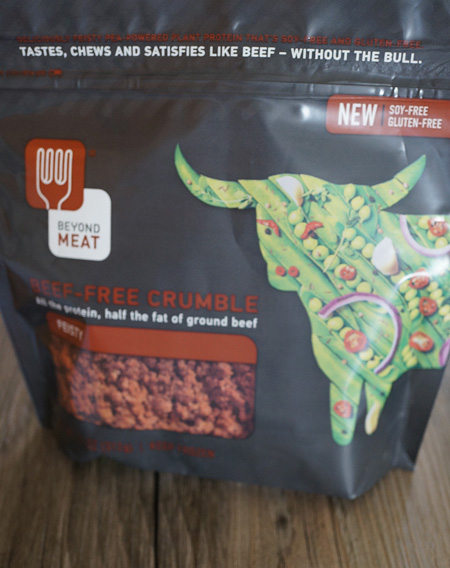
I was at Whole Foods and they were giving out samples of this soy-free, gluten-free, beef-free, cholesterol free, 100% vegan crumble called Beyond Meat. It tasted good so I decided to try it as a filling for my puffs. Beyond Meat is a new soy free, fake meat company. The crumble is made from pea proteins. You could also make the filling with two cups of boiled vegetables like carrots, peas, potatoes and cauliflower instead of the feisty beef-free crumble and the potato that is listed in this recipe. The Shakti meat masala gives the filling a nice flavor.

No, Whole Foods or the company, Beyond Meat, is not paying me to promote these products. I just think the Beyond Meat Beef or Chicken Crumble is a great option for my vegetarian friends. I’ve included a picture of the packet so you can identify it in the freezer section of your Whole Foods grocery store. Try it and let me know how it turns out.

Vegetarian Puffs
Prep time: 10 minutes
Cooking time: 35 minutes
Serves: 6

Ingredients:
1 pkg. (17.3-ounces) Puff Pastry Sheets, thawed
3 tablespoons oil
1 teaspoon cumin seeds
2 cups finely chopped onion
Salt
1 tablespoon finely chopped ginger
1 tablespoon finely chopped garlic
2 teaspoon finely chopped green chillies, (depending on heat and your preference)
2 tablespoons finely chopped cilantro
¼ cup finely chopped tomato
3 teaspoons Shakti meat masala powder, (or any other meat masala powder)
1 medium sized potato
1 11-oz package Feisty Beef-Free Crumble, (available in the frozen section)
2 tablespoons soy milk

Directions:
Thaw the pastry sheets at room temperature for 40 minutes or use the directions on the package. Heat the oven to 400°F. Lightly grease or line two baking sheets with parchment paper.

To make the filling for the puffs, boil the potato until it is fork tender. Remove the skin and dice into small pieces. Heat oil in a small non-stick frying pan over medium-high heat. Add cumin seeds and when they sputter add onion, and salt. Cook onions until they turn translucent. Then add the ginger, garlic, green chillies, and cilantro. Cook for three minutes or until the raw smell of the garlic disappears. Add tomato and the meat masala powder. Let the tomato cook until you see the oil separate from the mixture. Turn the heat to low and add the potato and beef-free crumble. Break up the pieces with your spoon, so there are no large lumps. Cover with a lid and cook for five minutes. Stir to dry out any water that may remain. Remove from heat and cool the filling completely.

To assemble the puffs:
Unfold one pastry sheet on a lightly floured surface.
Cut the pastry sheet into three strips along the fold marks. Gently roll each strip to make it slightly wider.
Cut each strip in half crosswise, making six pastry rectangles.
Place the pastry rectangles onto the baking sheet.
Put one heaped teaspoon of the filling onto each pastry rectangle.
Brush the edges of the pastry rectangles with a little water.
Fold the pastries in half over the filling to form small rectangles.
Brush the tops of the filled puffs lightly with soy milk.
Put the tray in the freezer.
Repeat this process with the second puff pastry sheet.
Bake the puffs for 20-25 minutes or until they are golden brown. Let the puffs cool on the baking sheets on wire racks for 10 minutes. Serve with ketchup or Cilantro and Mint Chutney.

Please note:
There are two pastry sheets in one package. If you do not want to use the second pastry sheet, you can wrap it in parchment paper, put it in a ziplock bag, and freeze it. Or, you can fill the puffs and freeze them individually wrapped in parchment paper. Bake them at 400°F for 30-35 minutes straight from the freezer. No thawing required.

Vegan Puffs Crumble

Cilantro Pesto

Cilantro Pesto1

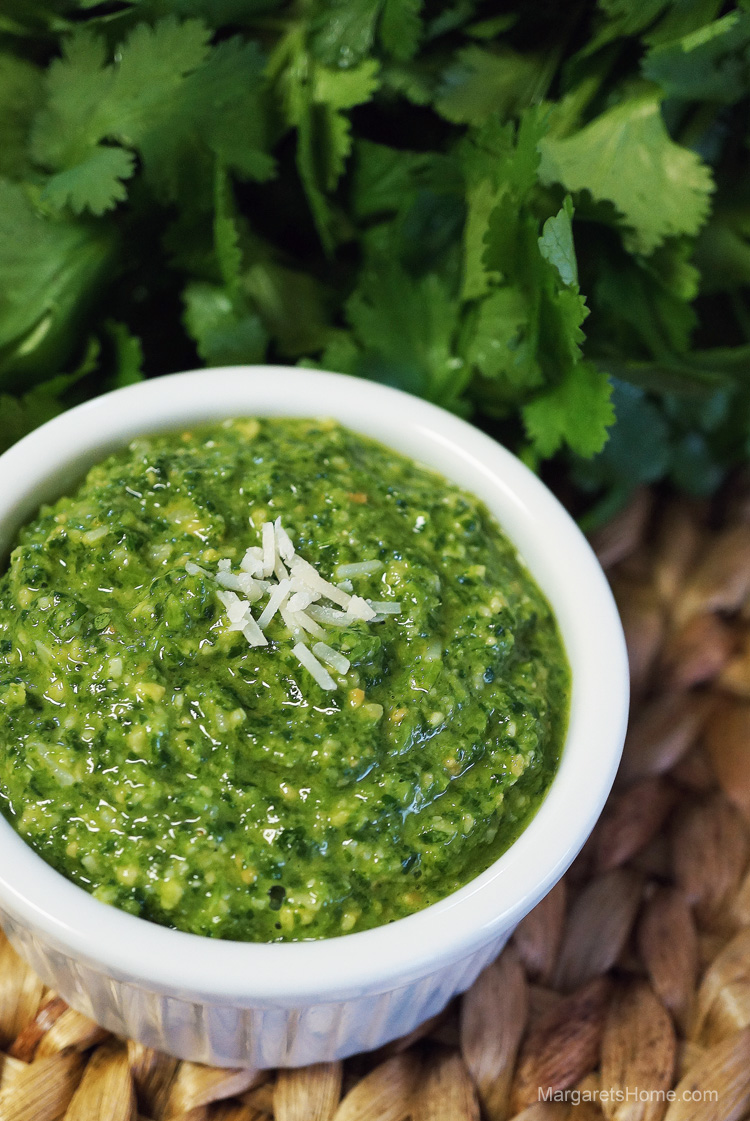
This recipe is a delightful version of the classic basil pesto, especially for people like me that are not big fans of basil.

Cilantro pesto can be used in several ways. Use it as a condiment on your sandwich and bruschetta or as dressing on pasta salad. Add lots of shredded cheese to it and use it as a filling in puffs. A tablespoon added to hummus or egg salad creates an extra layer of flavor. Garnish your tomato soup with cilantro pesto to take it to the next level. These are just a few ideas. I am sure you can come up with many more of your own. Until next week, have fun cooking.

Cilantro Pesto
Prep time: 8 minutes
Cooking time: 8 minutes
Makes: About 1 cup

Ingredients:
½ cup slivered almonds
2 cups cilantro, roughly chopped
1 shallot, roughly chopped
1 serrano chilli, chopped and seeded, optional
1 garlic clove, roughly chopped
2 tablespoons parmesan cheese
salt
2 tablespoons lemon juice
¼ cup olive oil

Directions:
Place a small pan over medium heat. Add the almonds and roast them until they turn golden and fragrant. Remove and cool.

In the bowl of your food processor add the cooled almonds and pulse until coarsely chopped.

Add cilantro, shallot, serrano, garlic, parmesan cheese, salt, and lemon juice. Pulse until coarsely ground. With the food processor running, slowly drizzle olive oil. Keep refrigerated until you are ready to use.

Chicken Cutlets

Chicken Cutlets1

I remember going to restaurants in India many years ago and ordering chicken or vegetable cutlets and soup instead of the typical masala dosa. It was a great alternative when I didn’t feel like having Indian food. It was often listed on the menu under the Western items section. Well, now we have “Indianized” the cutlet so much that it isn’t considered so much of a Western item on the menu in India any more.

I often use leftovers to make cutlets and my children think I’ve created something new and awesome. When they were young, I would put lots of vegetables into my cutlets and they had no idea! They loved them anyway. What I’m trying to say, is that once you understand the basics of cutlet making, you don’t need a recipe. You can make almost anything into a cutlet. This recipe is one of my favorites. Enjoy!

Chicken and Potato Cutlets
Prep time: 35 minutes (includes time to cook chicken)
Cooking time: 25 minutes
Makes: 15

2 large chicken breasts
½ teaspoon whole black pepper
1½ teaspoons salt
2 large potatoes, boiled and mashed
1 teaspoon cumin seeds
3 teaspoons coriander seeds
2-3 teaspoons red chilli flakes, (depending on heat and your preference)
1 tablespoon kasoori methi, crushed
1 large onion, finely chopped
1 small bunch cilantro, finely chopped
½ teaspoon freshly crushed black pepper
1 cup Panko bread crumbs
2 eggs
Oil for shallow frying

Cook chicken in three cups of water, whole black pepper, and half a teaspoon of salt. The chicken should be cooked well enough so that it falls off the bone easily. It will take about 25-30 minutes over medium-high heat. Cool, shred the meat and put into a large mixing bowl.

Lightly roast cumin and coriander seeds and crush them to a coarse powder.

Add mashed potatoes, the lightly roasted and crushed cumin and coriander powder, chilli flakes, kasoori methi, onions, and cilantro into the large mixing bowl along with the shredded chicken. Add salt and pepper. Mix well. Taste to make sure there is enough salt. Shape into cutlets – either round or oval. Line them on a baking tray.

Heat a large frying pan over medium-high heat. Add oil for shallow frying. There should be enough oil in the pan so that when you put the cutlets in, the oil should come at least half way up the sides of the cutlets.

Beat eggs in a small bowl, and spread the panko crumbs on a plate. Dip each cutlet into the egg and then coat them in breadcrumbs. Add them to the hot oil and fry until golden brown on both sides. Drain on paper towels.


Misal Pav

Misal3

I grew up in Pune, a city close to Mumbai in the state of Maharashtra. Many of the dishes my mom prepared were influenced by our neighbors and friends. Needless to say, Maharashtrian cuisine is one of my indulgences.

Recently I was invited to a birthday lunch and misal was served as an appetizer. The sight, smell and taste of my days in Pune came flooding back. I shamelessly ate the appetizer as my main course, to the amusement of all the other guests. It made my day and I decided to do a blog post for others that might miss misal as much as I did.

I must confess that my misal recipe is unconventional. I know people from Maharashtra have their own authentic recipes, but I had to make do with whatever ingredients I had available. I used sprouted green gram (moong beans) because I did not have moth beans (matki). You can also make misal using a combination of legumes like sprouted green gram, moth beans, black eyed peas, and dried white peas. I made this misal recipe for a party of 15 people and everyone enjoyed it. The recipe looks long with the number of ingredients, but it’s not that difficult to make.

Misal Pav
Prep time: 20 minutes
Cooking time: 30 minutes
Serves: 15

For the Usal:
10 cups sprouted green gram, (moong beans) or sprouted moth beans, (matki)
1 cup water
3 tablespoons oil
1 teaspoon mustard seeds
1 teaspoon cumin seeds
1 pinch asafoetida
½ teaspoon turmeric
1 sprig curry leaves
1 cup finely chopped onion
1 tablespoon finely chopped garlic
3 tablespoons Goda masala or Kanda-Lasoon masala
1 cup boiled and cubed potato, (optional)
Salt
1 tablespoon finely chopped cilantro

Cook the sprouted green gram in a pressure cooker with one cup of water. I cooked it without the weight for five minutes. Set aside.

Heat oil in a large sauce pan, over medium-high heat, until it shimmers. Add mustard and cumin seeds. When the mustard seeds splutter, add asafoetida, turmeric, and curry leaves. Fry for five seconds and then add the chopped onion and cook until the onions turn translucent. Add the garlic and sauté until the onion turns light brown. Garlic should not turn brown. Add Goda masala and sauté for a minute longer. Add the sprouts, potato, salt and any water left from pressure cooking the sprouts. Mix well and cook for five minutes or until the water evaporates. Garnish with chopped cilantro.

For the Kat/Rassa (gravy):
2 cup thinly sliced red onions
1 tablespoon garlic slices
2 tablespoons desiccated coconut
1 cup diced tomatoes
4 tablespoons oil
salt
2 packets Rasoi Magic Misal Rassa
8 cups water
1 teaspoon Kashmiri chilli powder

In a medium size non-stick frying pan, add one teaspoon of oil. Place over medium heat. When the oil is hot add sliced onion and roast until they turn light brown. Remove and then add garlic. Roast the garlic slices until they start turning light brown. Remove and add the desiccated coconut. Roast until light brown. Remove, cool, and with the help of very little water grind onion, garlic and coconut in a blender until smooth. Set aside.

Mix the two packets of Rasoi Magic Misal Rassa with two cups of water and set aside.

In a large pot heat three tablespoons of oil over medium heat. Add the ground onion, garlic and coconut paste. Fry until it turns light brown. Add the chopped tomatoes. Cook until the oil separates and then add salt, the Rasoi Magic Misal Rassa mixture, and eight cups of water. Bring to a boil and then turn heat to low and let it simmer for ten minutes.

To season the kat, take a small non-stick pan and add the rest of the oil. Place over low heat. When the oil gets warm turn off the stove and add one teaspoon of Kashmiri chilli powder. Pour this over the kat. It will float over the kat and give it a beautiful red color.

To put it all together and serve:
1 packet hot mix, (farsan, chivda)
1 packet fine sev
20 pavs, (or slices of bread or soft rolls)
2 cups boiled and cubed potatoes
½ cup finely chopped onion
½ cup finely chopped cilantro
¼ cup finely chopped green chillies, (optional)
1 cup lemon wedges

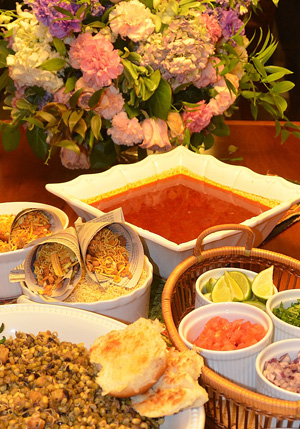
To serve – put 2 tablespoons of usal in a small bowl, add a few cubed potatoes, two tablespoons of the hot mix, stir the kat, and pour two-three tablespoon over it. Then sprinkle sev, onion, tomatoes, cilantro and green chillies. Serve a lemon wedge and pav on the side. You could also cut the pav in half, butter and toast them on a griddle before serving. Misal a complete light meal any time of the day, a great tea time snack, and a showstopper at a party!

Notes:
– The quantity given for this recipe serves 15-20 people.
– Assemble the misal just before serving.
– Goda masala is available at Indian grocery stores. If you cannot get this masala you can use Kanda-Lasoon masala.
– Kat can be made by following the directions on the misal rassa packet.
– To sprout green gram, I soaked it in water for six hours. Drained it in a colander and put it in the oven with the light on overnight. I had beautiful sprouts the next morning.
– The picture at the bottom of the page was taken by a friend at the party.

misal6

Minced Chicken Puffs

Minced Chicken and Egg Puffs

Two lovely young ladies have asked me to share a recipe for puffs, so this blog post is especially for them. Chicken puffs, eggs puffs, and vegetable puffs bring back memories of bakery shops in India. The lovely aroma that came from these shops, as you passed by, was magnetic.

Egg puffs were a popular item in a bakery in Manipal and my children and I would pick some up every Friday afternoon. It was in Manipal where I learned how to make puff pastry from scratch. My teacher was a young lady from Malaysia. Making puff pastry is a tedious process and since puff pastry sheets are available in the frozen section of our grocery stores in the U.S., I’ve used them to save time. This recipe will give you the basics on how to make puffs but use your imagination to make the filling your own. Enjoy.

Minced Chicken Puffs
Prep time: 10 minutes
Cooking time: 35 minutes
Serves: 6

Ingredients:
1 pkg. (17.3-ounces) Puff Pastry Sheets, thawed
2 tablespoons oil
1 teaspoon mustard seeds
½ teaspoon cumin seeds
2 cups finely chopped onion
Salt
1 tablespoon finely chopped ginger
1 tablespoon finely chopped garlic
2 teaspoon finely chopped green chillies, (depending on heat and your preference)
2 tablespoons finely chopped cilantro
¼ cup finely chopped tomato
3 teaspoons Shakti meat masala powder, (or any other meat masala powder)
1 pound minced chicken
1 egg
1 tablespoon water

Directions:
Thaw the pastry sheets at room temperature for 40 minutes or use the directions on the package. Heat the oven to 400°F. Lightly grease or line two baking sheets with parchment paper. Stir the egg and water in a small bowl with a fork.

Heat oil in a small non-stick frying pan over medium-high heat. Add mustard seeds and when they sputter add cumin seeds, onion, and salt. Cook onions until they turn translucent. Then add the ginger, garlic, green chillies, and cilantro. Cook for three minutes or until the raw smell of the garlic disappears. Add tomato and the meat masala powder. Let the tomato cook until the oil separates. Turn the heat to low and add minced chicken. Break up the chicken with your wooden spoon, so there are no lumps. Then turn the heat to medium. Cover with a lid and cook for 10 minutes. Stir to dry out any water that may remain. Remove from heat and cool completely.

To assemble the puffs:
Unfold one pastry sheet on a lightly floured surface.
Cut the pastry sheet into three strips along the fold marks. Gently roll each strip to make it slightly wider.
Cut each strip in half crosswise, making six pastry rectangles.
Place the pastry rectangles onto the baking sheet.
Put one heaped teaspoon of the chicken filling onto each pastry rectangle.
Brush the edges of the pastry rectangles with a little egg mixture or water.
Fold the pastries in half over the filling to form small rectangles.
Brush the filled puffs with the egg mixture.
Put the tray in the freezer.
Repeat this process with the second puff pastry sheet.
Bake the puffs for 20-25 minutes or until they are golden brown. Let the puffs cool on the baking sheets on wire racks for 10 minutes. Serve with ketchup or cilantro and mint chutney.

Please note:
There are two pastry sheets in one package. If you do not want to use the second pastry sheet, you can wrap it in parchment paper, put it in a ziplock bag, and freeze it. Or, you can fill the puffs and freeze them individually wrapped in parchment paper. Bake them at 400°F for 30-35 minutes straight from the freezer. No thawing required.