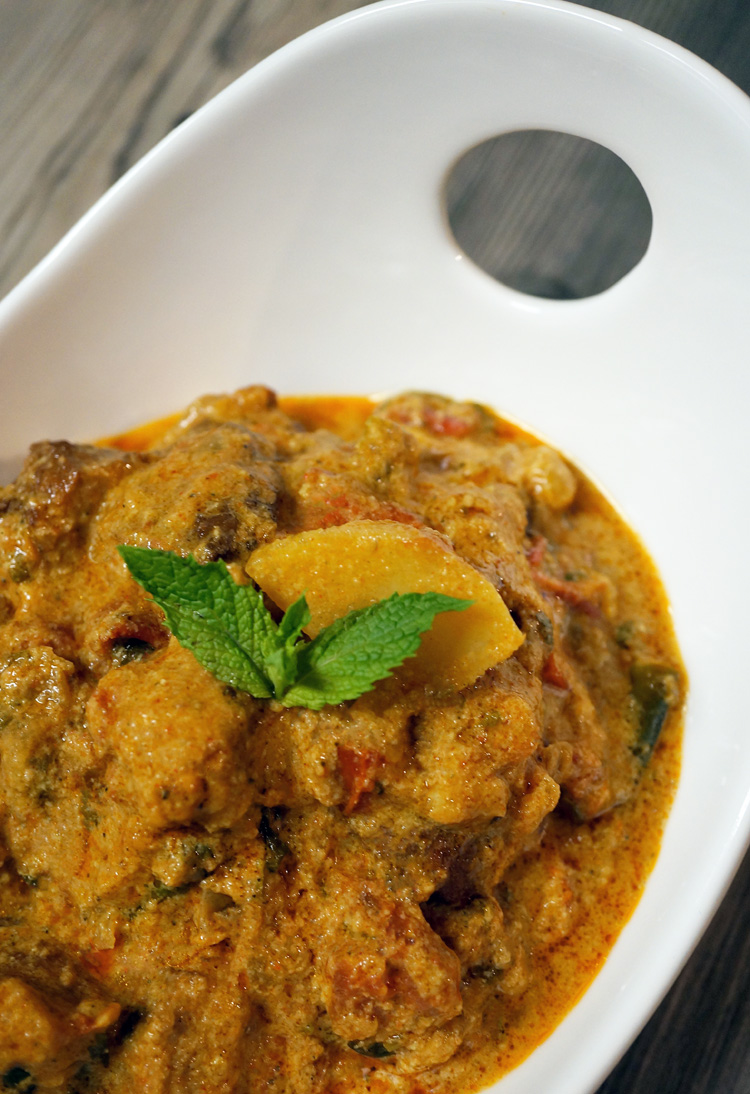
Instant Pot FriChik Curry

FriChik Curry-lastIngredients:
For the spice blend

12 Cashew nuts
½ cup hot water
5 cardamoms
5 cloves
2 1-inch piece of cinnamon
1½ teaspoons fennel seeds
1 small piece of black stone flower, optional
¼ cup grated coconut
2 sprigs curry leaves
2 tablespoons cilantro

Directions:

Add the cashew nuts to a small bowl. Cover them with half a cup of hot tap water and let them soak for 15 minutes. Add the cashew nuts, along with the water they were soaking in, into a blender. Add the rest of the ingredients and blend to a smooth paste. Set aside until you are ready to use it in the curry. 

Ingredients:
To make the curry

¼ cup oil
1 teaspoon cumin seeds
1 cup ground onion
1 tablespoon ginger-garlic paste
1 teaspoon turmeric
1 cup diced tomatoes
1 teaspoon cumin powder
2 teaspoons Kashmiri chilli powder, depending on heat and your preference
2 teaspoons coriander powder
1 teaspoon garam masala, optional
2 medium potatoes, each cut into quarters
1 cup Lima beans
1 large can (2 lbs) Worthington FriChik original, drain and cut into four pieces
Salt
3 cups water
2 tablespoons finely chopped cilantro

Directions:

Select sauté to pre-heat the Instant Pot. When the word “Hot” appears on the display add the oil. Add cumin seeds and ground onion. Sauté for 2 minutes. Add the ginger-garlic paste and turmeric. Sauté for another 2 minutes. When the raw smell of turmeric disappears add the tomatoes. Sauté for a minute. Add cumin powder, chili powder, coriander powder, garam masala, potatoes, peas, FriChik, and salt. Mix well. Add water. 

Close and lock the lid. Select “Pressure Cook” or “Manual” and set 4 minutes. When time is up use Quick release. (Release pressure instantly, by pressing (Cancel) and then turning the steam release handle on the lid to “Venting” position.)

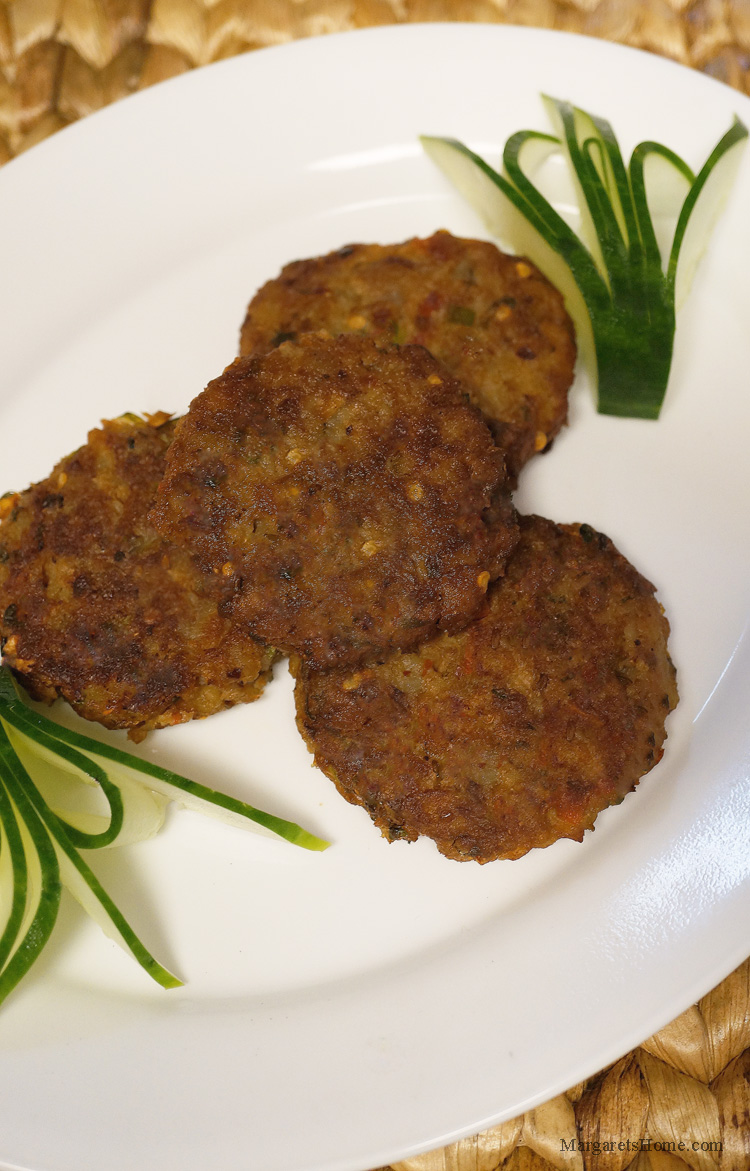
Reposting – Fishless Tuna Cutlets

Fishless Tuna Cutlets Fishless Tuna Cutlets
Prep time: 10 minutes
Cooking time: 25 minutes
Makes: 10-15

Ingredients:
3 Yukon gold potatoes, boiled, skins removed, and mashed, (about 3 cups)
2 cans (13oz/369g) Fishless Tuna, well drained
1 green bell pepper, finely chopped
1 small onion, finely chopped, (about ½ cup)
1 Roma tomato, diced
¼ cup finely chopped cilantro
5 mint leaves, finely chopped (optional)
3 green chillies, finely chopped (depending on heat and your preference, optional)
3 teaspoons chilli flakes, (depending on heat and your preference, optional)
½ teaspoon whole cumin seeds
2 teaspoons coriander powder
3 teaspoons dry mango powder, (amchur, optional)
¼ cup Bengal gram flour, (besan)
1 egg, (replace egg with two extra tablespoons of Bengal gram flour for vegetarian/vegan)
salt
Oil for shallow frying

Directions:
Add the potatoes, Fishless Tuna, green bell pepper, onion, tomato, cilantro, mint, green chillies, chili flakes, whole cumin seeds, coriander powder, dry mango powder, Bengal gram flour (besan), egg, and salt into a large bowl. Mix well. Form the cutlets and put them on a small tray.

Place a medium-sized non-stick frying pan over medium heat and add oil for shallow frying. Add a few cutlets at a time. If you over crowd the pan, it will be difficult to turn the cutlets over. Wait until you see the bottom edges of the cutlets turn golden brown in color. Then gently turn them over. Fry the other side until golden. Remove and place on a paper towel lined baking tray.

Notes:
1. Drain the Fishless Tuna and discard the water. Put the tuna in a sieve and press it with a wooden spoon so you can get all the water out before you use it.
2. Have all the ingredients ready before you mix them together, form the cutlets, and shallow fry them. If you mix the ingredients and leave it in the bowl to rest the onion, green pepper, and tomato will give out water which will make it difficult for you to form the cutlets.
3. Fry the cutlets on medium heat until you see the edges on the bottom of the cutlets turn golden brown.
4. If you like tartness, then add the dry mango powder (amchur).
5. Both Bengal gram flour and dry mango powder can be bought from an Indian grocery store.
6. These cutlets freeze well.
7. Replace the egg with two extra tablespoons of Bengal gram flour to make these cutlets vegetarian or vegan.
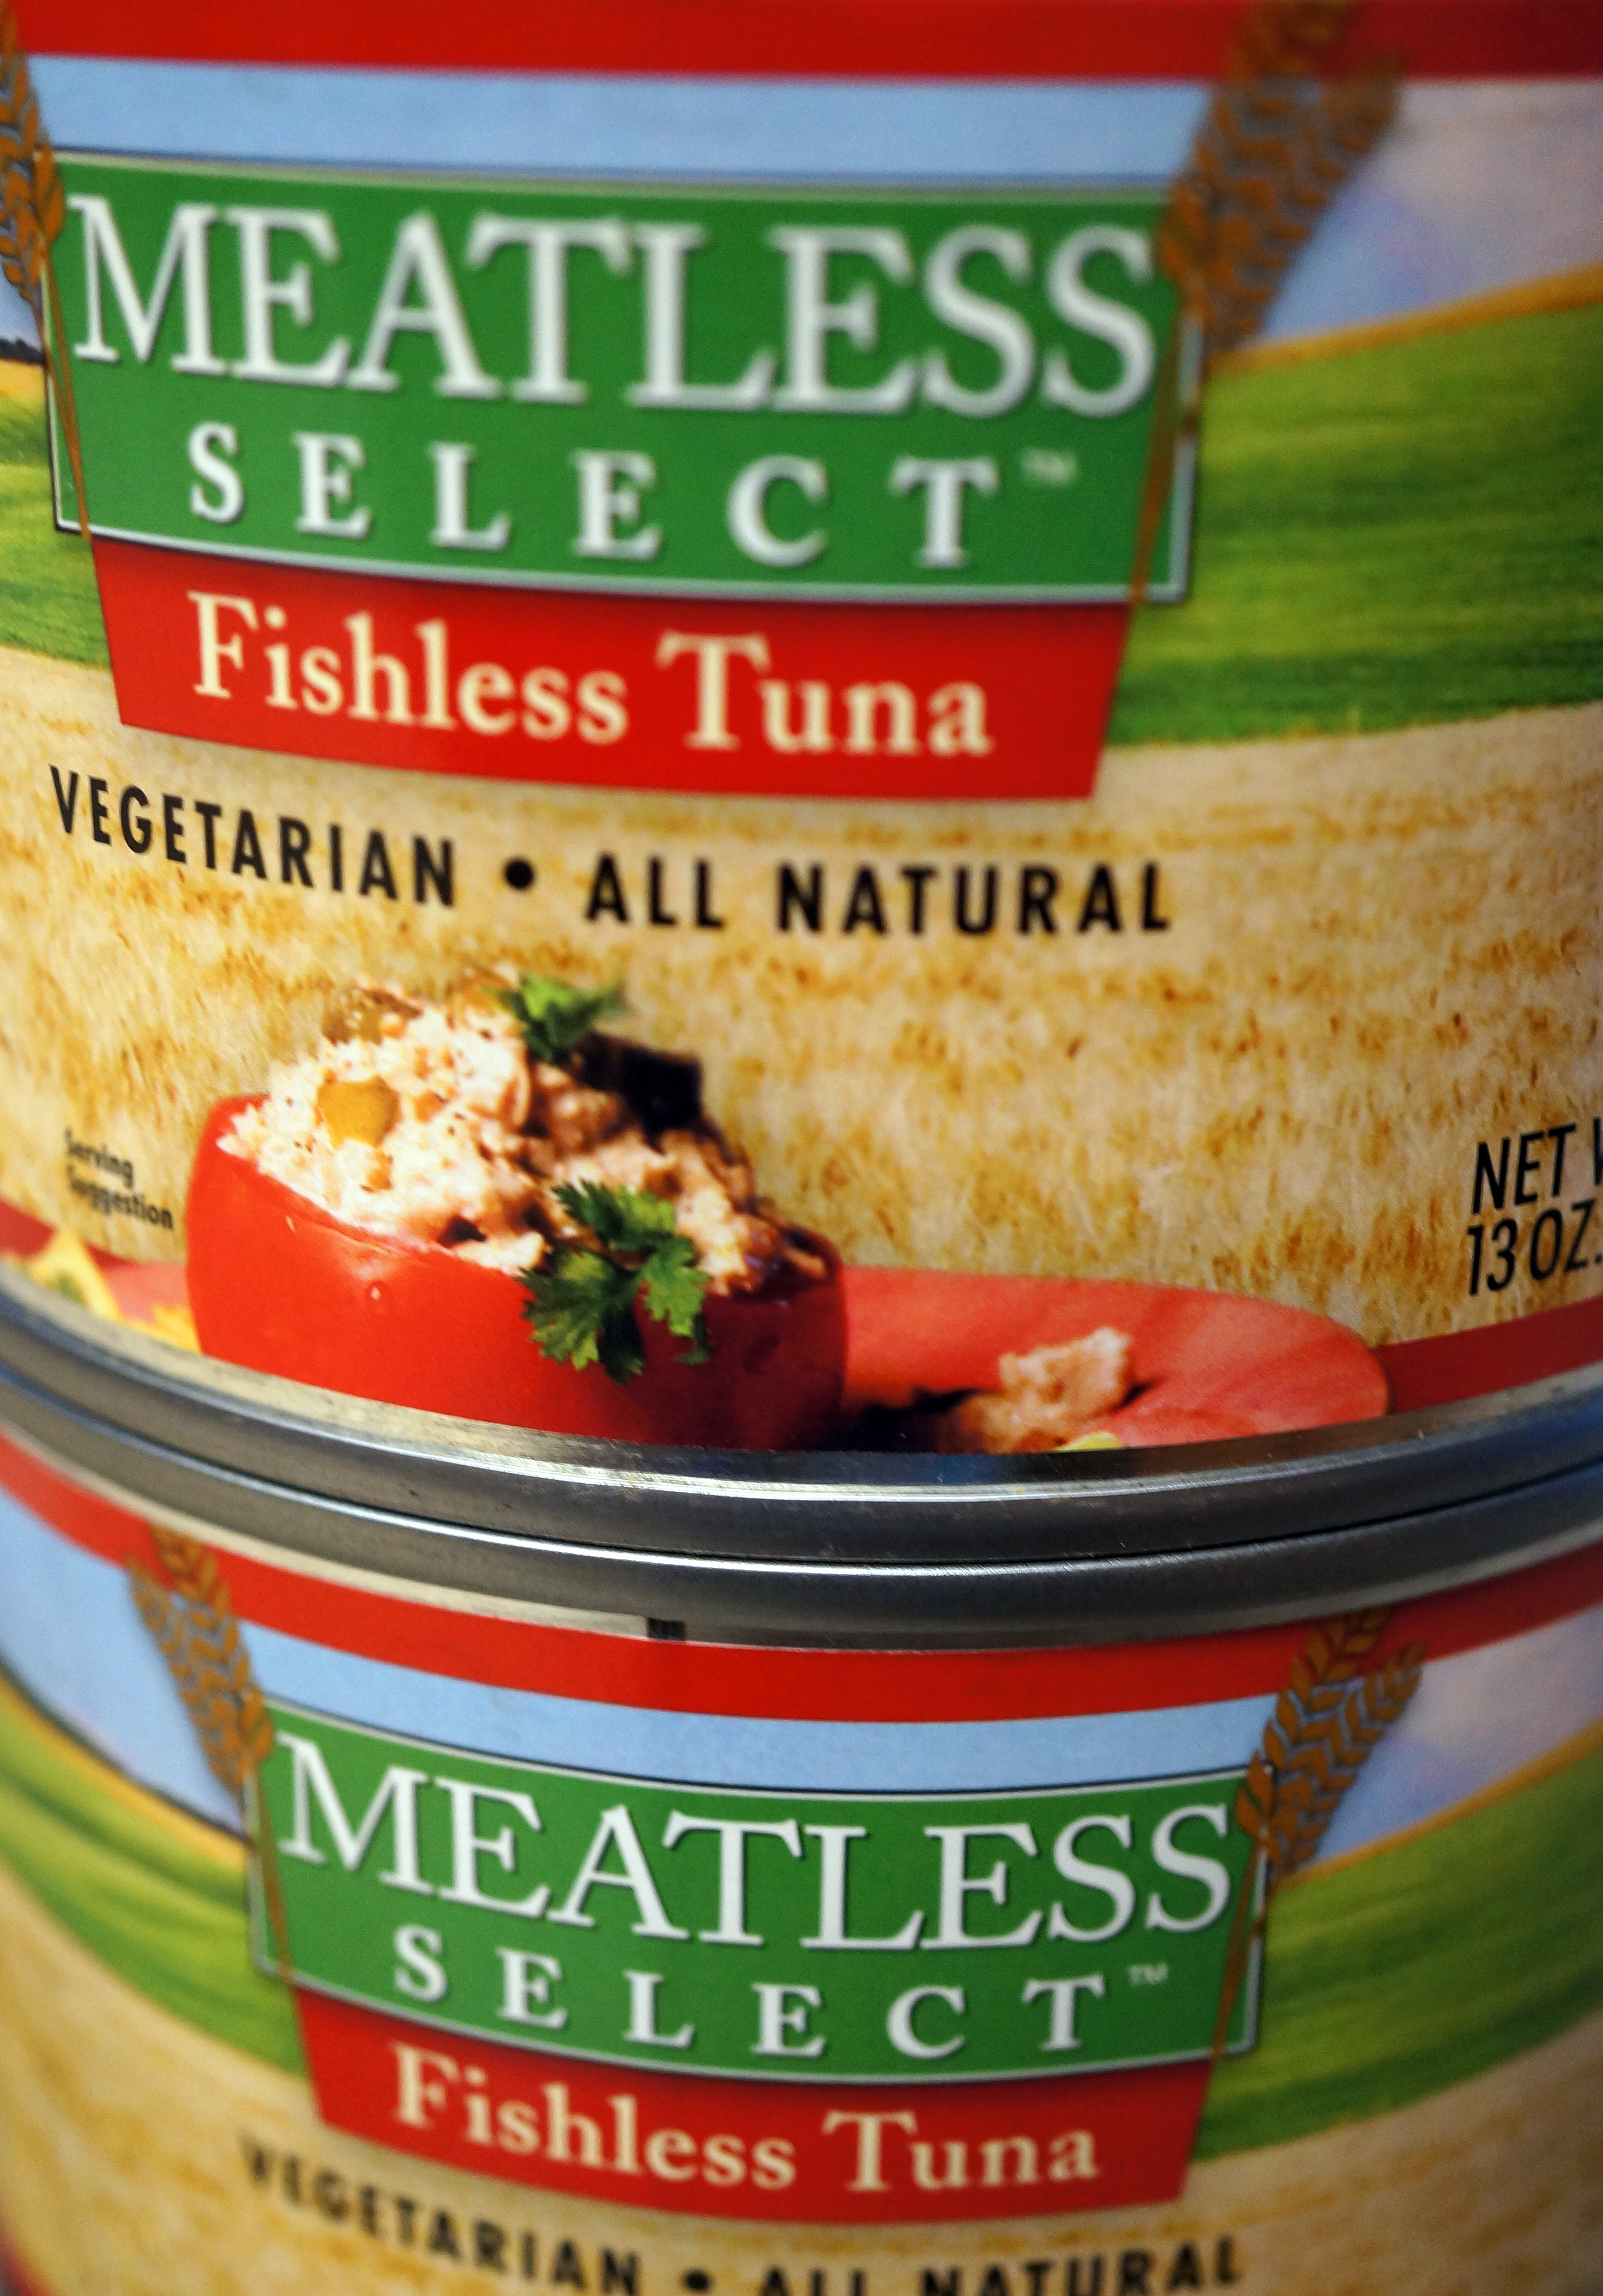
8. Fishless Tuna is a product of Atlantic Natural Foods Meatless Select. The cans are available at the Potomac Adventist Book & Health Food Store in Silver Spring, Maryland.

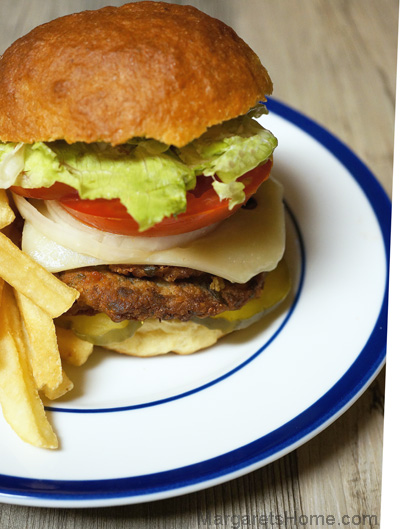
Fishless Tuna Burger1October 22, 2014 – Attaching a picture of the cans for those that asked. If you don’t have a store that sells this, you can contact the company directly: Atlantic Natural Foods Meatless Select at: http://www.foodprocessing.com/vendors/products/2013/atlantic-natural-vegetarian-proteins/
Fishless Tuna Can Pic

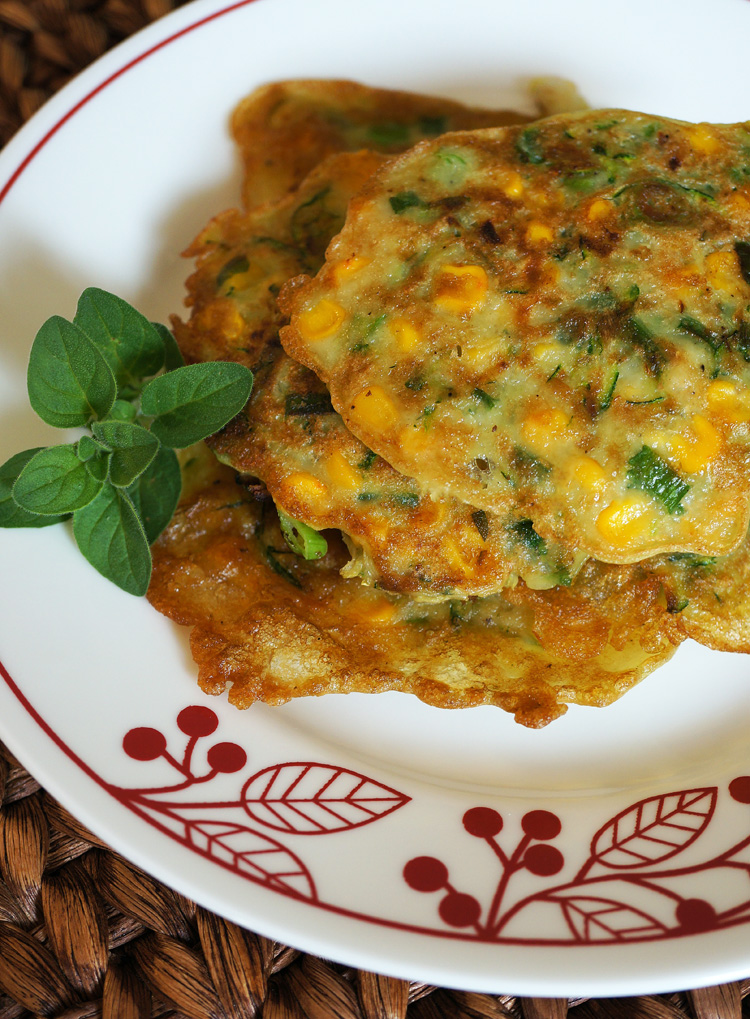
Zucchini and Corn Fritters

Zucchini and Corn Fritters
There are several ways to enjoy these zucchini and corn fritters. You can put them in a sandwich, have them as a side dish, or pair them with a spring salad for a lovely, light lunch. You can make these fritters gluten free by using one cup of pure cornstarch instead of the cornstarch and all purpose flour listed in the ingredients. While reading about gluten free, I learned that anything can be contaminated with gluten during processing. If you want to be on the ultra-safe side, it’s always best to buy ingredients that are certified gluten-free.

When I made these fritters the first time, I did not squeeze the excess water from the shredded zucchini and it made my batter too thin. So, use a cheesecloth to squeeze the excess water from the zucchini. Save the liquid. You can always add a tablespoon or two of the zucchini water to make the batter a thick, pouring consistency.

Summer is a great time to experiment with fresh herbs. I used oregano in this recipe but you can use whatever herbs float your boat! Or, Indianize it with cilantro, whole crushed cumin or coriander seeds, and dry chilli flakes.

What are some of your favorites herbs and spices? Do you use herbs like rosemary, thyme, oregano, parsley, basil, and marjoram to give your Indian recipes a new twist? I look forward to your comments on my blog or on my Facebook page.

Zucchini and Corn Fritters
Prep time: 15 minutes
Cooking time: 30 minutes
Makes: 20

2 eggs, slightly beaten
¾ cup Argo cornstarch, (Argo & Bob’s Red Mill are gluten free)
¼ cup all purpose flour
½ teaspoon baking soda
¼ teaspoon pepper
1¼ teaspoons salt, (or to taste)
4 cups shredded zucchini, (squeeze water out)
1½ cups thawed frozen corn
1 cup finely chopped green onions, (white and green parts)
1 tablespoon finely minced fresh oregano leaves
1 tablespoon finely minced jalapeño, (optional, depending on heat and your preference)
5 tablespoons grape seed oil, (or oil of your choice)

In a large bowl add slightly beaten eggs, cornstarch, flour, baking soda, pepper, and salt. Use a cheesecloth to squeeze excess water from the shredded zucchini. Save the liquid. Add zucchini, corn, green onion, oregano, and jalapeño to the rest of the ingredients in the bowl. Mix well to combine. Stir in a tablespoon or two of the zucchini water if the batter is too dry.

Heat a large non-stick frying pan on medium heat. Add a tablespoon of oil for shallow frying and when it shimmers, add half cup of the batter. Gently spread to form a three-inch pancake. Make three more fritters. When the edges start turning light brown, about three minutes, turn over and fry the other side for two minutes. Remove on to a paper towel lined sheet pan. Make the rest of the fritters.

Idli – Rice and Lentil Steamed Cake

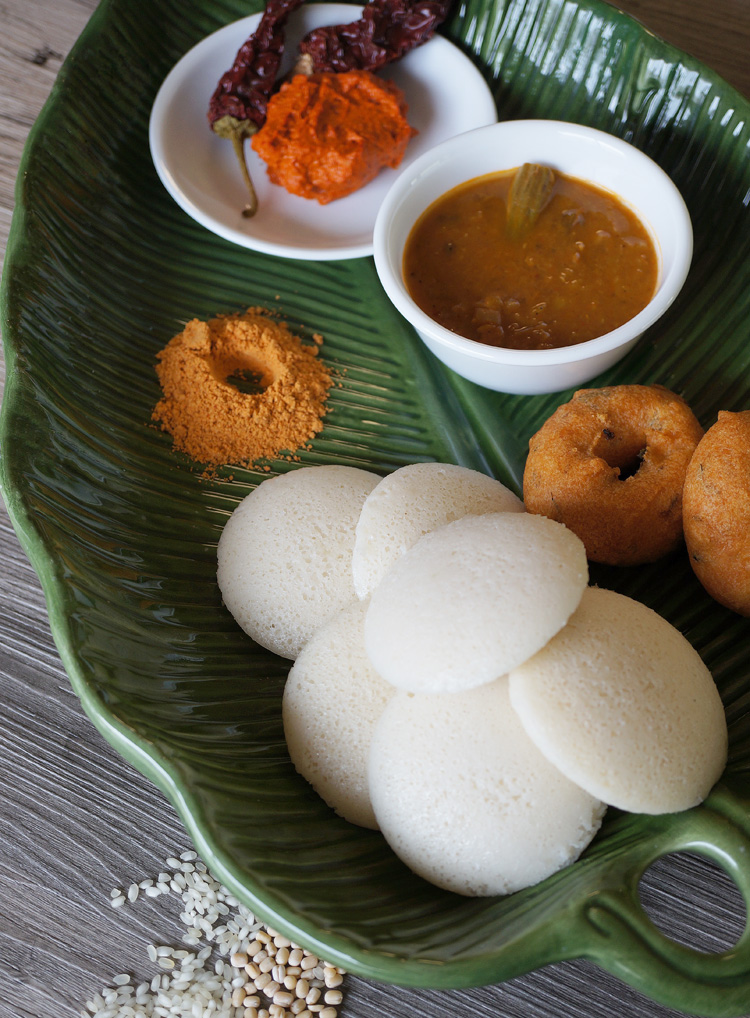
Idli2
Idlis are traditional South Indian steamed rice cakes that are eaten at breakfast or at tea time. Black lentils and rice are soaked, ground, fermented, poured into idli moulds, steamed, and eaten with sambar and chutney. There are hundreds of variations. Making idlis, when I lived in India, was easy. The climate was conducive to the fermentation process. After moving to the US, I had to learn some new tricks to get the batter to cooperate.

The table top wet grinder that my daughter bought for me as a birthday gift made the grinding process easy (thank you, daughter). Many of my friends still use their trusted mixies (powerful blenders) to do the job. I learned the most important secret to soft, spongy idlis is using the right amount of water while grinding the lentils and rice. So, in my directions below, I’ll go to great lengths to explain the process and to give you the approximate amount of water to be used.

Fermenting the batter in winter is difficult. I turn the oven on and bring the temperature up to 200°F. Then I turn the oven off, wait for about 15 minutes and then put the batter in the oven. I also leave the oven light on to ensure that the oven stays warm. To avoid accidents, I put a sheet tray under the pot just in case the batter overflows. Could I be more optimistic than that?

While experimenting with this recipe, I tested using a teaspoon and a half of fenugreek seeds which I soaked along with the rice to help with the fermentation process, but it changed the color of the idli. So, instead, I recommend using beaten rice (poha), or cooked rice. To get the light sour taste and smell in your idlis, the batter has to ferment well. Using three tablespoons of starter batter also helps to achieve this.

Try my recipe, and I hope your next batch of idlis will turn out perfectly. If you do try my recipe, please post a picture of your results on my Facebook page.

Idli
Prep Time: 8 hours (includes soaking time but does not include time to ferment batter)
Cooking time: 15 minutes
Serves: 8 (makes around 72 small 2.5″ idlis)

Ingredients:
3 cups idli rice
1 cup whole black lentils, (whole urad dal)
½ cup beaten rice, (flattened rice flakes, poha)
3 teaspoons salt
3 teaspoons olive oil or sesame oil, (to grease idli mould)

Directions:
Wash the rice in three changes of water. Place it in a large bowl and add filtered water to cover the rice by about three inches. Set it aside for four hours.

After the rice has soaked for four hours, soak the black lentils. Wash the lentils in three changes of water. Put it into a medium bowl and add filtered water to cover it by about three inches. Soak the beaten rice in a small bowl with one cup of filtered water. Let the rice, lentils, and beaten rice soak for one hour.

I used a table top wet grinder to make the idli batter. Clean the grinder. Drain the black lentils. Make sure that you save the water the lentils were soaking in. Use this water when you grind. I also want to tell you that the amount of water that I suggest works well for me. But it depends on the kind of rice and lentils you will use. It might require a little more or a little less water. But this will give you an idea.

Add the drained lentils and 1 cup of water into the grinder and turn it on. The whole process of grinding the lentils will take about 15 minutes. Let the machine run for five minutes. Scrape the sides and add ½ cup water and grind for another five minutes. You will see the batter turn light, fluffy, and increase in volume. Scrape the sides and add another ½ cup of water – one tablespoon at a time. Grind for five minutes. Turn the machine off and feel the batter. It should be light and when you rub the batter between your finger and thumb, the texture should be smooth and light. You should not feel any coarse grains, and if you put a spoon full into a bowl of water it will float. Remove the lentil batter into a large stainless steel pot.

If there is a little of the lentil batter remaining in the wet grinder, don’t worry. Add the rice and ½ cup water. Then, while the machine is running add another ½ cup of water. Grind for five minutes. Scrape the sides. Drain the beaten rice. Add it to the rice and add ½ cup water and grind for ten minutes. Scrape the sides, add salt, ½ cup water – one tablespoon at a time – and grind for the final ten minutes. Turn off the machine. It will take about 20-25 minutes to grind the rice. The batter can be anywhere from slightly coarse to smooth. Depends on how you like it.

Add the rice batter to the lentil batter in the large pot. The batter will rise during fermentation, so make sure that the pot is only half full of batter. Mix the lentil batter and rice batter with your hand. The warmth of your hand will help speed the fermentation process. If you live in a country where the weather is hot. You can leave your pot on your kitchen counter. However, if it is cold, turn your oven to 200°F. Wait for about 15 minutes. Cover the pot with a lid, set the pot in the oven, and turn the oven light on. The batter will ferment in about 8-10 hours. I leave it overnight and make idlis in the morning for breakfast.

When you are ready to start making idlis, fold the batter using a spatula. Just like you would do with a light, chiffon cake! The rice batter would have fallen to the bottom of the pot and the lentil batter would have risen to the top. Fold them together, gently.

Grease the idli mould with olive oil or sesame oil. Fill the idli mould leaving a little space for the batter to rise. Steam for 12 minutes. I use an idli steamer for this purpose but you can also use your pressure cooker (weight not required). Let the idlis cool down before you remove them with a wet idli spoon or butter knife.

The idlis turn out best on the first day. They freeze well. So you can use the whole batter to make idlis on the first day and then freeze them for use later. I usually make idlis on the first day and then use the remaining batter to make dosas. Store the batter in the refrigerator. Just add a little water to make the batter a pouring consistency before you make dosas.

To reheat idlis put them in a steamer. Or, if you are like me, put three idlis in a small bowl, put three drops of water in the center of each idli and microwave them for 20 seconds. You will have to eat the microwaved idlis right away because they get tough after a while. If you have ideas that could help me make better idlis, let me know. If you have questions for me, I’m only a phone call or email away.
Quinoa Salad

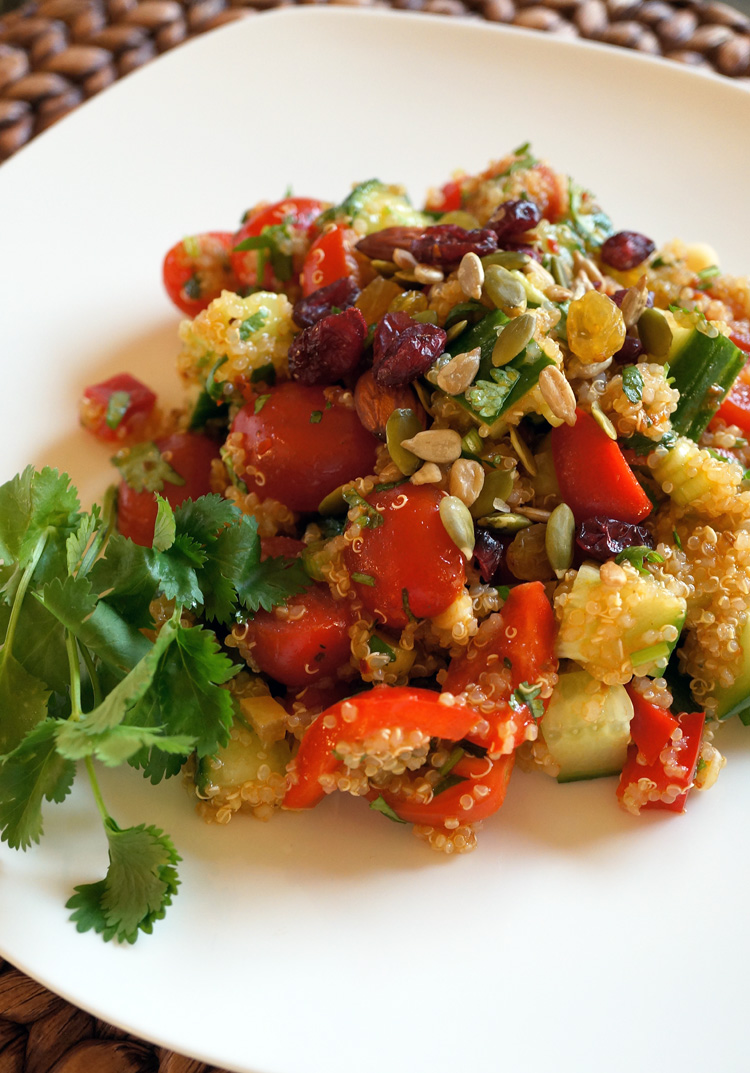
Quinoa, Cucumber and Cherry Tomato Salad
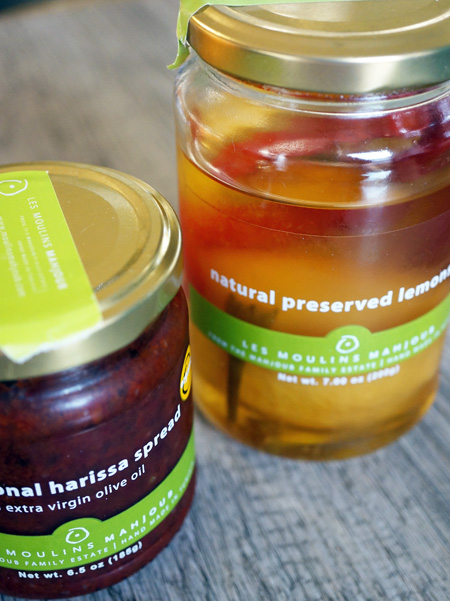
I’ve been attending cooking classes at Sur la Table and the first class I attended was called, “Healthy Mediterranean Cooking.” Chef Bradley Curtis was a superb teacher. Not only did he share several easy and healthy dishes, but he taught us good knife skills and introduced us to spices and herbs from around the world. I was excited to learn how to use Moroccan preserved lemons and Northwest African harissa. I could not wait to get home so I could use these two ingredients in my recipes, and this salad was my first creation.

I used quinoa because it is an excellent source of iron, phosphorus, fiber, and riboflavin. It is gluten-free and one of only a few plant foods that are considered a complete protein. Doctors and nutritionists call it a “super grain.” A natural soap-like substance, that is bitter, covers each grain. It is said that the bitter taste deters birds and insects from eating it. So, that also means it is low in pesticides.

Spring is here and it’s a good time to get back on track on eating right. Here’s a salad that’s “super” good!

Quinoa Salad
Prep time: 10 minutes
Cooking time: 25 Minutes
Serves: 4

Ingredients:
1 cup quinoa
2 cups vegetable broth or water
1 seedless English cucumber, diced
1 cup cherry tomatoes, halved
¼ cup finely chopped green onions, white parts only
2 tablespoons cilantro, finely chopped
1 tablespoons pumpkin/sunflower seeds, (optional)
1 tablespoons dry cranberries, (optional)
1 tablespoon raisins, (optional)

Directions:
Quinoa has a natural coating, called saponin. If it is not washed, the grains taste bitter or soapy. So, rinse the quinoa well under cold water and drain. It helps to use a fine mesh sieve to do this. Boxed quinoa is often pre-rinsed, but an additional rinse doesn’t hurt. Put the rinsed quinoa into a saucepan and add vegetable broth or water. The quinoa to broth/water ratio is 1:2. Add a little salt if you are not using broth.

Cover and bring to a boil. When it starts boiling, turn the heat to low. The lid should be slightly ajar, to prevent boiling over. Simmer for 20 minutes. It’s just like cooking rice. The grains get a bit transparent when it is cooked, except for a little spiral sprout. Use a fork to fluff it up and then let it cool.

Once the quinoa comes to room temperature, put it into a large bowl. Add cucumber, cherry tomatoes, green onion, and cilantro. Set aside and make the dressing.

Ingredients for dressing:
2 tablespoons fresh lemon juice
1 tablespoon honey
2-3 tablespoons harissa, (depending on heat and your preference)
1 small Moroccan preserved lemon, rind only, rinsed and finely chopped
¼ teaspoon pepper
salt
3 tablespoons extra-virgin olive oil
¼ teaspoon cumin seeds
1 garlic clove, minced

Directions for the dressing:
Whisk lemon juice, honey, harissa, preserved lemon, pepper, and salt in a small non-reactive bowl. Heat olive oil in a small non-stick pan and when it shimmers add cumin seeds and garlic. Stir for 30 seconds and then turn off the heat. Cool and drizzle the seasoned oil into the rest of the ingredients that are in the small bowl. Whisk vigorously.

To finish the salad:
Pour the dressing over the quinoa and vegetables. Toss gently. Cover and let stand at room temperature for one hour. It can also be kept in the refrigerator overnight. Serve chilled or at room temperature. Sprinkle pumpkin seeds, cranberries, and raisins just before you serve.

Note on how to use Moroccan preserved lemon: Remove lemon from the bottle with clean utensils to avoid contaminating the inside of the jar. This way, the remaining contents of the jar will not need to be refrigerated. Rinse the lemon under cold water to remove excess salt. Cut the lemon in quarters. Scoop off the insides. With a sharp knife remove the pith. Dice the lemon rind into small 1/8-inch cubes or finely chop.
Quinoa salad Harissa2

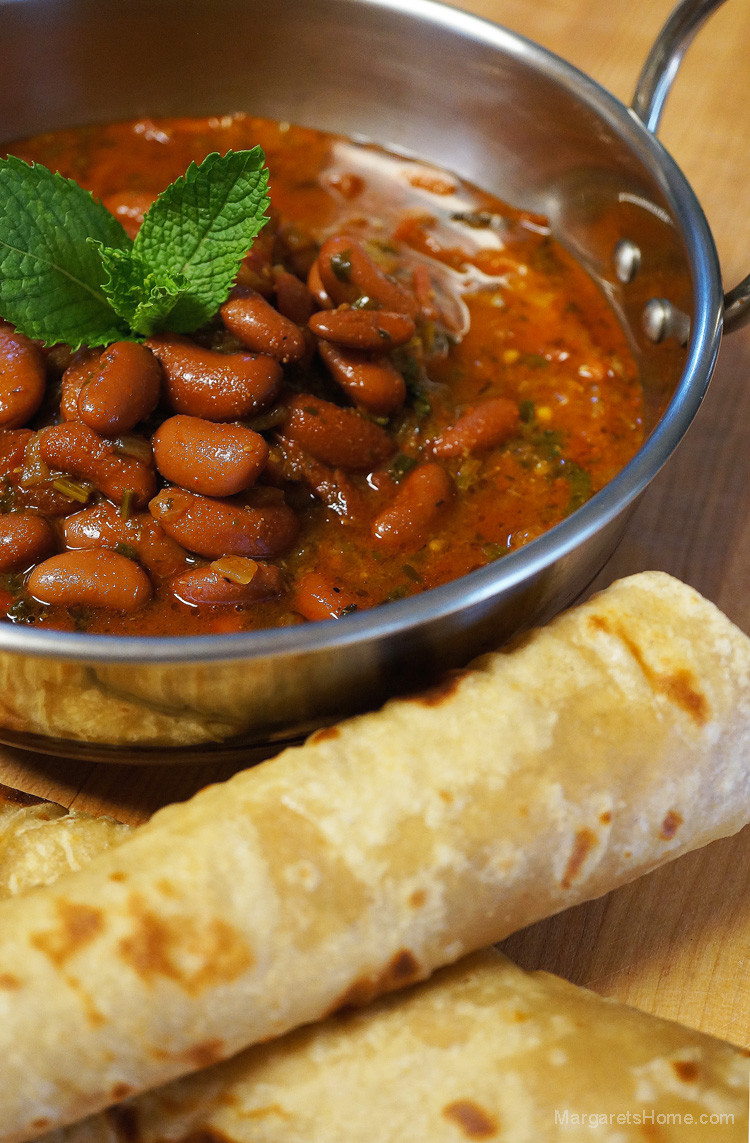
Reposting – Red Kidney Bean Curry (Rajma curry)

Red Kidney Bean Curry3Red Kidney Bean Curry
Prep time: 8 minutes
Cooking time: 25 minutes
Serves: 4

Ingredients:
1lb 13 oz (822 grams) red kidney beans
3 tablespoons vegetable oil
1 bay leaf, (tej patta)
2 black cardamoms
1-inch piece cinnamon
2 cups finely chopped onion
salt
2 tablespoons ginger-garlic paste
2 cups diced tomatoes
3 green chillies, (slit down the center – adjust depending on heat and your preference)
1 teaspoon whole cumin seeds
½ teaspoon turmeric powder
2 teaspoons Kashmiri chilli powder, (depending on heat and your preference)
1 teaspoon crushed red chilli flakes, (depending on heat and your preference)
1 tablespoon coriander powder
2 teaspoons garam masala, (depending on your preference)
3 teaspoons kasori methi, (crushed in your palm)
1 cup warm water
¼ cup finely chopped cilantro
3-4 mint leaves, (torn into bits)

Directions:
Heat a heavy bottomed pot on medium-high heat. Add oil and when it shimmers add the bay leaf, black cardamoms, and cinnamon. After 30 seconds add the chopped onion and salt. Fry until the onion turns light brown. Lower the heat to medium and add the ginger-garlic paste. Fry until the raw smell of ginger-garlic disappears, then add the tomatoes and green chillies. Cook until you see the oil separate from the tomato-onion mixture.

Add cumin seeds, turmeric powder, chilli powder, crushed red chilli flakes, coriander powder, garam masala powder, and kasori methi. Cook for 30 seconds and then add the canned red kidney beans along with the liquid in the can and one cup of warm water. Turn the heat to high and let the beans come to a boil. Once it comes to a boil, turn the heat to low, and let the beans simmer for 15-20 minutes. Garnish with cilantro and mint. Serve with plain steamed rice or rotis.

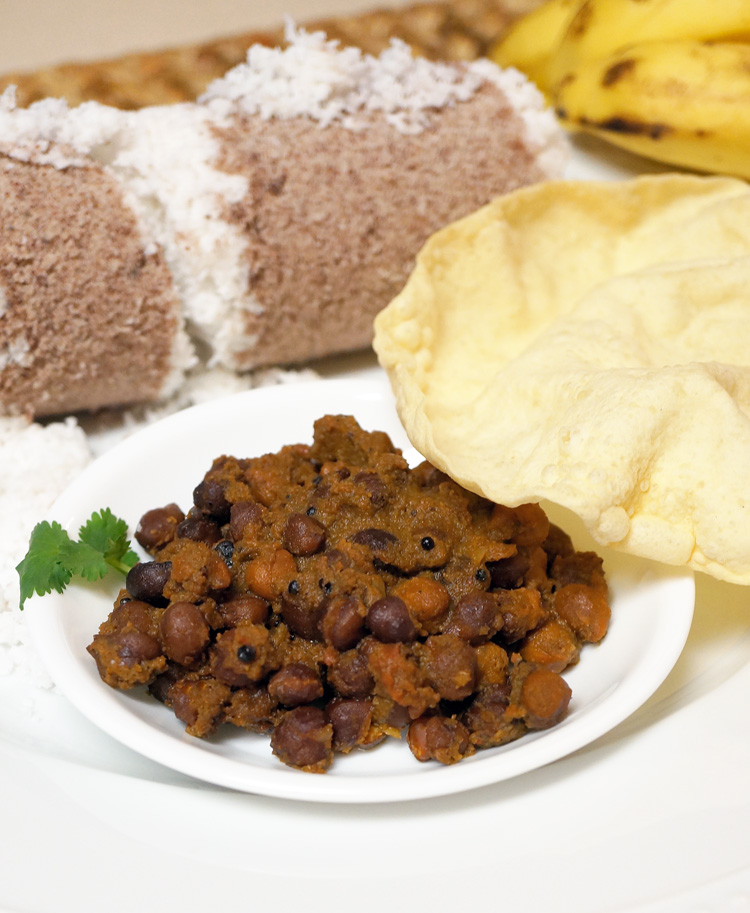
Black Chickpea Curry

Black Chickpea Curry1
The classic combination of puttu, kadala curry (black chickpea curry), and papadam is made for breakfast in most homes in Kerala. When I’m homesick, it’s my comfort food. Unlikely as the combination may sound, it actually works. Check out my post on, “Puttu, Pazham, and Pappadam” to learn how to make puttu.

In Kerala, black chickpea curry accompanies puttu, appam, idiyappam, and dosa. But it can also be served with rice, chapati, and puri. You can make it with or without gravy. Black chickpeas are called kala channa in Hindi.

Using garam masala is key. It adds flavor and spice to this curry. The feedback that I received on the garam masala recipe that I shared with you is excellent. Take the time to make it and use it in my recipes. It’s the best!

Black chickpeas are a good source of protein, low in fat, high in dietary fiber, and rich in vitamins and minerals. So, add them to your diet, especially if you are vegetarian or vegan.

Black Chickpea Curry
Prep Time: 20 minutes + soak the chickpeas overnight (8-9 hours)
Cooking time : 30 minutes
Serves : 4

Ingredients:
1 cup black chickpeas (kala channa/kadala), soaked overnight
1 teaspoon coconut oil
4 tablespoons coriander seeds
2 South Indian dry red chillies (depending on heat and your preference, optional)
½ cup grated coconut
¼ cup diced shallots
2 teaspoons sliced garlic
1 sprig curry leaves
½ teaspoon cumin seeds
¼ teaspoon turmeric powder
1 teaspoon garam masala powder, (depending on heat and your preference, optional)

To season the black chickpea curry
3 tablespoons coconut oil
½ teaspoon black mustard seeds
1 sprig curry leaves
2 tablespoons diced shallots

Directions:
Rinse the black chickpeas in several changes of water. Add half teaspoon salt to 2½ cups of water and soak the chickpeas for 8-9 hours or overnight.

Heat one teaspoon oil in a small pan set over medium-low heat. Add coriander seeds and when they begin to turn light brown add the dry red chillies. Roast until coriander turns golden brown. Remove to a small plate. To the same pan add coconut. Roast the coconut, stirring constantly, until the coconut turns golden brown. Off the heat and add quarter cup shallots, two teaspoons garlic, curry leaves, cumin, turmeric, and garam masala. Mix and let it remain on the stove top until it cools. Once all the ingredients that were roasted have cooled, put them into a blender and grind with three tablespoons of water to make a smooth paste.

Add the black chickpeas, along with the water it was soaking in, to a pressure cooker. Add another two cups of fresh water and the ground coconut paste. Stir well. Cover with lid. Bring to full cooking pressure on maximum heat. Reduce heat to medium and cook for eight minutes. Allow the cooker to cool gradually before opening. Please check on the cooking time for your make of pressure cooker.

To season the black chickpea curry, heat three tablespoons of coconut oil in a small pan. Add mustard seeds and when they splutter, add curry leaves and shallots. Keep stirring until the shallots turn golden brown. Add the seasoning to the cooked black chickpea curry. Stir well and serve. If you want a thick gravy, cook the water down on high heat until the gravy thickens and reaches the consistency you desire.

Kale and Red Lentil Soup

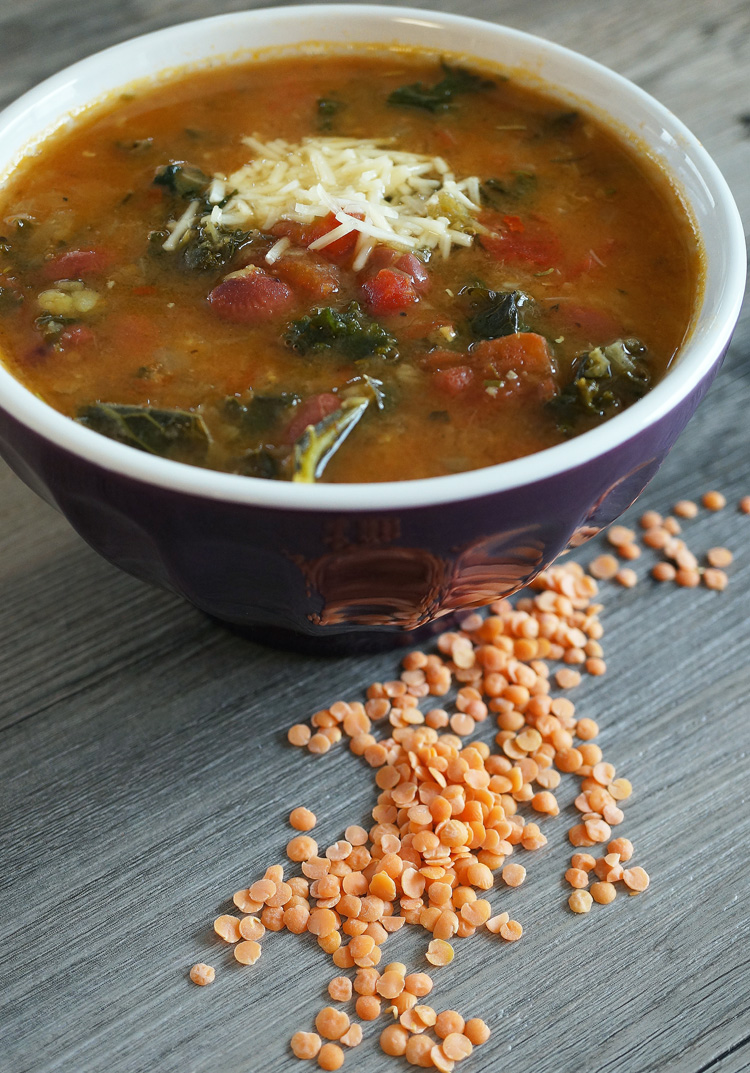
Kale SoupMy inspiration for today’s recipe was a spice rack that I got for Christmas. Thank you, Sonia, for this beautiful gift. The 20-jar revolving spice rack has dry herbs and spices that are of the highest quality. I used rosemary and thyme in my soup today. If you don’t own a spice rack, I recommend that you get one. Having spices and herbs at your fingertips is a time saver in the kitchen.

My love for kale is no secret and I’m using it in the soup of the day. Kale has been a very popular vegetable recently. Doctors have named it one of the world’s healthiest foods. Kale has antioxidant-related health benefits, anti-inflammatory health benefits, and cancer-preventive benefits. It also provides cardiovascular support, controls blood glucose levels, improves bone health, and helps lower blood pressure and cholesterol.

I also used red lentils (masoor dal) in the soup. You can find red lentils at your regular grocery store or at the Indian grocery store. I used the split red lentils instead of the whole red lentils, because they cook faster. Take the time and effort to wash the kale well. If the stems on the kale are tough, remove them and use only the leaves. You can use some of the tender stems, but cut them into small pieces.

My family enjoyed this soup a lot and I hope you will too.

Kale and Lentil Soup
Prep time: 10 minutes
Cooking time: 35 minutes
Serves: 4

Ingredients:
3 tablespoons olive oil
1 cup chopped onion
2 teaspoons sliced garlic
¼ teaspoon turmeric
½ cup split red lentils, (masoor dal)
2 cups water
1 can (14.5 oz 411 g) diced Tomatoes
1 can (15.5 oz 439 g) Goya small red beans
½ teaspoon dried rosemary
½ teaspoon dried thyme
½ teaspoon crushed red pepper flakes, (optional)
½ teaspoon fresh ground black pepper
salt
7 cups low-sodium stock, (vegetable or chicken)
4 cups kale
3 tablespoons grated Parmigiano-Reggiano (optional)

Directions:
De-stem the kale by pulling the leaves away from the stem. Wash the leaves and tear (or cut) them into small bite size pieces. If you use the tender stem, cut them into small pieces. Set aside.

Heat olive oil in a large saucepan set over medium heat. Add onion and garlic. Stir and when they turn translucent, add turmeric and lentils. Stir and cook for a minute. Add two cups of water. Bring the water to a boil, then turn the heat to low. Partially cover the saucepan with a lid and let it cook for 20 minutes. The lentils should be well cooked before you add the rest of the ingredients.

Add the tomatoes, red beans, rosemary, thyme, red pepper flakes, pepper, salt, and vegetable stock. Turn the heat to high and bring to a boil. Add the kale, turn the heat to medium-low, and let the soup simmer for ten minutes. Serve in soup bowls and garnish with grated Parmigiano-Reggiano.

Dal Makhani

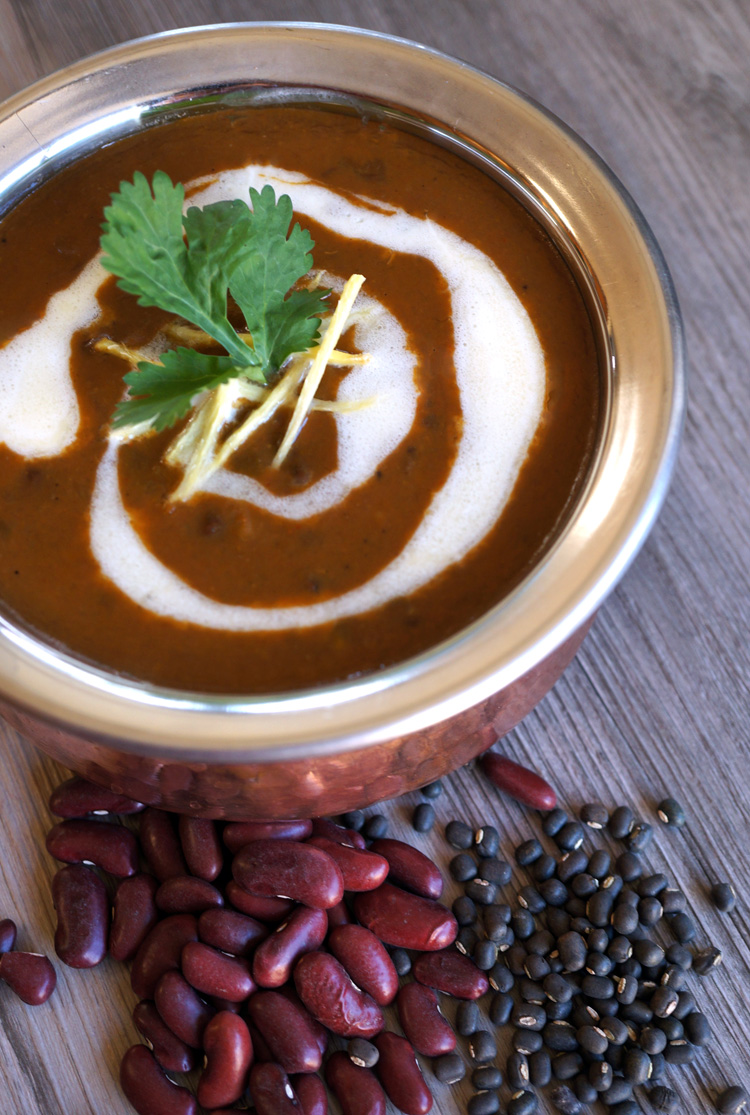
Dal Makhani1
I was cleaning my kitchen cupboards and noticed that I had over ten different dry lentils and beans on the shelves. Some of them I used often and others only for specific recipes. I was reminded of the classic Punjabi dish, dal makhani, when I saw the black lentils and kidney beans sitting next to each other. Makhani, in Punjabi, means buttery. You will find this dish on the menu of almost every Indian restaurant.

Dhabas, small restaurants found along the highways in North India, serve the best dal makhani.  Black lentils and kidney beans are soaked for eight hours. Then, before the cooks go home for the night, it is place in a large pot over the residual heat of a tandoor (clay oven) and cooked until they return in the morning. It is seasoned lightly and finished with lots of fresh butter and cream. The subtle taste and smooth, velvety texture of dal makhani is absolutely glorious!

A slow cooker would have been the ideal appliance to cook this dish. But since I didn’t have one, I experimented with cooking the dal makhani in a pressure cooking for a long period of time over very low heat.

Dal makhani is not a dish you would eat every day! It is high in calories and loaded with butter and cream. However, you can add as much or as little butter and cream as your conscience will allow. As much as I love dal makhani, it is definitely an occasional indulgence!

Dal Makhani
Prep time: 15 minutes, (does not include time for soaking)
Cook time: 60 minutes
Serve: 4

Ingredients:
1 cup whole black lentils, (urad dal)
2 tablespoon red kidney beans, (rajma)
6 cups water, (3 cups to soak and an additional 3 cups to pressure cook)
1/8 teaspoon baking soda
1 teaspoon salt, (plus more depending on your preference)
1 cup roughly chopped onion
1 tablespoon roughly chopped ginger
2 cups roughly chopped tomato
2 green chillies, optional
3 tablespoons ghee
1 bay leaf
2 cloves
2 black cardamoms
½ teaspoon cumin seeds
1/8 teaspoon asafoetida powder
¼ teaspoon turmeric powder
1 teaspoons Kashmiri chilli powder
2 teaspoons coriander powder
1 teaspoon garam masala powder
2 teaspoons kasoori methi
2 tablespoons unsalted butter
2 tablespoons heavy cream
1 tablespoons finely chopped cilantro
2 tablespoons julienned ginger

Directions:
Wash the who black lentils and red kidney beans four times, changing the water each time. Cover with three cups of water and soak overnight. Put the lentils and kidney beans, along with the water that it was soaked in, into a pressure cooker. Add the baking soda, salt, and three more cups of water. Stir, cover with pressure cooker lid, and add the weight. Bring to full cooking pressure on maximum heat. Then reduce heat to lowest point on your stove. Cook for 35 minutes. Turn off the heat and let the pressure cooker cool gradually before opening.

Use a blender to puree the onion and ginger. Remove into a small bowl and set aside. Put the tomato and chilli into the blender next and puree. Remove into another bowl and set aside.

 Use a potato mashed to gently mash a small portion of the lentils that are in the pressure cooker.

Place a large saucepan over medium-high heat and add ghee. When it sizzles add bay leaf, cloves, cardamoms, cumin seeds, and onion-ginger puree. Cook, stirring intermittently, for 7-10 minutes or until the raw smell of the ginger disappears. Turn heat to low and add asafoetida, turmeric, chilli, coriander, and garam masala. Immediately add the tomato puree and crushed kasoori methi. Stir well, cover and cook on medium heat for 10 minutes or until the oil separates.

 Add the cooked lentils. Stir well to combine all the ingredients. Add salt to taste, half of the julienned ginger, and butter. Cook for five minutes. Garnish with cilantro, the remaining julienned ginger, and cream. Serve immediately. This dal thickens if you keep it in the refrigerator. So add some water while re-heating. Tastes great with rice, roti, paratha, and naan.

Reposting – French Green Lentil Soup

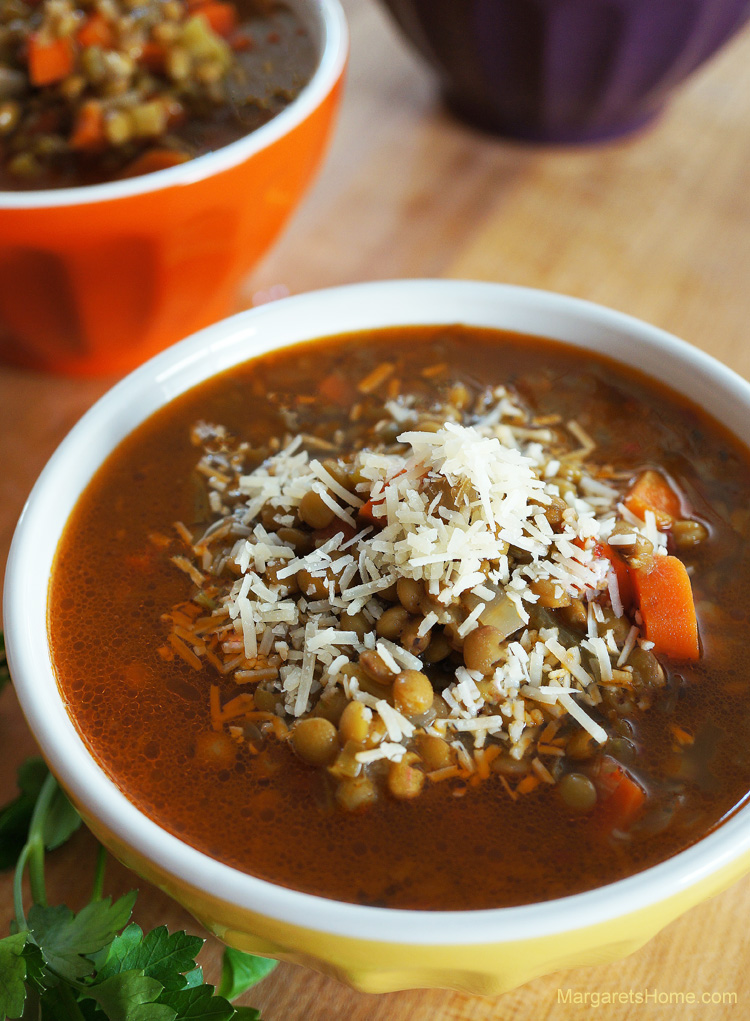
Lentil Soup4Lentil Soup
Prep time: 20 minutes
Cooking time: 1 hour 20 minutes
Serves: 10

3 tablespoons vegetable oil
1 bay leaf
4 cups chopped onion
1 tablespoon grated ginger
2 tablespoons grated garlic
1 tablespoons minced thyme leaves, (or 1 teaspoon dry thyme leaves)
1 cup chopped leeks, (white parts only)
Salt
1 tablespoon coriander powder
2 teaspoons cumin powder
1 teaspoon chilli flakes, (depending on heat and your preference)
2 teaspoons freshly ground black pepper
3 cups medium-diced celery
3 cups medium-diced carrots
¼ cup tomato paste
2½ cups green lentils, (you can also use brown or red lentils)
12 cups low-sodium chicken or vegetable stock
2 tablespoons lemon juice
2 teaspoons red wine vinegar
4 tablespoons freshly grated Parmigiano-Reggiano cheese

Rinse and soak the green lentils in boiling water for 15 minutes.

Add oil to a large pot, over medium-high heat. When it shimmers add bay leaf, onion, ginger, garlic, thyme, leeks and salt. Sauté until onion turns translucent. Add coriander powder, cumin powder, chili flakes, ground pepper, celery, carrots, and tomato paste. Stir and cook until the oil separates.

Drain the lentils and add to the soup. Then add the chicken or vegetable stock. Cover with a lid and bring to a boil. Once the soup starts boiling, turn the heat to medium-low, remove the lid and let the soup simmer and cook for one hour. Add lemon juice and red wine vinegar, stir and check to see if the salt is sufficient. Turn off the heat. Cover the soup and let it rest for 15-20 minutes. Reheat the soup when you are ready to serve. Garnish with Parmigiano-Reggiano cheese.