Instant Pot FriChik Curry

FriChik Curry-lastIngredients:
For the spice blend

12 Cashew nuts
½ cup hot water
5 cardamoms
5 cloves
2 1-inch piece of cinnamon
1½ teaspoons fennel seeds
1 small piece of black stone flower, optional
¼ cup grated coconut
2 sprigs curry leaves
2 tablespoons cilantro

Directions:

Add the cashew nuts to a small bowl. Cover them with half a cup of hot tap water and let them soak for 15 minutes. Add the cashew nuts, along with the water they were soaking in, into a blender. Add the rest of the ingredients and blend to a smooth paste. Set aside until you are ready to use it in the curry. 

Ingredients:
To make the curry

¼ cup oil
1 teaspoon cumin seeds
1 cup ground onion
1 tablespoon ginger-garlic paste
1 teaspoon turmeric
1 cup diced tomatoes
1 teaspoon cumin powder
2 teaspoons Kashmiri chilli powder, depending on heat and your preference
2 teaspoons coriander powder
1 teaspoon garam masala, optional
2 medium potatoes, each cut into quarters
1 cup Lima beans
1 large can (2 lbs) Worthington FriChik original, drain and cut into four pieces
Salt
3 cups water
2 tablespoons finely chopped cilantro

Directions:

Select sauté to pre-heat the Instant Pot. When the word “Hot” appears on the display add the oil. Add cumin seeds and ground onion. Sauté for 2 minutes. Add the ginger-garlic paste and turmeric. Sauté for another 2 minutes. When the raw smell of turmeric disappears add the tomatoes. Sauté for a minute. Add cumin powder, chili powder, coriander powder, garam masala, potatoes, peas, FriChik, and salt. Mix well. Add water. 

Close and lock the lid. Select “Pressure Cook” or “Manual” and set 4 minutes. When time is up use Quick release. (Release pressure instantly, by pressing (Cancel) and then turning the steam release handle on the lid to “Venting” position.)

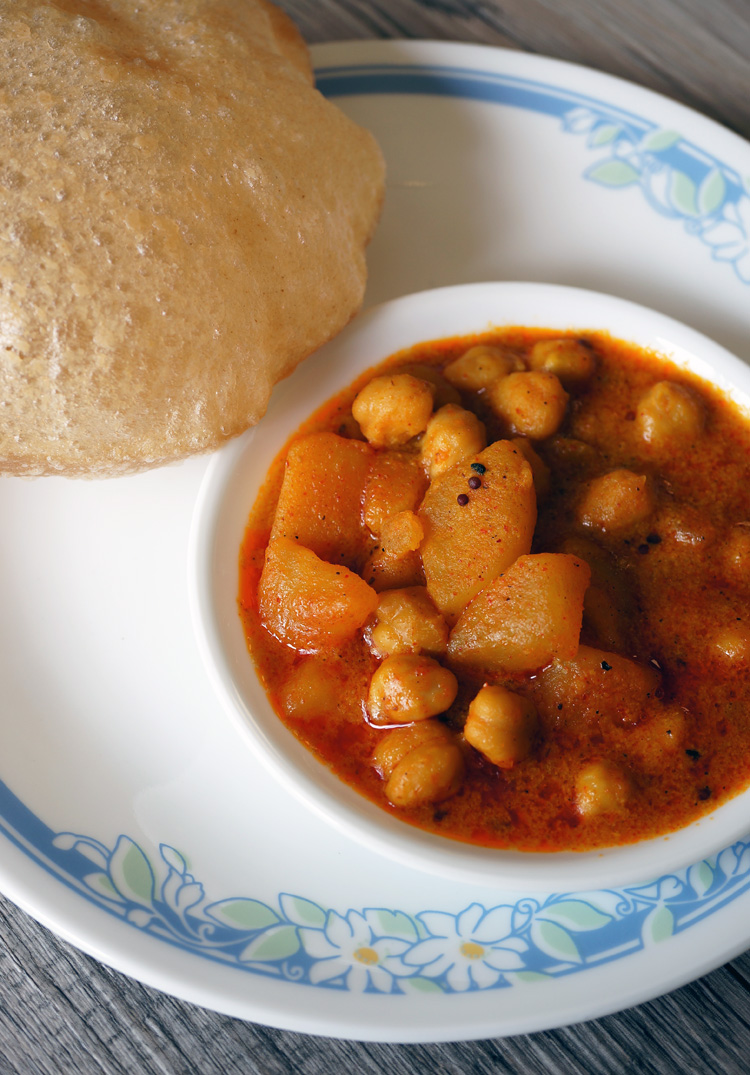
Curried Chickpeas and Potatoes

Curried Chickpeas and Potatoes
This was my lunch today. Curried chickpeas and potatoes can be eaten with chapati, naan or puri. It is easy to make and all you need is a small can of chickpeas, a few potatoes, and spices that are found on most Indian kitchen shelves. You can adjust the amount of chilli powder in this recipe depending on your preference.

I will be taking a break from blogging to travel, to take some cooking classes, and to catch up with projects around the house. Have a wonderful summer!

Curried Chickpeas and Potatoes
Prep time: 10
Cooking time: 20 minutes
Serves: 4

Ingredients:
4 tablespoons oil
½ teaspoon mustard seeds
½ teaspoon nigella seeds, (kalonji)
2 tablespoons ginger-garlic paste
1 15.5oz can (439g) chickpeas, (garbanzos)
3 medium potatoes, (boiled and peeled)
1 teaspoon Kashmiri chilli powder, (depending on heat and your preference)
1 teaspoon cumin powder
1 teaspoon garam masala powder
½ teaspoon turmeric powder
2 cups of water
salt
½ cup plain yoghurt
1 tablespoon chopped cilantro

Directions:
Place a saucepan on medium-high heat. Add oil. When the oil is hot add mustard seeds and when they crackle add nigella. Add the ginger-galic paste and saute until the raw smell of ginger-garlic disappears. Drain the chickpeas and add them to the saucepan. Cut the potatoes into small cubes and add them too. Saute for two minutes. Then add the chilli, cumin, garam masala, turmeric, water, and salt. Cover with a lid, turn the heat to high and bring to a boil. Once it starts boiling turn the heat down to medium-low and let the chickpeas and potatoes cook along with the spices for about ten minutes.

Beat the yoghurt until it is smooth and creamy. Turn the heat to low and add the yoghurt. Let the curry continue to cook for another ten minutes. The gravy should have thickened by now. Garnish with chopped cilantro. Sorry, I didn’t have any so you don’t see it in the picture!

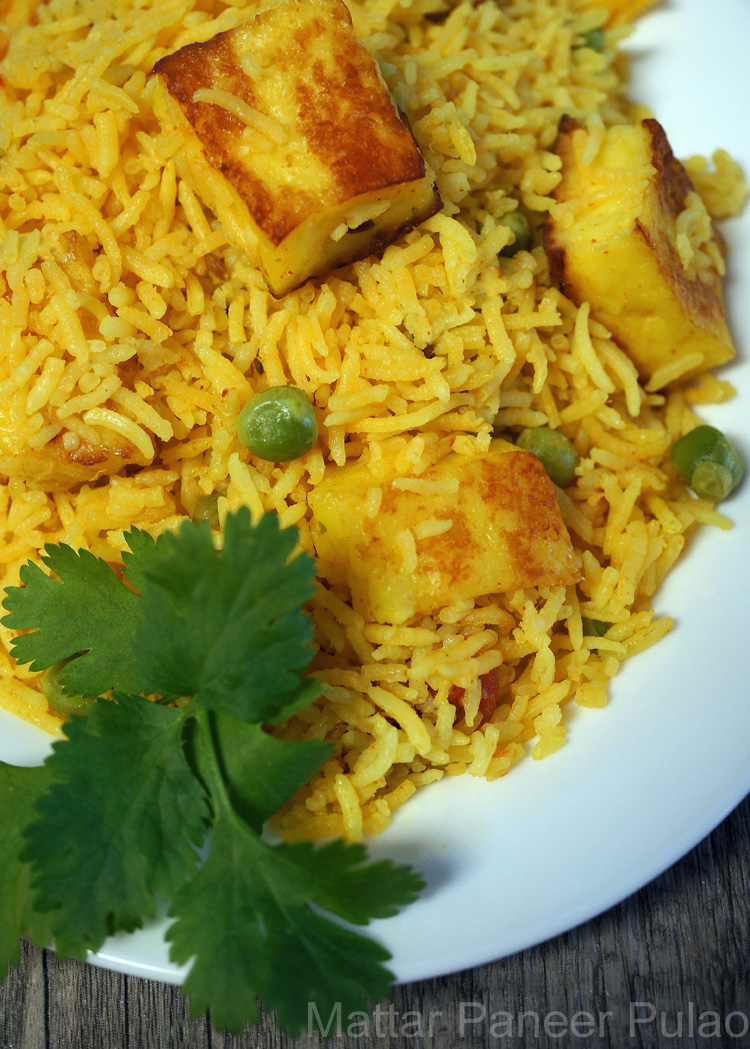
Mattar Paneer Pulao

Mattar Paneer Pulao1
When I go to an Indian restaurant for a meal, I often order mattar paneer. Mattar paneer is a North Indian vegetarian dish that consists of green peas (mattar) and cubes of fresh Indian cheese (paneer) in a creamy tomato based sauce. I enjoy eating mattar paneer with naan (Indian bread). That was my inspiration for the mattar paneer pulao recipe that I’m sharing with you today.

Paneer can be made at home by curdling heated milk with lemon juice or vinegar. Sometime soon, I will share the steps on how you can make paneer at home. Until then, you can buy paneer from the Indian grocery store. You will find it in the frozen food section.

Mattar paneer pulao can be made mild or spicy depending on your level of comfort. You can add the same number of spices that I’ve suggested or reduce them by half. You can also add green chillies or leave them out. This pulao pairs well with a simple cucumber raita or tomato chutney.  Try it out, and let me know if you agree.

Mattar Paneer Pulao
Prep time: 20 minutes
Cooking time: 35 minutes
Serves: 4

Ingredients:
2½ cups Basmati rice
14 oz (400g) paneer
3-4 teaspoons oil
¼ cup ghee
1 large onion, (sliced)
1 bay leaf, (torn into two bits)
6 cloves
2 star anise
6 green cardamoms
1-inch piece cinnamon
10 whole black pepper corns, (optional)
1 teaspoon cumin seeds
2 tablespoons ginger-garlic paste
3 large Roma tomatoes, (blanched and diced)
4 green chillies, (slit in half, optional)
½  teaspoon turmeric powder
1 teaspoon Kashmiri chilli powder
salt
4 cups water
1 cup green peas, (fresh or frozen)

Directions:
Place the rice in a small bowl and add enough water to cover it by two inches. Using your hands, gently swish the rice grains so that it releases starch. Pour the water out, leaving the rice in the bowl. Do this three or four times until the water runs clear. Soak the rice in fresh water for 15-20 minutes. Drain the water before you use the rice in this recipe.

Cut the paneer into bite sized cubes. Heat one teaspoon of oil in a medium non-stick frying pan, over medium heat. Fry a few paneer cubes at a time, until they turn light brown. Remove and put them directly into a bowl of hot tap water. Fry the rest of the paneer cubes in the same manner. Let them soak in the water until they are called for in the recipe.

Melt ghee in a large saucepan over medium-high heat; add the onion and cook until softened, about four minutes. Add the whole spices – bay leaf, cloves, star anise, cardamoms, cinnamon, black pepper, and cumin. When you get the fragrant smell of spices, add the ginger-garlic paste.  Stir and cook until the raw smell of the ginger-garlic paste disappears. Add tomatoes, green chillies, turmeric, chilli powder, and salt. Cook until the oil separates. Add four cups of water. Turn the heat to high, and let the water come to a boil. As soon as the water starts boiling, turn the heat to medium, drain the rice, and add.

Drain water from the paneer and add it to the rice. Add the peas and stir everything gently just one time so the rice, paneer, peas, and spices are well combined. Let the rice cook on medium heat until you see bubbles appearing on top of the rice. Cover the saucepan with a lid. When you see steam escaping through the lid, turn the heat to low, and cook the mattar paneer pulao for 10-15 minutes. Fluff the rice with a fork before serving.

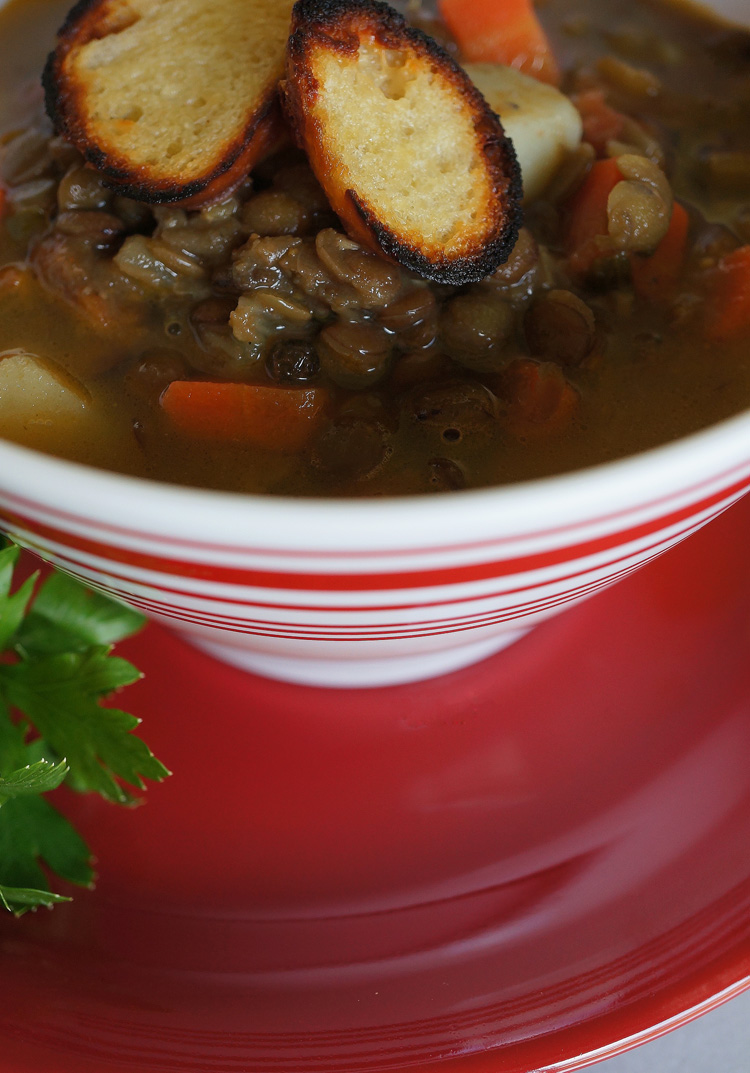
Hearty Lentil Soup with Rasam Powder

Lentil Soup with Rasam Powder3
I pretend I’m on the TV show Chopped, when my fridge and pantry are down to their last few vegetables – one potato, one onion, one carrot, a few stalks of celery, tail end of the parsley, and lentils. That is how I came up with this recipe.

The rasam part of the recipe was included because both my daughter and I had sore throats. Rasam is a watery, spicy, tart Indian soup. The English called it mulligatawny soup. The name originates from the Tamil words milagu and thanni which translates to pepper-water.

Rasam powder can be bought at Indian grocery stores. Its spicy but you can adjust the amount you use to your own level of comfort. This soup is excellent when you have a cough or cold. It clears the sinuses, helps with digestion, and it is rich in vitamins. I hope you enjoy this soup as much as we did.

Hearty Lentil Soup with Rasam Powder
Prep time: 15 minutes
Cooking time: 1 hour
Serves: 6-8

Ingredients:
1 cup diced onion
3 tablespoons oil
6 medium garlic cloves
2 teaspoons whole black pepper, (optional)
2 teaspoons whole cumin seeds
1-2 tablespoons Aachi Rasam Powder, (depending on heat and your preference)
1 cup whole green lentils, (French green lentils)
1 cup whole brown lentils, (masoor dal)
3-4 cups water, (enough to cover the lentils by two inches)
1 cup carrot cubes
1 cup potato cubes
½ cup diced celery
14.5 can of diced tomatoes
32 oz (2 lbs) vegetable or chicken broth, (99% fat free, low sodium)
1½ teaspoons balsamic vinegar, (optional)
salt
2 tablespoons minced parsley, (optional)

Directions:
Fry the onion in a large pot over medium-high heat, stirring occasionally, until the onion becomes translucent.

While the onions are getting translucent, crush the garlic, black pepper, and cumin in a mortar and pestle. Crush them well so the pepper breaks into tiny pieces. Add the crushed ingredients to the onion and cook until fragrant, about three minutes. Add the rasam powder, stir and cook for 30 seconds. Add the lentils and enough hot water to cover the lentils by two inches. Bring to a boil, reduce the heat to medium-low, cover partially, and cook for 30 minutes.

Increase the heat to high and add carrot, potato, celery, tomato, vegetable broth, balsamic vinegar, and salt to taste. Reduce heat to low, cover partially, and simmer for 20 minutes or until the vegetables are soft and the lentils have darkened. Add parsley and cook for another five minutes with the lid off. Stir well and serve hot. Can be refrigerated in an airtight container for two days. Warm over low heat until hot.

Idli – Rice and Lentil Steamed Cake

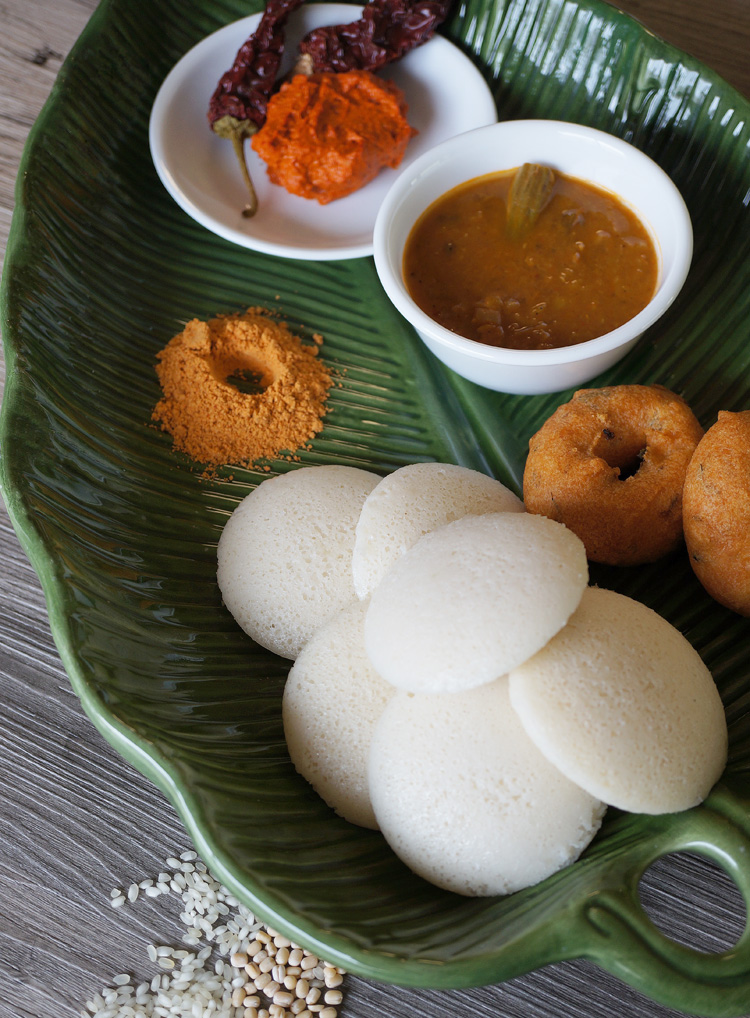
Idli2
Idlis are traditional South Indian steamed rice cakes that are eaten at breakfast or at tea time. Black lentils and rice are soaked, ground, fermented, poured into idli moulds, steamed, and eaten with sambar and chutney. There are hundreds of variations. Making idlis, when I lived in India, was easy. The climate was conducive to the fermentation process. After moving to the US, I had to learn some new tricks to get the batter to cooperate.

The table top wet grinder that my daughter bought for me as a birthday gift made the grinding process easy (thank you, daughter). Many of my friends still use their trusted mixies (powerful blenders) to do the job. I learned the most important secret to soft, spongy idlis is using the right amount of water while grinding the lentils and rice. So, in my directions below, I’ll go to great lengths to explain the process and to give you the approximate amount of water to be used.

Fermenting the batter in winter is difficult. I turn the oven on and bring the temperature up to 200°F. Then I turn the oven off, wait for about 15 minutes and then put the batter in the oven. I also leave the oven light on to ensure that the oven stays warm. To avoid accidents, I put a sheet tray under the pot just in case the batter overflows. Could I be more optimistic than that?

While experimenting with this recipe, I tested using a teaspoon and a half of fenugreek seeds which I soaked along with the rice to help with the fermentation process, but it changed the color of the idli. So, instead, I recommend using beaten rice (poha), or cooked rice. To get the light sour taste and smell in your idlis, the batter has to ferment well. Using three tablespoons of starter batter also helps to achieve this.

Try my recipe, and I hope your next batch of idlis will turn out perfectly. If you do try my recipe, please post a picture of your results on my Facebook page.

Idli
Prep Time: 8 hours (includes soaking time but does not include time to ferment batter)
Cooking time: 15 minutes
Serves: 8 (makes around 72 small 2.5″ idlis)

Ingredients:
3 cups idli rice
1 cup whole black lentils, (whole urad dal)
½ cup beaten rice, (flattened rice flakes, poha)
3 teaspoons salt
3 teaspoons olive oil or sesame oil, (to grease idli mould)

Directions:
Wash the rice in three changes of water. Place it in a large bowl and add filtered water to cover the rice by about three inches. Set it aside for four hours.

After the rice has soaked for four hours, soak the black lentils. Wash the lentils in three changes of water. Put it into a medium bowl and add filtered water to cover it by about three inches. Soak the beaten rice in a small bowl with one cup of filtered water. Let the rice, lentils, and beaten rice soak for one hour.

I used a table top wet grinder to make the idli batter. Clean the grinder. Drain the black lentils. Make sure that you save the water the lentils were soaking in. Use this water when you grind. I also want to tell you that the amount of water that I suggest works well for me. But it depends on the kind of rice and lentils you will use. It might require a little more or a little less water. But this will give you an idea.

Add the drained lentils and 1 cup of water into the grinder and turn it on. The whole process of grinding the lentils will take about 15 minutes. Let the machine run for five minutes. Scrape the sides and add ½ cup water and grind for another five minutes. You will see the batter turn light, fluffy, and increase in volume. Scrape the sides and add another ½ cup of water – one tablespoon at a time. Grind for five minutes. Turn the machine off and feel the batter. It should be light and when you rub the batter between your finger and thumb, the texture should be smooth and light. You should not feel any coarse grains, and if you put a spoon full into a bowl of water it will float. Remove the lentil batter into a large stainless steel pot.

If there is a little of the lentil batter remaining in the wet grinder, don’t worry. Add the rice and ½ cup water. Then, while the machine is running add another ½ cup of water. Grind for five minutes. Scrape the sides. Drain the beaten rice. Add it to the rice and add ½ cup water and grind for ten minutes. Scrape the sides, add salt, ½ cup water – one tablespoon at a time – and grind for the final ten minutes. Turn off the machine. It will take about 20-25 minutes to grind the rice. The batter can be anywhere from slightly coarse to smooth. Depends on how you like it.

Add the rice batter to the lentil batter in the large pot. The batter will rise during fermentation, so make sure that the pot is only half full of batter. Mix the lentil batter and rice batter with your hand. The warmth of your hand will help speed the fermentation process. If you live in a country where the weather is hot. You can leave your pot on your kitchen counter. However, if it is cold, turn your oven to 200°F. Wait for about 15 minutes. Cover the pot with a lid, set the pot in the oven, and turn the oven light on. The batter will ferment in about 8-10 hours. I leave it overnight and make idlis in the morning for breakfast.

When you are ready to start making idlis, fold the batter using a spatula. Just like you would do with a light, chiffon cake! The rice batter would have fallen to the bottom of the pot and the lentil batter would have risen to the top. Fold them together, gently.

Grease the idli mould with olive oil or sesame oil. Fill the idli mould leaving a little space for the batter to rise. Steam for 12 minutes. I use an idli steamer for this purpose but you can also use your pressure cooker (weight not required). Let the idlis cool down before you remove them with a wet idli spoon or butter knife.

The idlis turn out best on the first day. They freeze well. So you can use the whole batter to make idlis on the first day and then freeze them for use later. I usually make idlis on the first day and then use the remaining batter to make dosas. Store the batter in the refrigerator. Just add a little water to make the batter a pouring consistency before you make dosas.

To reheat idlis put them in a steamer. Or, if you are like me, put three idlis in a small bowl, put three drops of water in the center of each idli and microwave them for 20 seconds. You will have to eat the microwaved idlis right away because they get tough after a while. If you have ideas that could help me make better idlis, let me know. If you have questions for me, I’m only a phone call or email away.
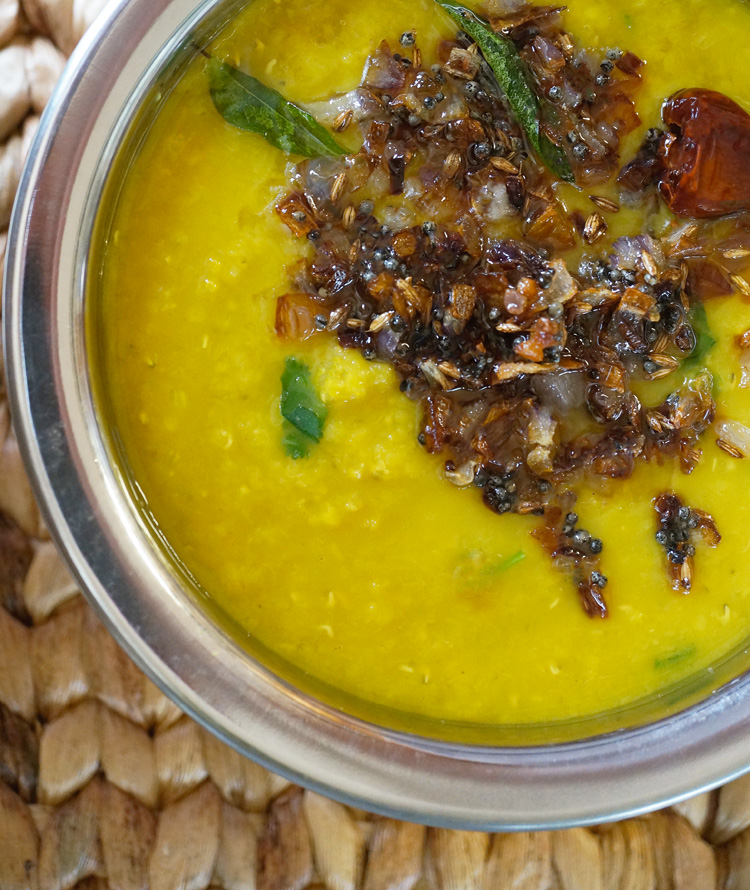
Tadka Dal – Tempered Red Lentils

Tadka Dal2Madhur Jaffrey says in her book Ultimate Curry Bible, “you can take meat, fish and vegetables away from an Indian, but you cannot take away his dal – the core of his meal.” Dal, in Hindi, means lentils, but the word is used for the soupy dish that you will find in the poorest as well as the richest homes in India. Every home has its own way of preparing dal. To complicate matters, there are at least 60 different kinds of dals. I learned how to cook dal (red lentils) from my mother-in-law and how to temper dal from my own mother. Cooking dal that is flavorful and creamy is an art. Let me explain.

I’ve learned from my mistakes that perfect flavor and texture cannot be achieved in a hurry. One of the first things mom-in-law did when she started cooking for the day, was to start preparing dal. A slow-cooking process was vital. She used a heavy bottomed, medium-sized pan, to cook the dal.  Once the dal and water came to a boil, she turned the heat to low and went about her other kitchen chores until the dal was perfectly done. This method produced a rich, silky textured dal.

The tempering or tadka (also called tarka, chaunk, baghaar) part of making dal, I learned from Amma, my mother. Most non-Indian cooks think of tempering as a way of heating and cooling chocolate. In Indian cooking, it’s also the method used at the beginning of the cooking process or at the end of the cooking process, to flavor a dish. The ingredients are usually added in rapid succession to hot oil or ghee. Tempering dal should be done just a few minutes before serving. The aroma of sizzling spices in hot oil is one of the best parts of eating a simple meal of plain rice and dal. For me, tadka dal takes me back to when I was a young girl growing up in Pune. It soothes my spirits, cheers me up, and brings back happy memories.

Tadka Dal – Tempered Red Lentils
Prep Time: 5 minutes
Cooking time: 40-50 minutes
Serves: 6

Ingredients:
1 cup red lentils, (masoor dal)
3 cups water (plus more hot water to achieve your preferred consistency)
2 teaspoons finely chopped ginger
2 teaspoons finely chopped garlic
1/2 teaspoon turmeric powder

Ingredients for tempering (tadka):
2 tablespoons peanut oil, (or ghee)
1/2 teaspoon black mustard seeds
1/2 teaspoon cumin seeds
1-2 dry red chillies, (depending on heat and your preference, optional)
a pinch of asafoetida, (optional)
1/2 cup diced shallots, (optional)
5 curry leaves, (optional)
1 tablespoon chopped fresh cilantro leaves, (optional)

Directions:
Wash the masoor dal (red lentils) in several changes of water until the water runs clear. Add the dal to a heavy bottomed saucepan and cover with three cups of cold water. Bring to a boil and skim off any scum that rises to the top. Add the ginger, garlic, and turmeric. Turn the heat to low. Cover with the lid, that is slightly ajar, to avoid from boiling over, and simmer gently for about 40-50 minutes. Stir occasionally until the dal is completely broken down. Use a whisk to stir until the dal becomes creamy. Add hot water to bring the dal to the consistency that you like. It can be as thin and soupy or thick and creamy as you desire. Add salt.

Having all the ingredients for the tempering process ready. Heat oil or ghee in a small frying pan over medium-high heat. When it shimmers, add mustard seeds. When the mustard seeds splutter, turn the heat to medium, and add cumin seeds, dry red chillies, and asafoetida. Fry for 15 seconds and then add the chopped shallots. Stir and cook until the shallots turn golden. Add curry leaves and fry for 20 seconds. Pour this over the dal. Add chopped cilantro as garnish. Cover with lid and let the dal stand for a few minutes. Serve with plain rice or rotis.

Black Chickpea Curry

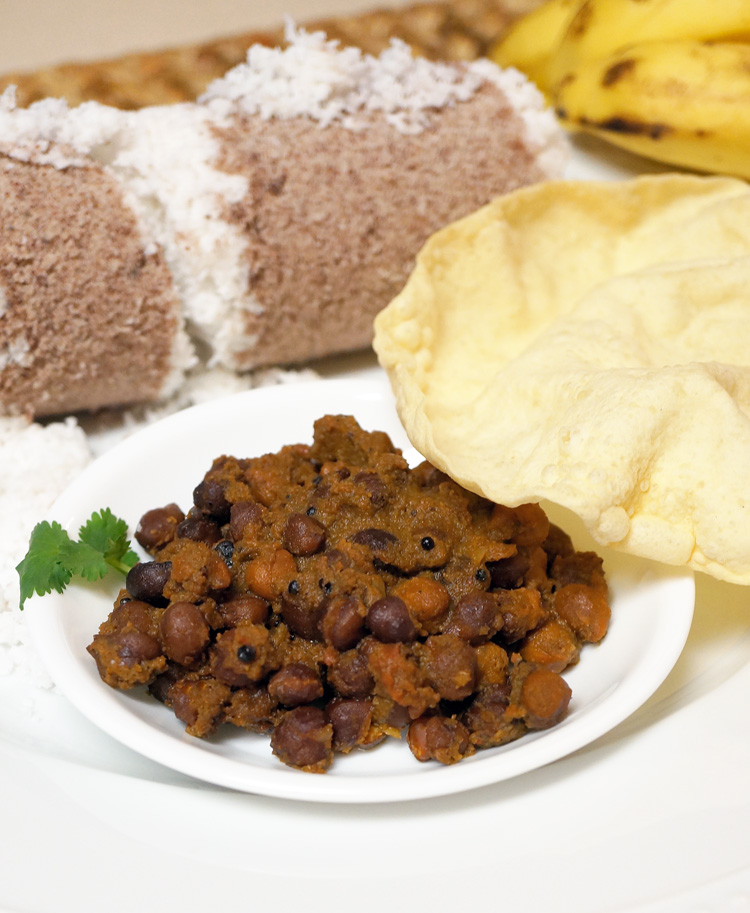
Black Chickpea Curry1
The classic combination of puttu, kadala curry (black chickpea curry), and papadam is made for breakfast in most homes in Kerala. When I’m homesick, it’s my comfort food. Unlikely as the combination may sound, it actually works. Check out my post on, “Puttu, Pazham, and Pappadam” to learn how to make puttu.

In Kerala, black chickpea curry accompanies puttu, appam, idiyappam, and dosa. But it can also be served with rice, chapati, and puri. You can make it with or without gravy. Black chickpeas are called kala channa in Hindi.

Using garam masala is key. It adds flavor and spice to this curry. The feedback that I received on the garam masala recipe that I shared with you is excellent. Take the time to make it and use it in my recipes. It’s the best!

Black chickpeas are a good source of protein, low in fat, high in dietary fiber, and rich in vitamins and minerals. So, add them to your diet, especially if you are vegetarian or vegan.

Black Chickpea Curry
Prep Time: 20 minutes + soak the chickpeas overnight (8-9 hours)
Cooking time : 30 minutes
Serves : 4

Ingredients:
1 cup black chickpeas (kala channa/kadala), soaked overnight
1 teaspoon coconut oil
4 tablespoons coriander seeds
2 South Indian dry red chillies (depending on heat and your preference, optional)
½ cup grated coconut
¼ cup diced shallots
2 teaspoons sliced garlic
1 sprig curry leaves
½ teaspoon cumin seeds
¼ teaspoon turmeric powder
1 teaspoon garam masala powder, (depending on heat and your preference, optional)

To season the black chickpea curry
3 tablespoons coconut oil
½ teaspoon black mustard seeds
1 sprig curry leaves
2 tablespoons diced shallots

Directions:
Rinse the black chickpeas in several changes of water. Add half teaspoon salt to 2½ cups of water and soak the chickpeas for 8-9 hours or overnight.

Heat one teaspoon oil in a small pan set over medium-low heat. Add coriander seeds and when they begin to turn light brown add the dry red chillies. Roast until coriander turns golden brown. Remove to a small plate. To the same pan add coconut. Roast the coconut, stirring constantly, until the coconut turns golden brown. Off the heat and add quarter cup shallots, two teaspoons garlic, curry leaves, cumin, turmeric, and garam masala. Mix and let it remain on the stove top until it cools. Once all the ingredients that were roasted have cooled, put them into a blender and grind with three tablespoons of water to make a smooth paste.

Add the black chickpeas, along with the water it was soaking in, to a pressure cooker. Add another two cups of fresh water and the ground coconut paste. Stir well. Cover with lid. Bring to full cooking pressure on maximum heat. Reduce heat to medium and cook for eight minutes. Allow the cooker to cool gradually before opening. Please check on the cooking time for your make of pressure cooker.

To season the black chickpea curry, heat three tablespoons of coconut oil in a small pan. Add mustard seeds and when they splutter, add curry leaves and shallots. Keep stirring until the shallots turn golden brown. Add the seasoning to the cooked black chickpea curry. Stir well and serve. If you want a thick gravy, cook the water down on high heat until the gravy thickens and reaches the consistency you desire.

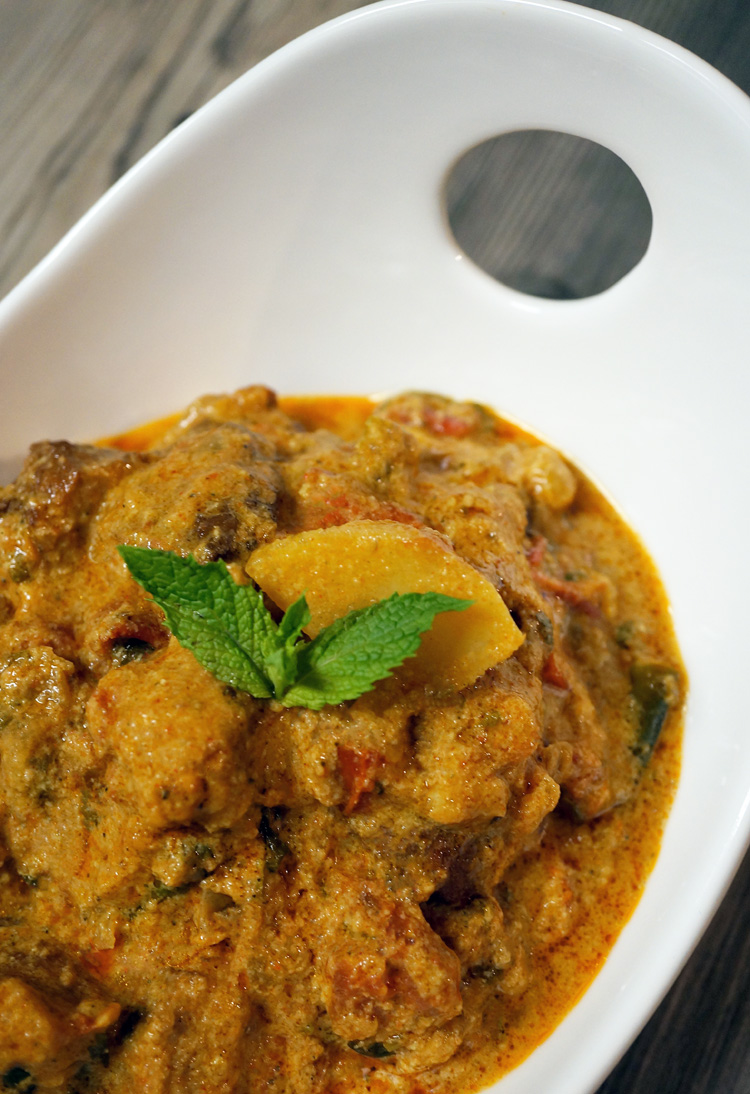
FriChik Curry

FriChik Curry-last
Taste this FriChik Curry and it will be easy to give up chicken! This is by far one of the best meatless meat curries I’ve learned to make. Credit for teaching me how to make this dish goes to my friend, Hannah. Thank you for sharing some of your best recipes with me. I’m certain that many of my vegetarian friends will appreciate this recipe as much as I do.

In my recipes, I often tell you to use chilli, “depending on heat and your preference.” It means that you can decide on the amount of chilli you use depending on how hot the chilli is and how much of it you can tolerate. Remember, that the heat level of chilli powder/green chillies/dry red chillies, differ. Many times I use Kashmiri chilli powder in my recipes because it is mild. So, adjust the chilli to suit your taste.

You can buy FriChik at the Potomac Adventist Book & Health Food Store in Silver Spring, Maryland. You can also buy it on line from Amazon.com. I know how difficult it is to come up with tasty, vegetarian dishes so you will want to bookmark this page.

FriChik Curry
Prep time: 15 minutes (does not include time for soaking nuts)
Cooking time: 30 minutes
Serves: 6

Ingredients:
¼ cup oil
2 cups finely chopped onion
2 teaspoons ginger-garlic paste
1 teaspoon whole cumin seeds
2 teaspoons Kashmiri chilli powder, (depending on heat and your preference)
½ teaspoons turmeric powder
2 teaspoons coriander powder
1 tsp garam masala
2 cups blanched and diced tomatoes
2 medium potatoes
2 cups water
Salt
2 cans (12.5oz/354g) Worthington FriChik original
2 tablespoons finely chopped cilantro

For the wet spice paste:
3 sprigs of curry leaves
½ teaspoon cardamom seeds
1 teaspoon fennel seeds
2 tablespoons grated coconut, (fresh or frozen)
2 tablespoons chopped cilantro
10 cashew nuts
10 almonds

Directions:
Add the cashew nuts and almonds to a small bowl. Cover them with half a cup of hot tap water and let them soak for 15 minutes. After the 15 minutes are up add the cashew nuts, almonds along with the water they were soaking in, into a blender. Add the rest of the ingredients for the spice paste – curry leaves, cardamom, fennel, coconut, and cilantro. Blend to a smooth paste. Set aside until you are ready to use it in the curry.

Place a heavy bottomed saucepan over medium-high heat. Add oil and when it shimmers, add the onion. When the onion turns translucent add the ginger-garlic paste. Stir constantly and cook for two minutes or until the raw smell of the ginger-garlic disappears. Add the cumin seeds, chilli, turmeric, coriander, garam masala, and tomatoes. Stir occasionally and cook until the oil separates.

Next, peel and wash potatoes. Cut each into eight pieces. Add the potatoes, water and salt. Cover the dish and cook for five minutes. In the meantime, drain the FriChik and discard the gravy. Cut each chunk into four. Add the FriChik and the ground wet spice paste. Stir so everything is mixed well. Then cover the saucepan and cook on medium-low heat until the potatoes are done, about 15-20 minutes. Garnish with chopped cilantro. FriChik curry goes well with plain rice or rotis.

Cluster Beans – (Gavar with Kanda Lasoon Masala)

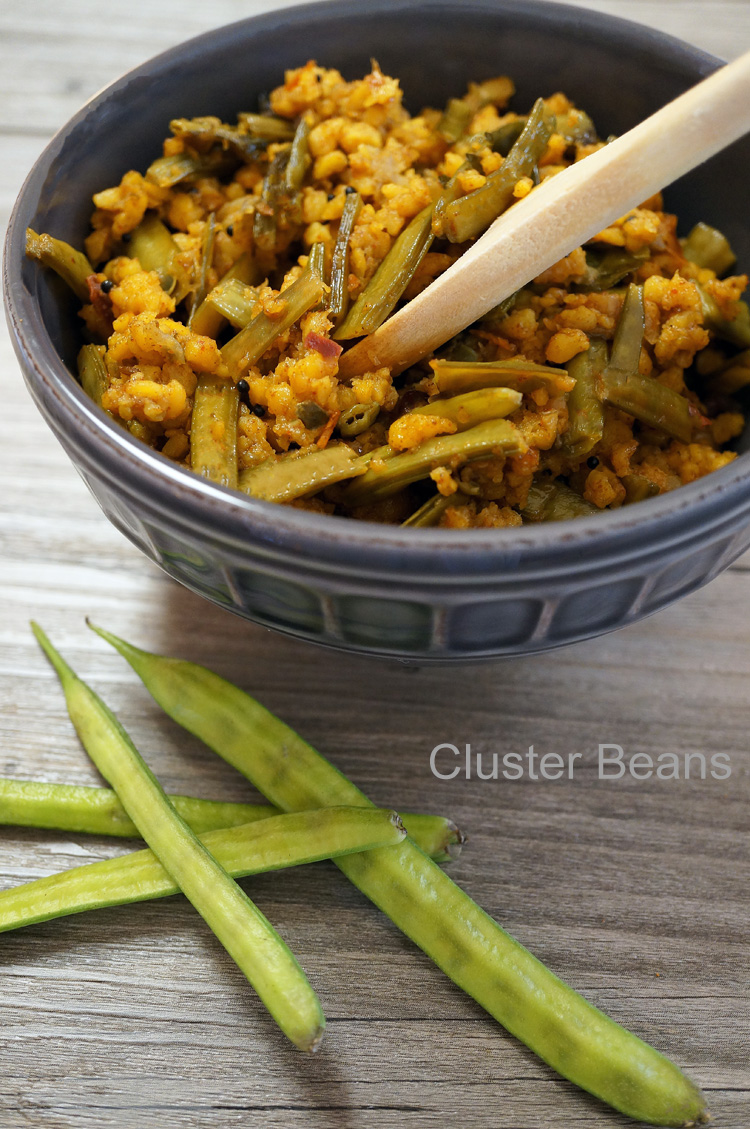
Cluster Beans2
Cluster Beans is an annual legume that grows in Rajasthan, Maharashtra, Andhra and other arid regions in India. They are related to French beans but have a narrow, flat, long body with tiny pods. They are light green in color and they taste slightly bitter. They are called gavar phalli in Marathi. You will find cluster beans at Indian and ethnic grocery stores.

In India different states cook these beans in their own unique way. I combined kanda lasoon masala (onion-garlic spice mix) from Maharashtra with split Bengal gram (chana dal), a lentil frequently used in vegetable dishes in Tamil Nadu. The result was a fusion of flavors.

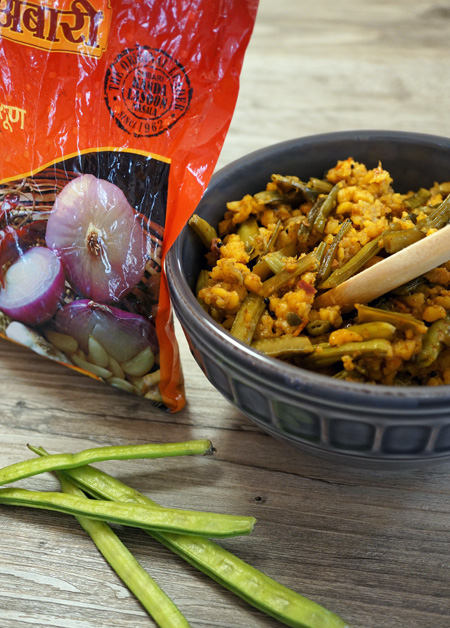
Thanks to my friend for bringing me a packet of this masala from India. You will find kanda lasoon masala at Indian grocery stores or you can order it on line. You could also use two teaspoons of coriander powder and one teaspoon of garam masala powder instead of the kanda lasoon masala. It will still taste great, but different. I love trying new vegetables. If you haven’t tried cluster beans, you should.

Cluster Beans – Gavar with Kanda Lasoon Masala
Prep time: 15 minutes
Cook time: 15 minutes
Serves: 5

Ingredients:
1 cup split Bengal gram, (soaked for 2 hours; Chana dal)
2 dry red chillies, (soaked with Bengal gram; depending on heat and your preference)
3 tablespoons oil
1 teaspoon mustard seeds
1 sprig finely chopped curry leaves
1 cup finely chopped onion
3 cups cluster beans
¼ teaspoon turmeric powder
1 tablespoon kanda lasoon masala
salt
3 tablespoons water

Directions:
Put the Bengal gram into a bowl and wash in several changes of water. Cover with water and let it soak for two hours along with the dry red chillies. After it has soaked for two hours drain and put it into a food processor or blender. You want a coarse grind, so pulse/blend until the Bengal gram and chillies break up into tiny bits.

Wash and dry the cluster beans. Top and tail them. If they need stringing, just pluck the end of a cluster bean with your hand, and then pull downward; if a thick thread comes away, the bean need stringing. Do the same on the other side of the bean. The beans can then be cut into one-inch pieces.

Heat a pressure cooker over medium-high heat.  Add oil and when it shimmers add the mustard seeds. When the mustard splutter, add the curry leaves and chopped onion. When the onion turns translucent, add the cluster beans. Stir and cook the beans for two minutes. Next, add the turmeric powder, kanda lasoon masala, and salt.

Sprinkle the coarsely ground Bengal gram over the cluster beans. Add water, put the lid and weight on the pressure cooker, and turn the heat to the lowest possible point on your stove. There is hardly any water so steam will not escape. Set your timer for ten minutes. When ten minutes are over, turn off the heat. Let the pressure cooker cool down completely and then remove the weight and lid. The dal and beans would have cooked perfectly. Mix well and serve with rotis.
Cluster Beans Kanda Lasoon Masala