Reposting – Doughnuts – Indian Style

Doughnuts Usha
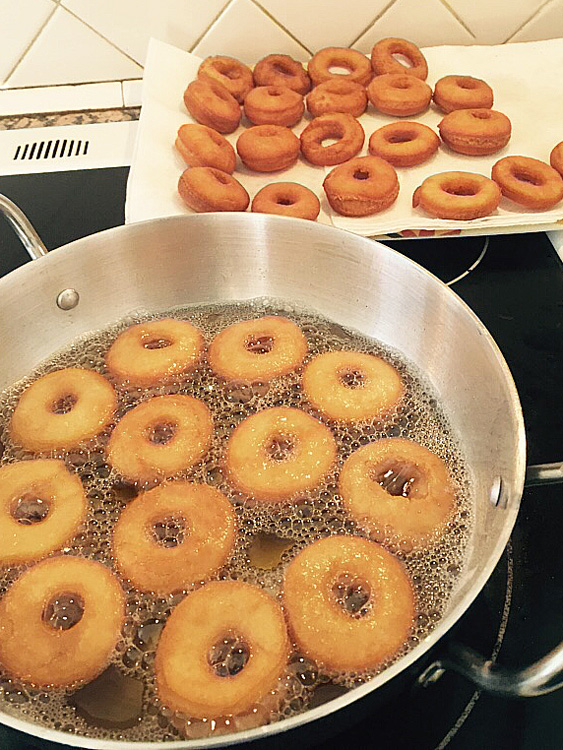
This picture was taken by my friend, Usha David, who made these doughnuts for her family recently. Thank you for sharing this picture with me, Usha.

Doughnuts – Indian Style
Ingredients:
2 cups all-purpose flour, plus more for dusting
1 cup confectioners’ sugar
¼ teaspoon salt
1½ teaspoon baking powder
1 egg
¼ cup vegetable oil or melted ghee
1 teaspoon vanilla
¼ cup milk
Peanut or canola oil for deep-frying
Confectioners’ sugar for dusting

Directions:
In a bowl, sift flour, sugar, salt, and baking powder. In another bowl whisk together egg, oil and vanilla. Add egg mixture into the flour and gently mix until crumbly. Add milk little by little until the dough hold together. Add a few teaspoons of flour if the dough is sticky. Knead until it forms a nice smooth dough. Cover with a damp paper towel, and let it rest for 15 minutes.

Divide the dough into two portions. Turn one portion out on to a lightly floured work surface. Roll out to a ten inch round. Cut using a doughnut cutter which is dipped in a little flour. This helps the doughnuts to slide off the cutter easily. Do the same with the other portion of the dough. Line a platter with paper towels.

In a deep, heavy saucepan, pour in oil to a depth of two inches, and heat. When oil is hot place a few doughnuts at a time in the hot oil. Using a slotted spoon remove doughnuts when they turn golden brown on both sides. Place them on paper towel lined platter to drain. If you like, you can use a fine mesh sieve to dust the doughnuts with confectioners’ sugar.

Ultimate Banana Bread

Banana Bread7
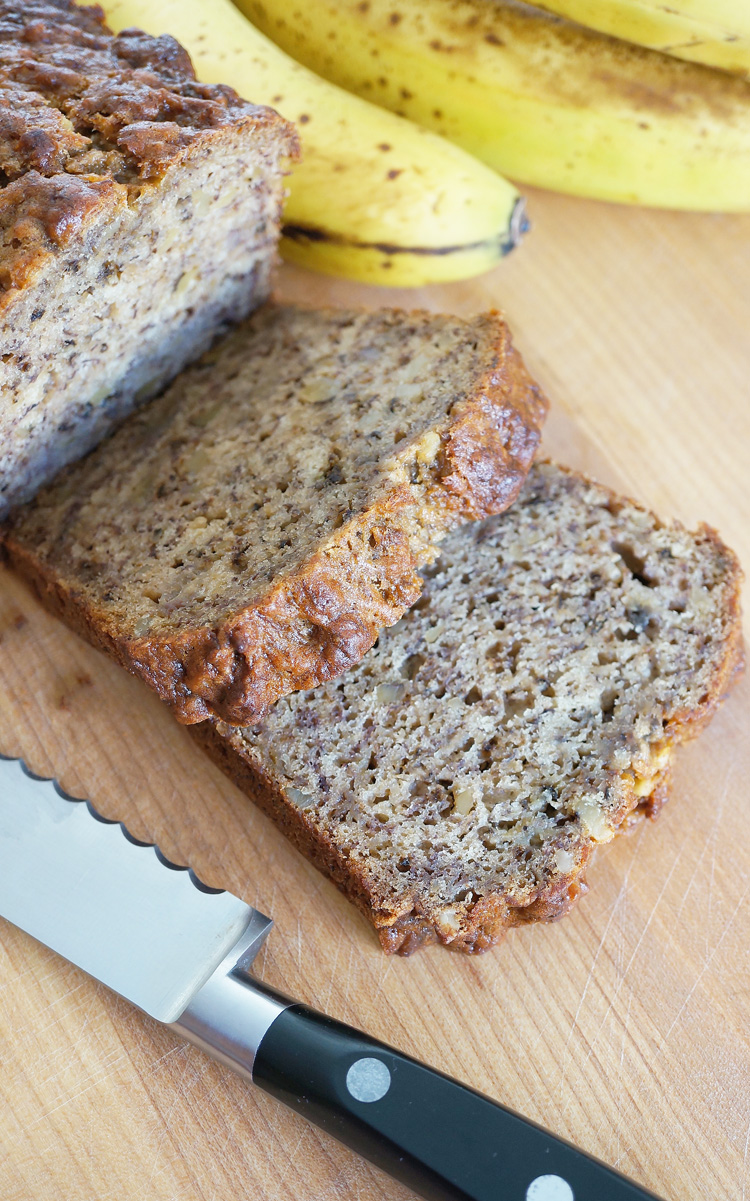
Overripe bananas are never a pretty sight in the kitchen. I’ve used them to make banana bread, banana fritters, banana pancakes, banana muffins, and even an occasional banana flambé. I bet you have your own “banana rescue mission” recipes.

I had six very ripe bananas, the exact number called for in the Cook’s Illustrated recipe, sitting on my counter. We were snowed in, and although the recipe had a few extra steps, I decided to try it. The verdict: I’m tossing out all my other banana bread recipes and keeping this one!

The method used to incorporate more banana flavor into the banana bread, without adding all their moisture, is brilliant. The secret is to use really ripe bananas for this recipe. I didn’t add the thinly shingled banana slices and the extra sugar on top. I loved the cake-like texture and the fact that it didn’t crumble when cut into slices. It was rich, moist, and truly the best banana bread I’ve ever eaten.

Ultimate Banana Bread
(Recipe from Cook’s Illustrated)

Total Time:  1 hr 20 min
Prep time:  20 min
Cook time:  60 min
Yield:  1 loaf (about 12 slices)

Ingredients:
1¾ cups (8¾ ounces) all-purpose flour
½ tsp table salt
1 tsp baking soda
6 large very ripe bananas (about 2¼ pounds), peeled and cut in half
2 large eggs
¾ cup (5¼ ounces) packed light brown sugar
8 tbsps (1 stick) unsalted butter, melted and slightly cooled
1 tsp vanilla extract
½ cup walnuts, toasted and coarsely chopped, (optional)
2 tsp granulated sugar

Directions:
Adjust oven rack to middle position and set oven to 350 degrees. Spray 8½ by 4½-inch loaf pan with nonstick cooking spray. Whisk flour, salt, and baking soda together in large bowl.

Place 5 bananas in microwave-safe bowl; cover with plastic wrap and cut several steam vents in plastic with paring knife. Microwave on high power until bananas are soft and have released liquid, about 5 minutes. Transfer bananas to fine-mesh strainer placed over medium bowl and allow to drain, stirring occasionally, about 15 minutes. You should have ½ to ¾ cup liquid.

Transfer liquid to medium saucepan and cook over medium-high heat until reduced to ¼ cup, about 5 minutes. Remove pan from heat, stir reduced liquid into bananas, and mash with potato masher until fairly smooth. Whisk in eggs, brown sugar, butter, and vanilla.

Pour banana mixture into flour mixture and stir until just combined with some streaks of flour remaining. Gently fold in walnuts. Scrape batter into prepared pan.

Slice remaining banana diagonally into ¼-inch-thick slices. Shingle banana slices on top of either side of loaf, leaving 1½-inch-wide space down center to ensure even rise. Sprinkle granulated sugar evenly over loaf. (I skipped this step.)

Place in the center of the rack. After 30 minutes turn the loaf around and check the bread for color. If it is browning too quickly, cover loosely with aluminum foil. Bake until toothpick inserted in center of loaf comes out clean, 55 to 75 minutes. Cool bread in pan on wire rack 15 minutes, then remove loaf from pan and continue to cool on wire rack. Serve warm or at room temperature.

Notes:
– Use very ripe bananas.
– Do microwave the bananas so they release their liquid.
– Reduce the liquid to a ¼ cup before adding them back into the bananas.
– I skipped putting the sliced banana on top of the banana bread and sprinkling sugar.
– To toast walnuts, heat a large non-stick frying pan over medium high heat. Add walnuts to the hot, dry pan and cook, watching constantly and stirring frequently, until walnuts starts to brown. Using walnuts is optional.
– To store banana bread, wrap the bread tightly in plastic wrap and store at room temperature overnight or in the refrigerator for up to 5 days. It can also be frozen. The wrapped loaf should be put into a resealable freezer bag and it can be kept up to two months.

Shakarpara (Shankarpali) – Indian Biscuits

Shakarpara2
Two days to Christmas! Here’s wishing you and your family a Happy Holiday and a delicious New Year!

Christmas is a great time to build lifelong memories with your family. Keeping up with family traditions takes time, energy, and planning. I am so thankful for the memories I have of my family during this time of year.

I am sure many of you have your own Christmas traditions. Please share them with us on my Facebook page or right here on my blog. A few of our family favorites are decorating the Christmas tree, making treats with friends, having family over for Christmas Eve dinner, Secret Santa parties, and of course, a delicious breakfast on Christmas morning (cinnamon rolls are a must)!

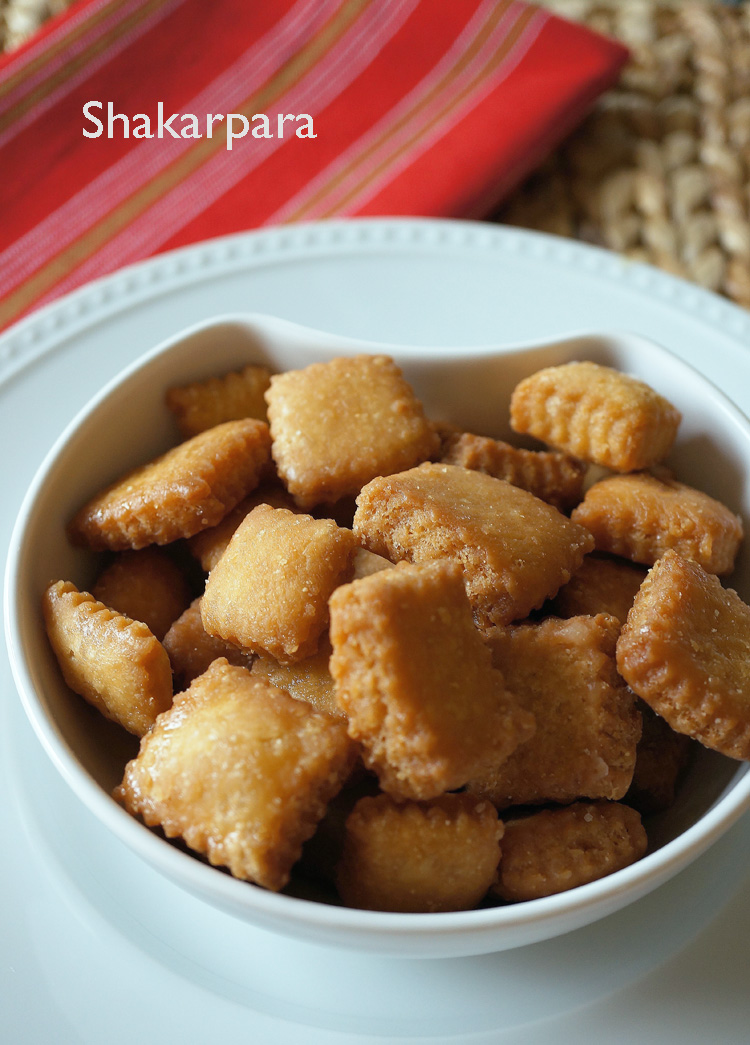
Today’s recipe is simple. You will find these little biscuits all over Maharashtra. Shakarpara or Shankarpali, as they are called, are made with all purpose flour, ghee or oil, sugar, and water. These are items you already have in your pantry. All you need to do is knead the dough, let it rest, roll, cut, and deep fry. So, you can even make them today – just in time for Santa’s arrival!

Shakarpara (Shankarpali) – Indian Biscuits
Prep time: 20 minutes (includes rest time)
Cooking time: 30 minutes

Ingredients:
1 cup granulated sugar
1 cup water
½ cup solid ghee, (or 3/4 cup vegetable oil)
5 cups all purpose flour, (approximately)
1 teaspoon salt
2 teaspoons semolina, (sooji, optional)
Oil for deep frying

Directions:
Add sugar, water, and ghee into a saucepan. Place over medium-high heat and stir until the sugar melts. Cool. Whisk flour, salt and semolina in a separate bowl until combined.

Pour the cooled sugar, water, and ghee mixture into the large bowl of an electric mixer, (Kitchen Aid), fitted with a dough hook. With the mixer on slow speed, add the flour, a little at a time, scraping down the bowl, until the mixture comes together. I needed five cups of flour. You might need to add a little more or a little less. Add flour until the mixture comes together into a ball. Turn the mixer on medium speed and knead for three minutes. You can also made the dough without a mixer. Knead with your hands until you have a smooth dough. Let the dough rest for 15 minutes. Knead it again with your hands and then divide the dough into equal portions. Roll to about 1/8 inch thick. Cut into diamond or square shapes.

Add about five inches of oil to a wok or heavy bottomed pan. Heat the oil over medium heat. Then turn the heat to medium-low. Add a small piece of dough. If it rises to the top quickly the oil is too hot. Add a few shakarparas at a time. They must come up slowly. Fry them on low heat so the inside cooks well. Remove when they turn golden brown and drain on paper-towel lined trays. Cool completely before storing them.

Notes:
– I used turbinado sugar for the shakarparas in the picture. The golden crystals are not bleached, so they keep the rich flavor and color of their natural molasses. But I found that the shakarparas were not as sweet as I would have liked, so I coated them with a sugar syrup.
– For the sugar syrup I used one cup granulated sugar and one cup water. Cooked it in a heavy-bottomed pan, over medium heat. When the sugar melted, I add quarter teaspoon lemon juice. The lemon juice keeps crystals from forming. Boil until the sugar reaches one-thread consistency. To do this, keep testing the syrup. Dip a wooden spoon into the syrup and lift out. Allow it to cool. Touch it with your forefinger and then touch your thumb and gently pull apart. When a single thread is formed and it does not break, you’ve reached one-thread consistency. Or use a candy thermometer (234° F–240° F).
– Dip the shakarparas in the syrup, drain the excess syrup with a slotted spoon, and put them on a large cookie sheet. They need to dry out before you store them.

Christmas Treats

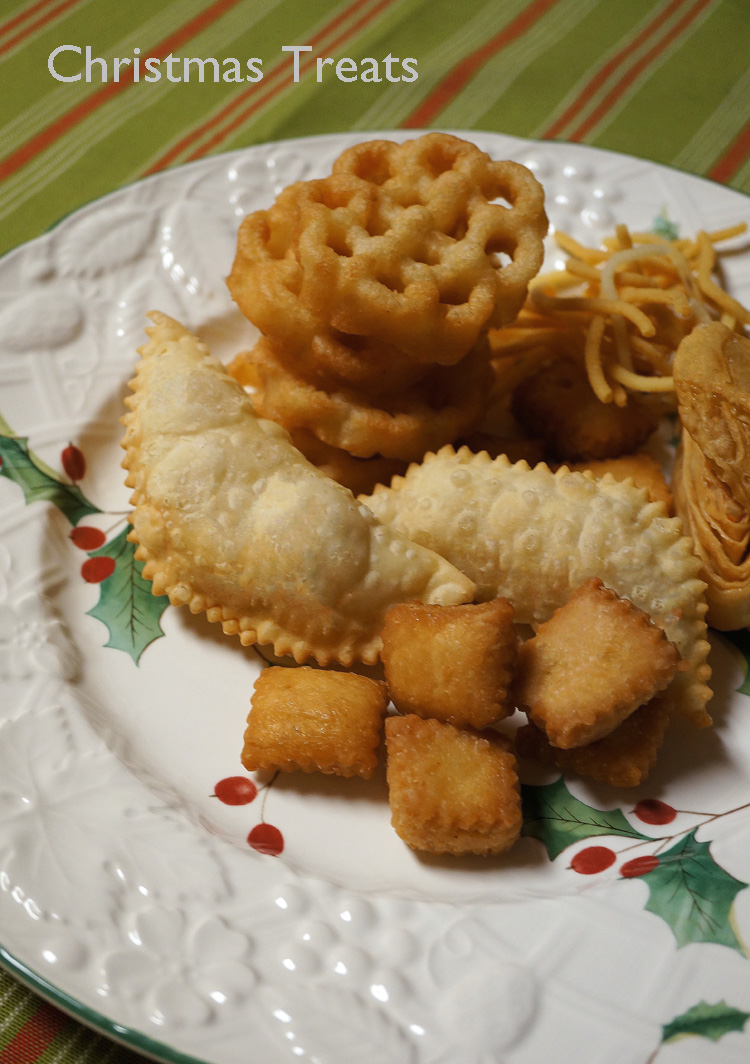
Christmas Treats_plate3There are only seven more days to Christmas! Are you ready? My friend and I spent the last two days in my kitchen making Christmas treats for our families. Karanji, rose cookies, namkeen, murukku, ladoo, and chirote are some of the goodies that most Indian homes make during this time of the year. Making these treats can be time-consuming, so about two years ago, I teamed up with my girlfriends to make the process quicker and more fun! While working together we shared stories from our childhood, laughed at pranks we had pulled off, and learned from each other. Time flew by, and before we knew it, we were able to fill our “dabbas” with traditional Christmas delights.

Do you have your own Christmas cooking family tradition? Anyone out there with a good recipe for kul kuls? Please share, either on my Facebook page or here on my blog.

Karanji is everyone’s favorite, so I’m re-posting this recipe for you. I’ve also included a new simple semolina filling.

Karanji final

Karanji with Semolina (Sooji) Filling
Ingredients:
1 cup fine semolina
1 tablespoon poppy seeds/khus khus, (optional)
1 cup desiccated coconut, (unsweetened)
1/4 cup finely chopped nuts, (optional)
1/4 cup golden raisins, (optional)
1 cup fine sugar
1/2 tsp cardamom powder, (optional)

Directions:
Place a large wok, over medium-low heat. Add semolina and dry roast. Stir constantly so it does not burn. It is ready when its turns light brown and smells fragrant. Remove from the wok and put it into a large bowl. Dry roast the poppy seeds for two minutes. Add it to the semolina. Next, dry roast the coconut. Stir constantly until it turns light brown and fragrant. Add the roasted coconut, chopped nuts, raisins, sugar, and cardamom powder to the semolina. Mix everything well. Make this filling a day before you make the karanjis.

Chirote – Flaky Indian pastry

Chirote2
It’s time to give thanks, celebrate, and reminisce. While I was growing up, making Indian sweets, cookies, cakes, and pastries during Christmas was a family affair. It was part of our celebration. Each one of us had a specific task to do in the kitchen. Making the different fillings, kneading the dough, rolling, cutting, frying or baking – whatever it was, the whole family participated. Being the youngest in the family, I got to do the fun parts, like putting raisins in karanjis. I would put two raisins in one karanji and one in my mouth. Needless to say, I was fired from that job!

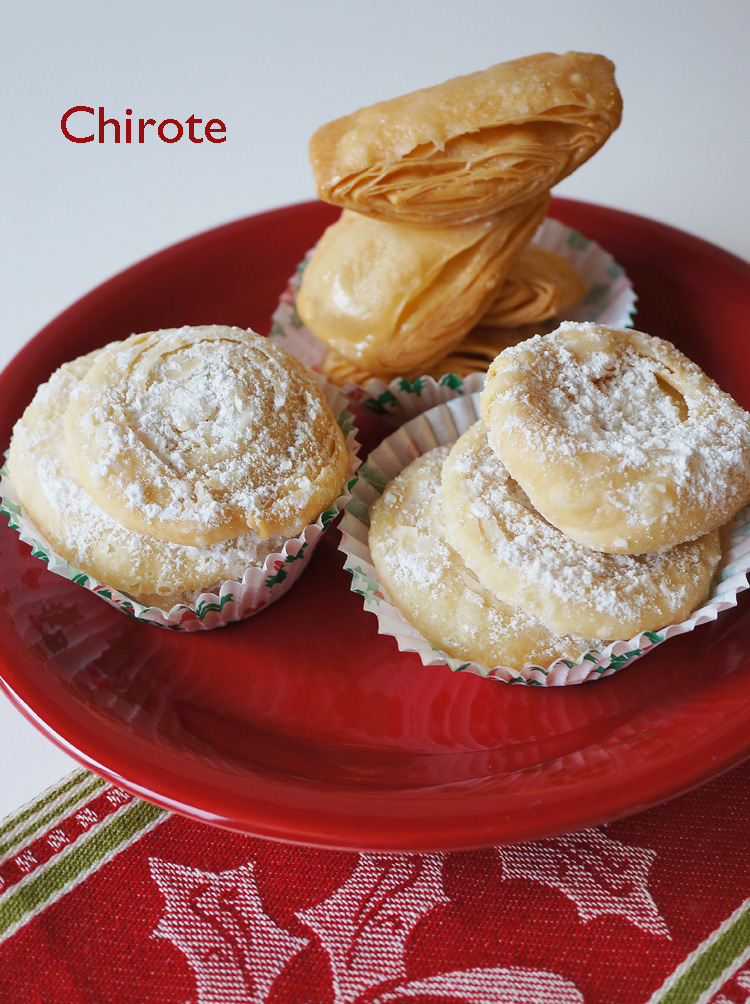
Too many of these traditions are forgotten these days. My own children don’t know how to make these delicacies. So, before these recipes are completely lost, I want to share them with you. Chirote (also spelled Chiroti) is a popular dessert from Maharashtra and Karnataka. It is a crisp, flaky, deep-fried pastry. The pastry is dipped in a sugar syrup or dusted with confectioners’ sugar. Half a teaspoon of rose water added a touch of elegance to the sugar syrup that I made.

I know that this recipe is long and it looks scary! But one way to tackle it, is to gather some of your friends and you could make them together. I’d love to know what special treats you plan to make for your families this Christmas. Please share them with me, here on my blog or on the MargaretsHome Facebook page. Thank you.

Chirote
Prep time: 1 hour (does not include time to rest dough)
Cooking time: 30 min
Makes: 20

Ingredients:
For the dough
2 cups all-purpose flour, plus 1 cup flour for dusting
3 tablespoons ghee or unsalted butter, melted
1/8 teaspoon salt
water (I used about ¾ cups)

For the rose syrup
1 cup granulated sugar
1 cup water
3 teaspoons lemon juice
½ teaspoon rose water

For the spread
2 tablespoons ghee/butter, melted
2 tablespoons rice flour

For dusting
¼ cup confectioners’ sugar
Use this to dust half the chirotes after you make them.

Directions:
For the dough
Add flour and salt into a large mixing bowl. Stir with a whisk. Make a well in the center and add melted ghee. Add a few tablespoons of water at a time and mix until the dough comes together. Knead to make a firm dough. Cover the dough with a damp towel and let it rest for one hour. You can also made the dough in a stand mixer. Use the dough hook.

For the rose syrup
In a heavy-bottomed saucepan add sugar and water. Place it over medium-high heat. Stir until the sugar dissolves. Simmer over low heat until the sugar syrup thickens (one-thread consistency), about six minutes. Turn off the heat. Stir in the lemon juice and rose essence.

For the spread
In a small bowl, mix melted ghee and rice flour until creamy. Set aside.
(If you live where it is cold during this time of the year, make this after you make the rotis. Otherwise, it will become solid and you have to put in the microwave to soften it. I know, because it happened to me!)

Put it all together
Divide the dough into six even sized portions. Roll each portion of dough between the palms of both hands, using a circular motion, to make smooth dough balls. Flatten each dough ball slightly and place it on a well floured surface. Dust some flour over it and using a rolling pin, roll it into a thin, round shape (like a roti), about 10 inches in diameter. Place each roti on a large plate or tray and cover them with a damp towel. You can place the rotis one on top of the other as long as you have dusted them with flour.

Place one roti on your work surface, smear with one teaspoon of the spread (rice flour and ghee), right to the edges. Dust with a little flour. Place the second roti over the first and again smear it with a teaspoon of the spread. Dust with flour and then place the third roti and smear it with the spread. Dust with a little flour. Starting at the lower edge, roll into a tight log. Stick the edge with a drop of water. Use a sharp knife and a sawing motion to cut the log into ½ inch pieces. Put the pieces on a plate and cover them with a damp towel. Using the same process, make another log with the remaining three dough balls.

There are two methods of making chirotes. For the first method, take one piece and keep the plain, smooth side up.  Roll lightly with a rolling pin to make a long, 2 inch chirote. For the second method, keep the cut edge up, press gently and roll lightly with a rolling pin, making a circle that is about 2½ inches in diameter. Keep them covered with a damp towel.

To show you, I used one log to make chirote which I dusted with confectioners’ sugar and the other log to make chirote that I dipped in rose syrup.

In a heavy-bottomed pot, heat oil for deep frying, over medium-high heat. Once the oil gets hot, turn the heat to medium. Drop three or four chirotes into the oil and fry them on both sides until they turn golden. Drain on paper towels. Sprinkle half of the chirotes, while they are still warm, with confectioners’ sugar. Drop the other half of the warm chirotes, a few at a time, into the rose syrup. Enjoy.
MargaretsHome.com turns TWO
Let’s celebrate with Rasmalai

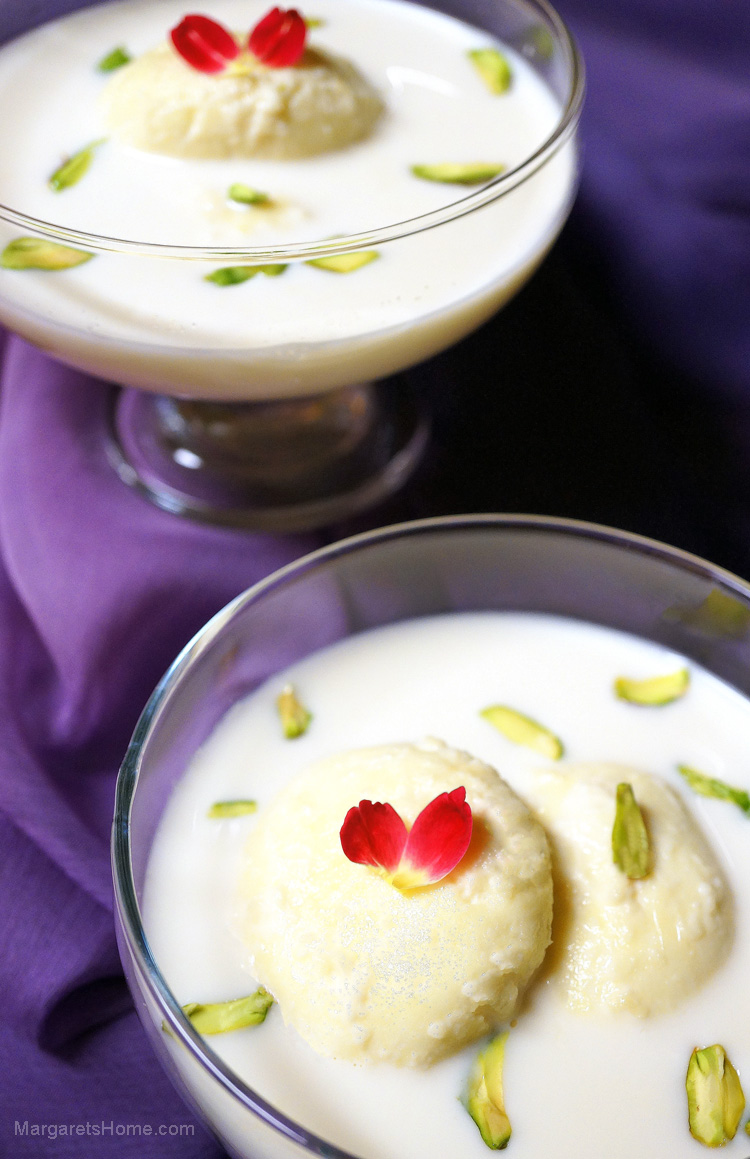
Rasmalai8newI cannot believe I’ve been blogging for two years! That’s 104 posts. My sincere thanks to each one of you who has visited my blog during these past two year. MargaretsHome.com had 38,883 views and 528 comments. Your feedback is important to me. When you call to ask a question or when you tell me that you’ve tried my recipe and it worked out well for you, it makes my day! MargaretsHome.com would not be the same without you. Please continue to visit and I hope I can inspire you to cook some incredible dishes at home. I’m celebrating this milestone with one of my favorite desserts – Rasmalai.

Rasmalai is sometimes spelled Ras Malai. Ras means juice and malai means cream. Wikipedia describes rasmalai as a rich cheesecake without a crust. The recipe that I’m sharing with you is less complicated than the version used by authentic sweetmeat shops in India. In my version, the soft, spongy, cardamom-flavored balls are made with milk powder. Sugar and whole cardamoms are added to whole milk. Then it is boiled and simmered until it becomes thick and rich. The rasmalai balls are then cooked in it until they double in size. Rasmalai is served with some of the sweet, creamy milk sauce and garnished with pistachios.

Rasmalai can been made out of paneer (Indian cheese), ricotta cheese, or powdered milk. I’ve experimented with all three ingredients several times and feel that this recipe is quick, easy and delicious. Adjust the amount of sugar that is added to the milk according to your taste. I’ve tried to give you detailed directions so that the rasmalai will turn out perfectly when you make them for the first time. Follow the instructions carefully and you will have success.

I will be taking a short break from blogging as I am going on vacation. I’m sure my travels will yield even more exciting food experiences and recipes to share with you.

Rasmalai
Prep time: 5 minutes
Cooking time: 40 minutes
Serves: 5

Ingredients:
6 cups whole milk
½ cup sugar, (depending on your taste)
5 whole cardamoms
1 cup Nestle’s Nido full cream milk powder
½ teaspoon all purpose flour
½ teaspoon baking powder
1/8 teaspoon cardamom powder, (optional)
2 teaspoons melted ghee
1 egg, (at room temperature)

Directions:
Pour the milk into a heavy-bottomed, wide, stainless steal pan. Add sugar and whole cardamoms. I cracked open the pods a bit, but you can leave them whole. Bring the milk to a boil over high heat and then turn the heat to medium-low and simmer for 15 minutes. Stir occasionally to avoid the milk sticking to the bottom of the pan.

Sift the milk powder, flour, baking powder, and cardamom powder into a large mixing bowl. If you don’t like the cardamom specks in the rasmalai, skip adding it. But it adds a wonderful flavor to the rasmalai. Add ghee and rub it into the milk powder mixture with your fingertips. In a small bowl, beat the egg lightly with a fork. Add one tablespoon at a time into the milk powder mixture and mix with your fingertips to form a soft and slightly sticky dough. Don’t knead, just bring the whole mixture together into a ball. I used about three and a half tablespoons of egg. Cover with a towel and let it rest for two minutes. If the mixture feels dry add a teaspoon of egg. Add one teaspoon at a time. Take small pieces of the dough and make them into small marble sized balls. Flatten them just a little and put them on a plate.

Bring the milk to a boil again and then immediately turn the heat to low and allow the milk to simmer. Add all the rasmalais into the milk. Cover the pan with a tight fitting lid and let the rasmalai cook for five minutes. Remove the lid after five minutes and gently turn each rasmalai over. Cover and let them cook for another 10 minutes. Take one rasmalai out and check if it is done. Place the rasmalai in a bowl and cut it in half. See if the rasmalai is cooked and looks spongy inside. If not, you need to cook them for another five minutes. When they are done, turn off the heat and leave the rasmalai covered for ten minutes at least. Then gently transfer them into a serving bowl. Let them cool and then chill them overnight in the refrigerator. Garnish with slivered pistachio and serve.

The Barefoot Contessa’s Sour Cream Coffee Cake

Coffee Cake Ina 2

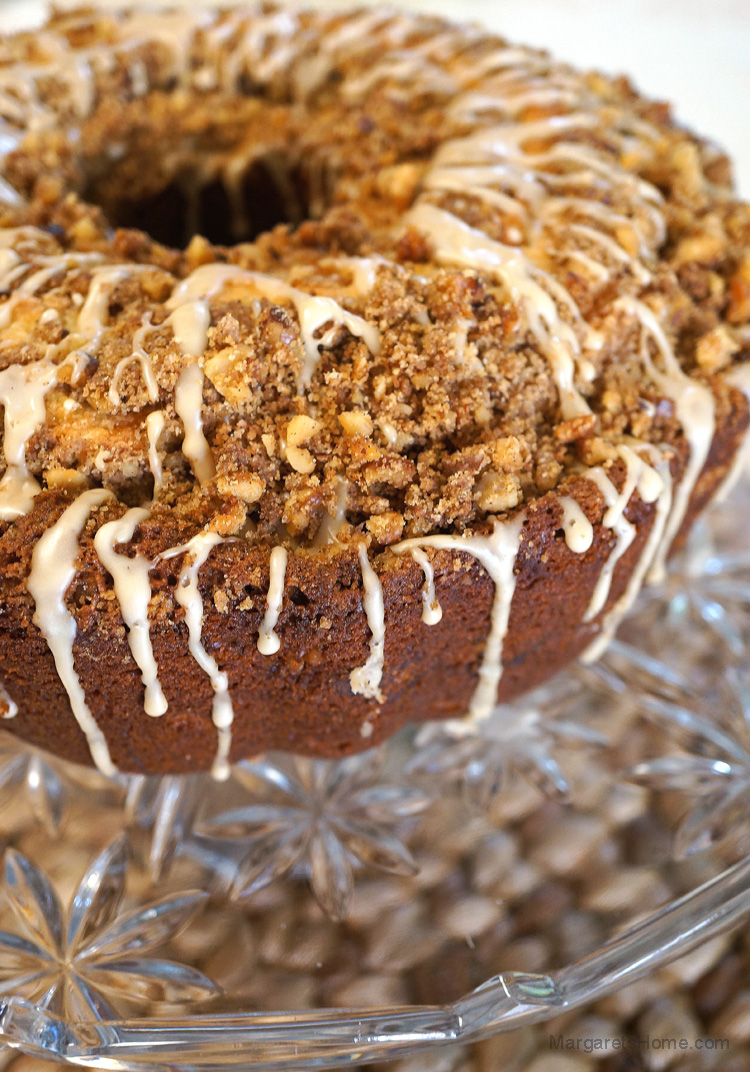
If you’re looking for the perfect coffee cake for brunch – this is it! Ina Garten’s Sour Cream Coffee Cake. It has a light, moist texture with a slight tang from the sour cream. The cinnamon, brown sugar and nut streusel runs through the middle of the cake and also tops it. And, as if that’s not enough, it has a delicious maple glaze that’s easy to make and absolutely yummy.

Be sure to use cake flour because it adds to the light texture of this cake. It also makes a big difference when you have the butter and eggs at room temperature before you get started. I’ve read that there was a typo in her online recipe where it called for 1/4 cup light brown sugar to make the streusel and it should have been 3/4 cup. I kept it at 1/4 cup and it was perfect so I wouldn’t change it. I hope you will enjoy this cake as much as we did.

The Barefoot Contessa’s Sour Cream Coffee Cake
Author: Ina Garten
Total Time:  1 hr 40 min
Prep time:  10 min
Inactive:  30 min
Cook time:  1 hr
Serves:  8-10

Ingredients:
12 tablespoons (1 1/2 sticks) unsalted butter at room temperature
1 1/2 cups granulated sugar
3 extra-large eggs at room temperature
1 1/2 teaspoons pure vanilla extract
1 1/4 cups sour cream
2 1/2 cups cake flour (not self-rising)
2 teaspoons baking powder
1/2 teaspoon baking soda
1/2 teaspoon kosher salt

For the streusel:
1/4 cup light brown sugar, packed
1/2 cup all-purpose flour
1 1/2 teaspoons ground cinnamon
1/4 teaspoon kosher salt
3 tablespoons cold unsalted butter, cut into pieces
3/4 cup chopped walnuts, optional

For the glaze:
1/2 cup confectioners’ sugar
2 tablespoons real maple syrup

Directions
Preheat the oven to 350 degrees F. Grease and flour a 10-inch bundt or tube pan.

Cream the butter and sugar in the bowl of an electric mixer fitted with the paddle attachment for four to five minutes, until light. Add the eggs one at a time. Then add the vanilla and sour cream. In a separate bowl, sift together the flour, baking powder, baking soda, and salt. With the mixer on low, add the flour mixture to the batter until just combined. Finish stirring with a spatula to be sure the batter is completely mixed.

For the streusel, place the brown sugar, flour, cinnamon, salt, and butter in a bowl and pinch together with your fingers until it forms a crumble. Mix in the walnuts, if desired.

Spoon half the batter into the pan and spread it out with a knife. Sprinkle with 3/4 cup streusel. Spoon the rest of the batter in the pan, spread it out, and scatter the remaining streusel on top. Bake for 50 to 60 minutes, until a cake tester comes out clean.

Let cool on a wire rack for at least 30 minutes. Carefully transfer the cake, streusel side up, onto a serving plate. Whisk the confectioners’ sugar and maple syrup together, adding a few drops of water if necessary, to make the glaze runny. Drizzle as much as you like over the cake with a fork or spoon.

Blueberry Cheesecake and Happy Mother’s Day

Blueberry Cheesecake3

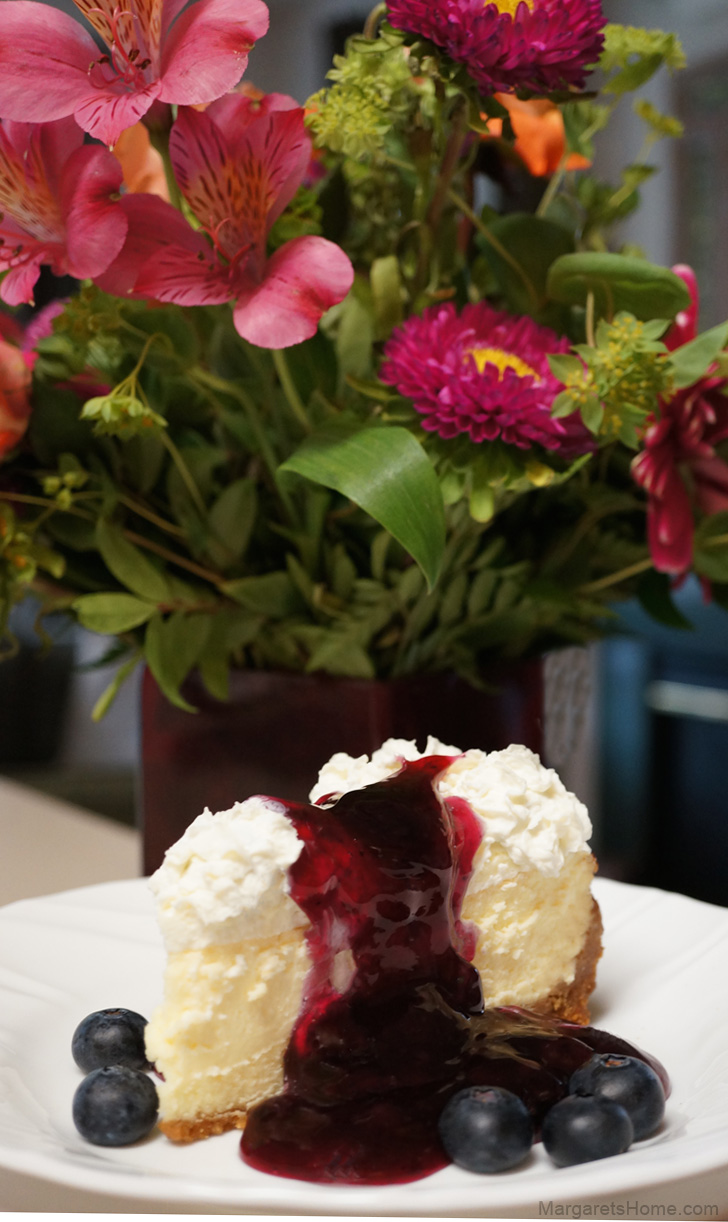
Celebrate Mother’s Day with this luxurious, rich, white chocolate cheesecake with home made blueberry topping. It is definitely worth the time and effort to make this special dessert for your mom.

Blueberry cheesecake has been one of our family favorites for many years. I remember making it for the first time in a 9 by 13 inch pan after tasting it at a restaurant. It was more like a blueberry bar than a cheesecake, but as far as the taste – I couldn’t have been happier. My recipe has evolved since then and it has become decadent with extra calories to go along with it. But Mother’s Day is a good time to have a piece of cheesecake without feeling terribly guilty.

I can’t help but think of my mom while I write this post around Mother’s Day. I have beautiful memories of of her. I remember she used to play catch with me while I ran around a flower bed in my garden. When I think back now, I wonder how she ever found the time to do that while holding a full-time job, cooking every meal, and doing a myriad other tasks that moms have to do. While she made chapatis in the kitchen, she taught me my multiplication tables and spelling. She was strong in her faith and prayed for all her children and grandchildren. We felt protected and loved when we went through difficult times in our lives. Oh, I love her so very much, and wish I could tell her one more time.

Happy Mother’s Day to all the selfless mothers out there. God bless you.

Blueberry Cheesecake
Prep time: 15 minutes
Cook time: 45-50 minutes
Serves: 6-8

Ingredients:
For the crust:

1 cup graham cracker crumbs
½ cup almond flour
2 tablespoons sugar
¼ cup butter, melted

For the topping:
2 cups fresh blueberries
⅓ cup sugar
⅓ cup water plus 2 tablespoons water
2 tablespoons cornstarch
2 tablespoons fresh lemon juice
½ teaspoon vanilla extract

For the filling:

2 packages (8 oz. each) cream cheese, softened
½ cup sugar
2 eggs
1 egg yolk
1 cup white chocolate chips, melted
1 teaspoon vanilla extract

Directions:
Preheat your oven to 350 degrees F. Line the bottom of an eight-inch springform pan with parchment paper.

To make the crust: In a bowl mix graham cracker crumbs, almond flour, sugar and butter. Press onto bottom of the springform pan. Bake for six minutes. Cool completely.

To make the topping: In a saucepan over medium heat, combine the blueberries, sugar and one-third cup of water. Stir frequently, and bring to a boil.

In a small bowl, mix the cornstarch with two tablespoons of cold water. Slowly stir the cornstarch mixture into the blueberries. Simmer until the blueberry topping is thick enough to coat the back of a metal spoon, about five minutes. Remove from heat and gently stir in lemon juice and vanilla. Cool and refrigerate until you are ready to serve the cheesecake.

To make the filling: Beat cream cheese and sugar in large bowl with mixer until creamy.  Add eggs and yolk, one at a time, mixing on low after each just until blended. Add melted white chocolate and vanilla and beat until mixture is smooth. Pour over the crust and bake for 45-50 minutes. Cool completely, run a butter knife gently around the edge of the pan, and refrigerate for four hours or over-night.

Serve slices of cheesecake with whipped cream and blueberry topping.

Molten Chocolate Cake – Happy Valentine’s Day!

Molten Chocolate Cake3

Happy Valentine’s Day! Bake this easy, decadent Molten Chocolate Cake and you’re bound to impress your sweetheart. This cake has several names – chocolate fondant pudding, chocolate lava cake, and chocolate moelleux. The French call it chocolate mi-cuit (semi-cooked) which, I think, perfectly describes this cake.

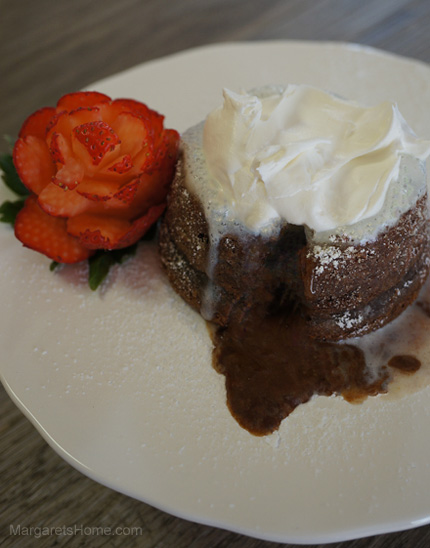
The molten chocolate cake was born out of a chocolate accident in the kitchen when its creator master chef Jean-Georges Vongerichten pulled an under-baked cake out of the oven. Served right out of the oven, these individual sized chocolate cakes release their ooey-gooey melted chocolate centers with your first bite. With a scoop of ice-cream, crème fraîche, or whipped cream it’s the perfect Valentine’s Day treat.

Molten Chocolate Cake
Adapted from Food & Wine by Jean-Georges Vongerichten
Prep time: 15 minutes
Baking time: 12 minutes
Serves: 4

1 stick softened unsalted butter, plus 1 teaspoon melted butter for brushing ramekins
1 cup semi-sweet chocolate chips
2 eggs
2 egg yolks
¼ cup granulated white sugar
Pinch of salt
1 teaspoon vanilla essence
2 tablespoons all-purpose flour, plus 2 teaspoons for dusting ramekins
Confectioners’ sugar for dusting, optional
Whipped cream or ice-cream and strawberries as garnish, optional

Place rack in the center of the oven and preheat to 400 degrees F. Butter and flour four 6-ounce ramekins. Gently tap and remove excess flour and set the ramekins on a baking sheet. You can also use molds, custard cups or even muffin tins instead of ramekins.

In a double boiler, oven simmering water, melt butter with chocolate chips. Stir until the chocolate chips and butter melt and turn smooth. Remove from heat and set aside.

In a medium bowl, beat whole eggs, the two yolks, sugar, and salt with a hand mixer, on high speed, for about four minutes or until the mixture turns thick and pale in color. Add the vanilla essence and beat just until it is incorporated. Using a spatula gently fold the chocolate mixture and flour into the egg mixture.

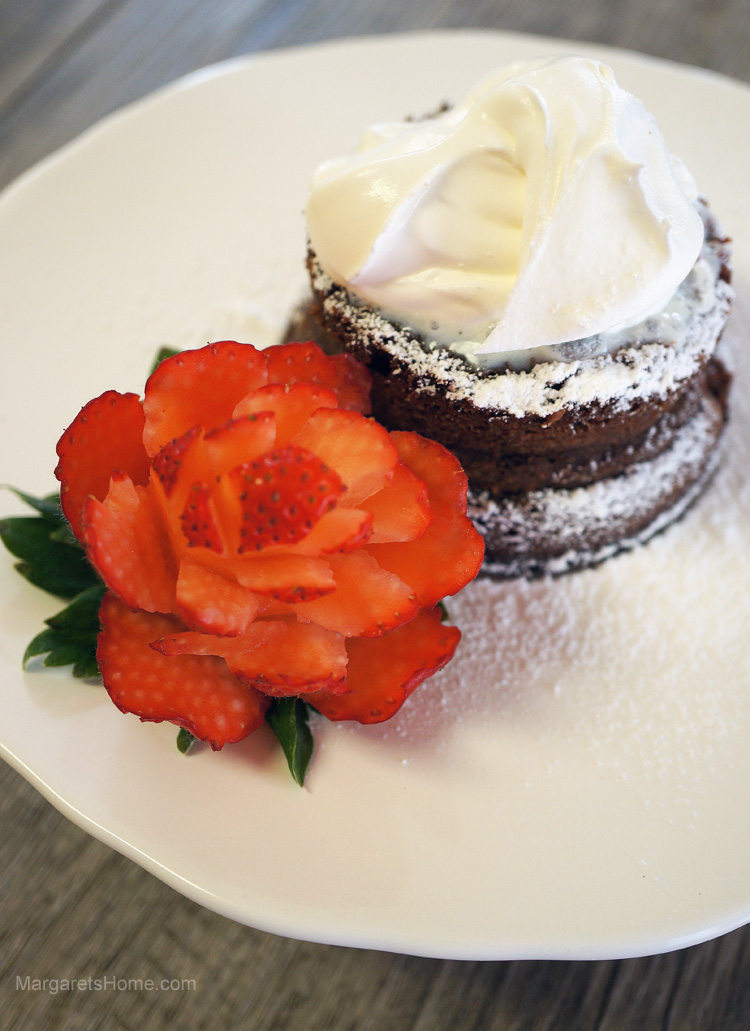
Spoon the batter into the prepared ramekins and bake for 12 minutes, or until the sides of the cake are firm but the centers are still wobbly and soft. Let the cake cool in the ramekins for one minute. You can serve the cakes in their ramekins or you can run a knife around the edge of each cake and then invert them onto serving plates. Gently remove the ramekins. Sprinkle the tops of each warm cake with confectioners’ sugar and serve with a dollop of whipped cream or ice cream. I’ve decorated my cake with a beautifully carved strawberry rose.

Note:
I used Ghirardelli premium baking semi-sweet chocolate chips.
– You can make the batter several hours in advance. Butter and flour your ramekins, pour the batter, cover with plastic wrap, and refrigerate until you are ready to bake. Bring to room temperature before you bake.
– Oven temperatures vary so check the cake after they have been in the oven for 10 minutes. The sides should be set but the centers should be wobbly and soft. This is important to get the perfect molten chocolate cake. It took 12 minutes in my oven.

Molten Chocolate Cake4

Raghavdas Ladoo – Semolina Ladoo

Sooji Ladoos3

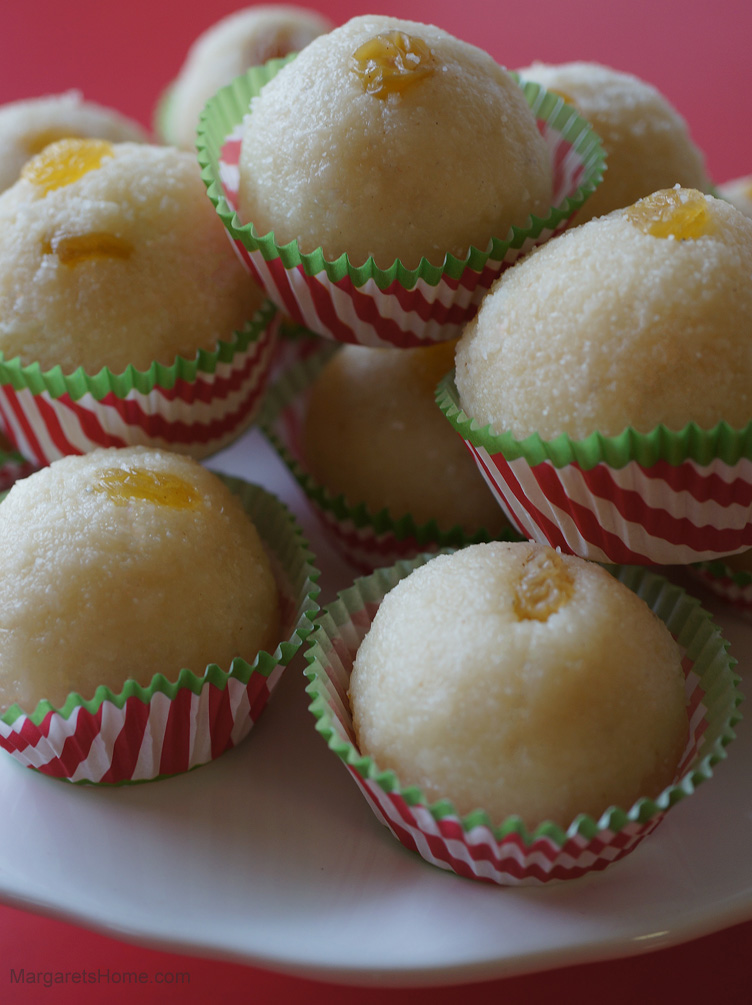
Happy Holidays to all my readers and Facebook friends! I love the month of December. It’s a month of lights, snow, parties, baking, and making Indian sweets and goodies to share with family and friends. Here is an easy recipe for Raghavdas Ladoo to add to your collection. They are made out of semolina and desiccated coconut.

Last year I shared recipes for Doughnuts, Karanjis, Almond Brittle, Rose Cookies, and Namkeen. I hope you used those recipes to make your celebrations a sweet success this year.

Raghavdas Ladoos
Prep time: 20 minutes
Cooking time: 10 minutes
Makes: 25 ladoos

1 cup desiccated coconut, (or coconut powder)
2 cups fine semolina
½ cup ghee
3 tablespoons golden raisins
½ teaspoon green cardamom powder
1 cup sugar
½ cup water

Dry roast the desiccated coconut in a wok, over medium-low heat. Roast until it begins to turn light golden in color, remove from heat and transfer it to a bowl. Make sure that the coconut doesn’t turn brown.

Let the wok cool down and then wipe it clean with a paper towel. Heat the wok over medium heat. Add ghee and the semolina. Cook till light pinkish and fragrant. You don’t want the semolina to turn brown. Remove from heat and add coconut, two tablespoon of raisins, and the cardamom powder. Mix well. Keep the rest of the raisins to decorate the ladoos.

Place a non-stick pan on medium heat. Add sugar and water and cook until it turns to a syrup of one-thread consistency. You have to watch and test the syrup frequently. Turn off the heat and pour the hot syrup into the wok with the semolina, coconut and cardamom powder. Mix well. Cover with a lid and let it rest for 15 minutes. The semolina will cook and the mixture will cool down. If it hardens, don’t panic, just sprinkle a tablespoon or two of hot water over the mixture.

Start making the ladoos while the mixture is still warm. Grease your palms with a little ghee. Take a lemon size portion of the mixture and shape them into ladoos. Garnish each ladoo with a raisin. As you make them, line them in a tray and let them cool. You can go back and make them perfectly round. Cool completely before you store them in an air tight container. They are fun and easy to make.