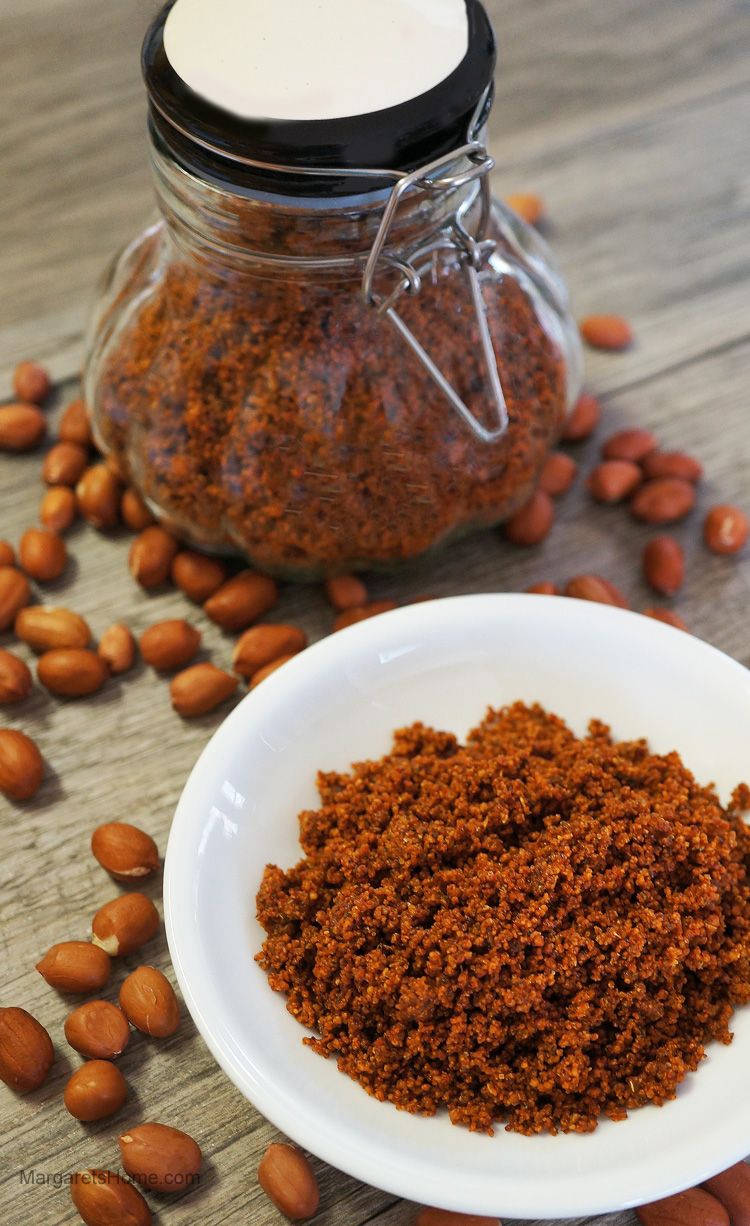
Pune Peanut Chutney

Pune Peanut Chutney1

Having grown up in the peanut growing state of Maharashtra, India, I have eaten my fair share of a variety of peanut chutneys. Some of the most popular ingredients that go into making peanut chutney are fresh or dry grated coconut, garlic, dry red chillies, sesame seeds, tamarind, and whole garam masala.

You can easily make this recipe your own by changing the quantity of the ingredients to suit your taste. I love all the different peanut chutneys I learned to make when I lived in Maharashtra. Peanut chutney goes well with plain rice, dal, and a vegetable fry. I hope you will try it out.

Pune Peanut Chutney
Prep time: 10 minutes
Cook time: 10 minutes
Serves: 3-4

Ingredients:
1 cup roasted peanuts, (salted or unsalted)
¼ cup freshly grated coconut, (or frozen grated coconut)
2 tablespoons sesame seeds
5 dry red chillies, (depending on heat and your preference)
2-4 garlic cloves, (depending on your preference)
1 tablespoon coriander seeds
1 teaspoon cumin seeds
1 teaspoon tamarind pulp
1 teaspoon Kashmiri chilli powder
1 teaspoon sugar
salt

Directions:
Place a non-stick pan, over medium-low heat. Add the coconut and roast until it turns light brown. Transfer to a plate and cool. Next, add the sesame seeds, chillies, garlic, coriander seeds, and cumin seeds to the pan. Roast until the sesame seeds pop and the rest of the ingredients are fragrant. Transfer them to the plate with the coconut. Let the ingredients cool for about five minutes.

Grind all the ingredients to a coarse powder in a food processor, or blender. Use very little salt, if you are using salted peanuts. Make sure you don’t turn the chutney into peanut butter! Store in a small bottle or jar. Peanut chutney is a great accompaniment to any meal.

Fish Molee – Fish Cooked in Mildly Spiced Coconut Milk

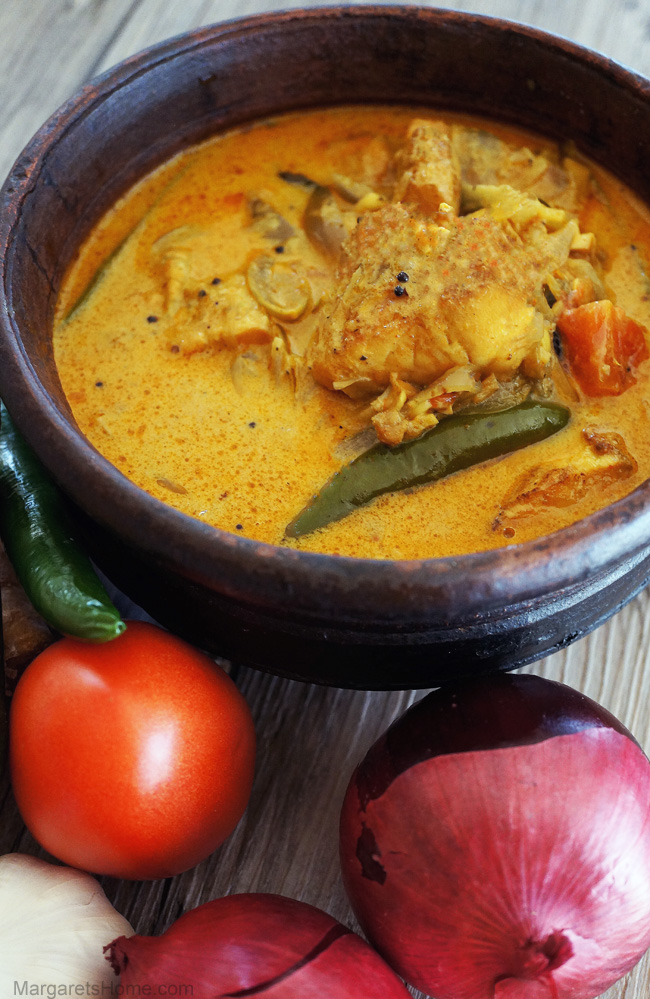
Fish Molee3

Fish Molee, also called Meen Molee in Malayalam, can be found on the menu at almost all wedding receptions and family celebrations in Kerala. It is a fresh fish curry, mildly spiced, and cooked in a coconut milk gravy. Definitely, one of my all-time favorite fish dishes. The recipe is simple and straightforward, with no exotic spices.

My variation of Fish Molee will give you a true taste of Kerala. I use fresh coconut milk and coconut oil, which brings out the authentic taste of this dish. But, if you have to use canned coconut milk, buy the best quality. Don’t shake the can before you open it. Use the thick top layer formed as the first extraction and the dilute coconut milk in the bottom of the can as the second extraction. Whisk both, the top layer and the bottom layer, with three-quarter cups of water for this recipe. I find that canned coconut milk from Thailand works well for my recipes. I’ve use Tilapia fish for this recipe, but you can also use other boneless, skinless fish.

Fish Molee is one of the most flavorful Kerala delicacies. Eat it with steamed rice, appams or rotis and you’ll understand why Kerala is called “God’s own country!”

Fish Molee
Prep time: 15 minutes
Cook time: 20 minutes
Serves: 3-4

For the Marinade
3 Tilapia fish fillets, each cut into 3 pieces
3 teaspoons lime juice
¼ teaspoon turmeric powder
½ teaspoon chilli powder
Salt

For the Gravy
3 tablespoons coconut oil to fry fish + 3 tablespoons coconut oil for the curry
½ teaspoon mustard seeds
1 sprig curry leaves
2 cups thinly sliced red onion or shallots
5 green chillies, slit down the center, (adjust depending on heat and your preference)
1 tablespoon finely chopped ginger
1 tablespoon finely chopped garlic
2 tablespoons coriander powder
1 teaspoon chilli powder
½ teaspoon turmeric powder
1 cup first extract (thick) coconut milk
1 cup second extract (thin) coconut milk
Salt
2 Roma tomatoes, quartered
1 teaspoon freshly ground pepper

Rinse the fish pieces thoroughly, drain off excess water, pat the pieces with a paper towel, and add the lime juice, turmeric, chili, and salt. Marinate for 20 minutes. Heat three tablespoons coconut oil and shallow fry fish on both sides until lightly brown. The fish does not need to be cooked as it will cook in the gravy. Remove and set aside.

Place a small saucepan over medium-high heat.  Add three tablespoons of coconut oil. When the oil shimmers, add mustard seeds. After the mustard seeds crackle, add curry leaves and onion. Sauté for two minutes and then add the green chillies, ginger, and garlic. Fry all the ingredients until the onion turns translucent. Next, add the coriander, chilli, and turmeric powder. Turn the heat to medium and pour in the thin extract of coconut milk. Add lightly fried fish pieces and salt. Bring to boil. Cook for seven minutes or until the fish is cooked. If you use fish other than Tilapia fillets, it may take a few minutes longer to cook.

Next, add the thick second extract of coconut milk, tomatoes, and freshly ground pepper. Turn the heat to low and let the curry simmer for a minute. Do not bring the curry to boil once the thick extract of coconut milk has been added, because it may curdle. Turn off the heat. Let the Fish Molee rest for 15 minutes before you serve it with steaming hot rice, appams or rotis.

Tamarind and Tomato Rasam

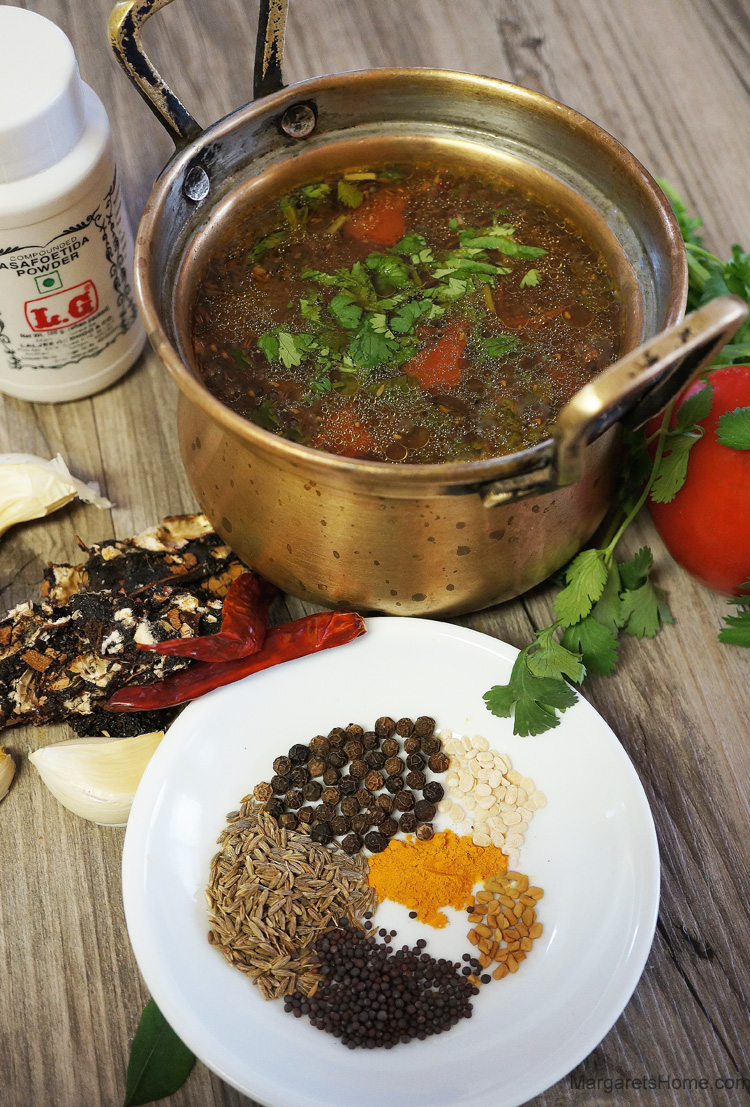
Rasam4

There are as many rasam recipes as there are South Indian families in India. Every home has their own unique blend of rasam powder and steps that they follow to make their favorite rasam. There are also several variations, such as, pepper rasam, cumin rasam, garlic rasam, lentil rasam, and buttermilk rasam. The list goes on and on! Today, I am sharing a rasam receipe that is easy and fool-proof. You won’t need to buy rasam powder. Everything is made from scratch. This post is for a my good friend, Bhadri, who requested this recipe.

Rasam is a popular soup used as an Ayurvedic remedy for coughs and colds all over Southern India. Whether you are sick or not, do give this recipe a try. It goes well with rice and a vegetable side dish like my avial, green bean thoren, or cabbage thoren.

Tamarind and Tomato Rasam
Prep time: 10 minutes
Cooking time: 10 minutes
Serves: 2-3

Ingredients:
3 cups hot tap water
¼ cup of tamarind, (or one small lime-sized ball of tamarind)
1 ripe Roma tomato
¼ teaspoon turmeric
½ teaspoon sugar
1 teaspoon salt
1 teaspoon whole black pepper corns
2 teaspoons cumin seeds
3 cloves of garlic
1½ teaspoons ghee or sesame oil
½ teaspoon mustard seeds
½ teaspoon black gram dal, (urad dal)
¼ teaspoon fenugreek seeds, (methi seeds)
2 whole dry red chillies, (depending on heat and your preference)
1/8 teaspoon asafoetida powder, (hing)
1 sprig curry leaves
2 teaspoons chopped cilantro leaves

Directions:
Soak the tamarind in one cup of hot water for 10 minutes. When it is cool, mash it with your fingertips to extract the tamarind pulp/juice. Strain the juice into a bowl. Using the same tamarind, repeat the process with the remaining two cups of water. This will give you three cups of tamarind juice. Set it aside.

Crush the tomato with your fingertips and add it to the bowl with the tamarind juice. Trust me, the rasam tastes better when you use your fingers to mash the tomato! But you can cut it, if you prefer. Add the turmeric, sugar, and salt to the tamarind and tomato mixture.

Grind to a coarse powder the pepper and cumin seeds. You can do this in a mortar and pestle or spice grinder. Add the pepper and cumin powder to the tamarind and tomato mixture. Taste, and if the mixture is too sour, add a tablespoon or two of water. Crush the three garlic cloves and set them aside.

Place a wok (kadai), over medium-high heat. Add the ghee and when it shimmers, add mustard seeds. When the mustard seeds splutter, add black gram dal. Watch carefully so you don’t burn the ingredients. When the dal turns light brown, add fenugreek seeds. Break the dry red chillies in half and add them next. Then add the asafoetida powder, curry leaves, and the tamarind and tomato mixture.

When you see the rasam beginning to boil and bubbles forming along the edges add the crushed garlic cloves. Let the rasam come to a rolling boil. As soon as you see froth forming on the top of the rasam, add the cilantro leaves and turn off the heat. Transfer the rasam to a serving bowl and cover it with a lid. Serve rasam with plain rice, papadums and a vegetable side dish. Yum!

Korma with Potatoes and Peas

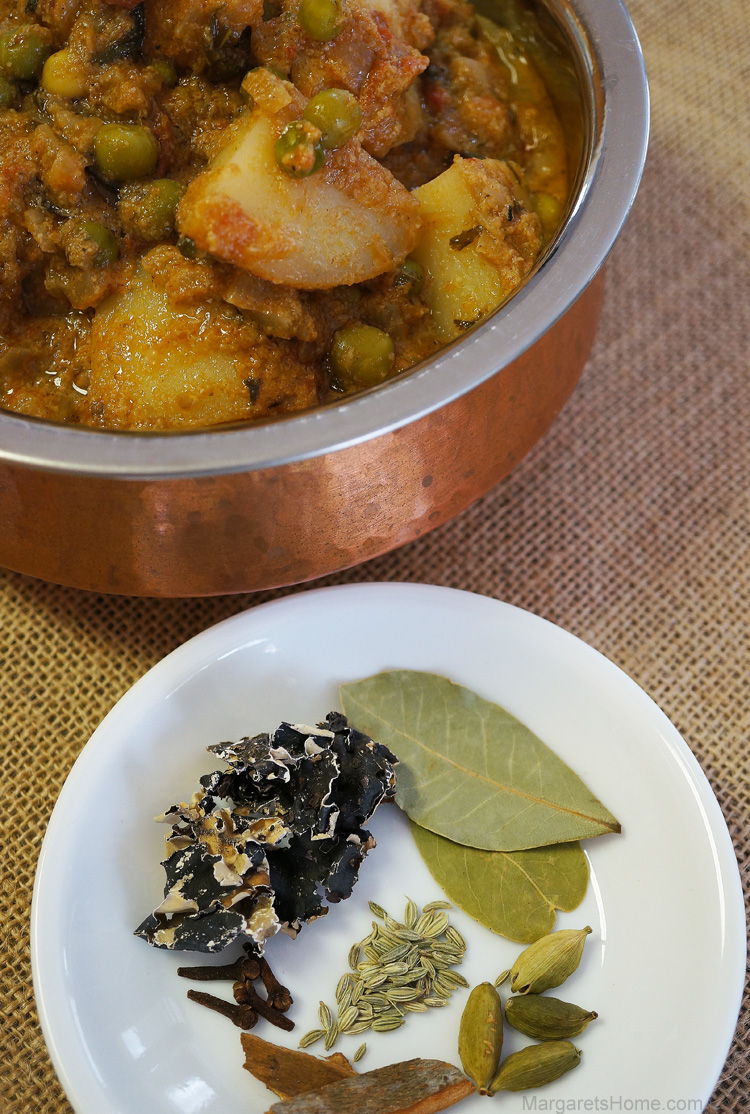
Potato & Pea Korma1

I want to introduce you to Parmotrema perlatum, commonly known as black stone flower, a species of lichen used as a spice in India. This mysterious lichen is the secret ingredient to my Chettinad and korma preparations. In India, it is called patthar ke phool in Hindi, dagad phool in Marathi and kalpasi in Tamil. It slightly resembles mushrooms and the plants grow on rocks and walls. An interesting fact about black stone flower is that it only grows in unpolluted air.

Black stone flower is sometimes included in some of the spice blends sold in Indian grocery stores. However, few home cooks use it knowingly. It is one of the ingredients in the famous Goda masala from Maharashtra. This unusual spice adds a very distinct, strong earthy aroma, and deep flavor to many vegetarian and non-vegetarian dishes. You will see, in the picture above, that I have added the spices I used in this recipe on a small white plate. Black stone flower is in between the bay leaves and cloves.

Well, now that my mystery ingredient has been disclosed, let’s use it in the korma recipe that I’m sharing with you today. Do you use black stone flower in your recipes? Tell us what recipes you use them in and how.

Korma with Potatoes and Peas
Prep time: 15 minutes
Cooking time: 25 minutes
Serves: 6

Ingredients:
3 tablespoons ghee
1 whole green cardamom, lightly crushed
1 clove
1 bay leaf
½ inch piece cinnamon, broken into bits
2 cups finely diced red onion
2 cups medium diced tomatoes
¼ teaspoon turmeric, optional
2 tablespoons chopped cilantro
5 mint leaves, torn into bits
2 cups medium diced potato, (I used red potatoes)
1 cup frozen green peas
2 cups water
salt
½ teaspoon garam masala, (use my Home-made garam masala)

To be ground
1 inch-piece cinnamon, broken into bits
2 cardamoms, outer cover removed
2 cloves
1 bay leaf
1 teaspoon fennel seeds
4 small pieces of black stone flower
8 cashew nuts, (soaked in ¼ cup hot water for 15 minutes)
¼ cup grated fresh coconut
1 tablespoon roughly chopped ginger
1 tablespoon roughly chopped garlic
2 roughly chopped green chillies, (depending on heat and your preference)

Directions:
First, prepare the ingredients to be ground. Add the dry spices to your blender or spice grinder and powder them. Next, add the cashew nuts along with the water it was soaking in, coconut, ginger, garlic, and green chillies. Grind everything to a smooth paste. Set aside.

Heat ghee in a large pan over medium-high heat. Add the whole spices – cardamom, clove, bay leaf, and cinnamon. Sauté for 30 seconds and then add the onion. Cook until the onion turns translucent. Add the ground spice and coconut mixture. Fry for five minutes being careful not to burn the ingredients. Sprinkle a few drops of water, if it is catching to the bottom of the pan. Add tomato, turmeric, cilantro, and mint. Fry until the tomato turns mushy and you see the oil separate. Add potatoes, two cups of water, and salt. Cook on high until the water begins to boil. Turn the heat to medium-low, add peas, cover with a lid, and cook for 15 minutes or until the potatoes are done. Sprinkle garam masala and cook for another three minutes. This dish goes well with chapatis or puris.

Cilantro Pesto

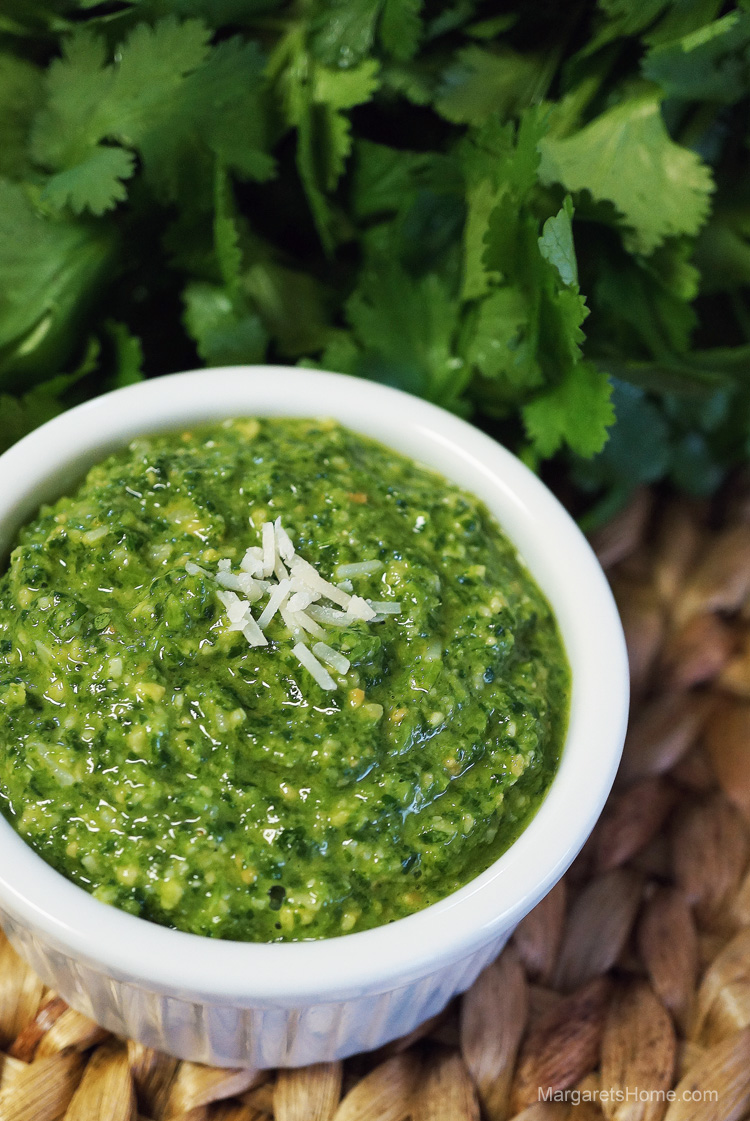
Cilantro Pesto1

This recipe is a delightful version of the classic basil pesto, especially for people like me that are not big fans of basil.

Cilantro pesto can be used in several ways. Use it as a condiment on your sandwich and bruschetta or as dressing on pasta salad. Add lots of shredded cheese to it and use it as a filling in puffs. A tablespoon added to hummus or egg salad creates an extra layer of flavor. Garnish your tomato soup with cilantro pesto to take it to the next level. These are just a few ideas. I am sure you can come up with many more of your own. Until next week, have fun cooking.

Cilantro Pesto
Prep time: 8 minutes
Cooking time: 8 minutes
Makes: About 1 cup

Ingredients:
½ cup slivered almonds
2 cups cilantro, roughly chopped
1 shallot, roughly chopped
1 serrano chilli, chopped and seeded, optional
1 garlic clove, roughly chopped
2 tablespoons parmesan cheese
salt
2 tablespoons lemon juice
¼ cup olive oil

Directions:
Place a small pan over medium heat. Add the almonds and roast them until they turn golden and fragrant. Remove and cool.

In the bowl of your food processor add the cooled almonds and pulse until coarsely chopped.

Add cilantro, shallot, serrano, garlic, parmesan cheese, salt, and lemon juice. Pulse until coarsely ground. With the food processor running, slowly drizzle olive oil. Keep refrigerated until you are ready to use.

Molten Chocolate Cake – Happy Valentine’s Day!

Molten Chocolate Cake3

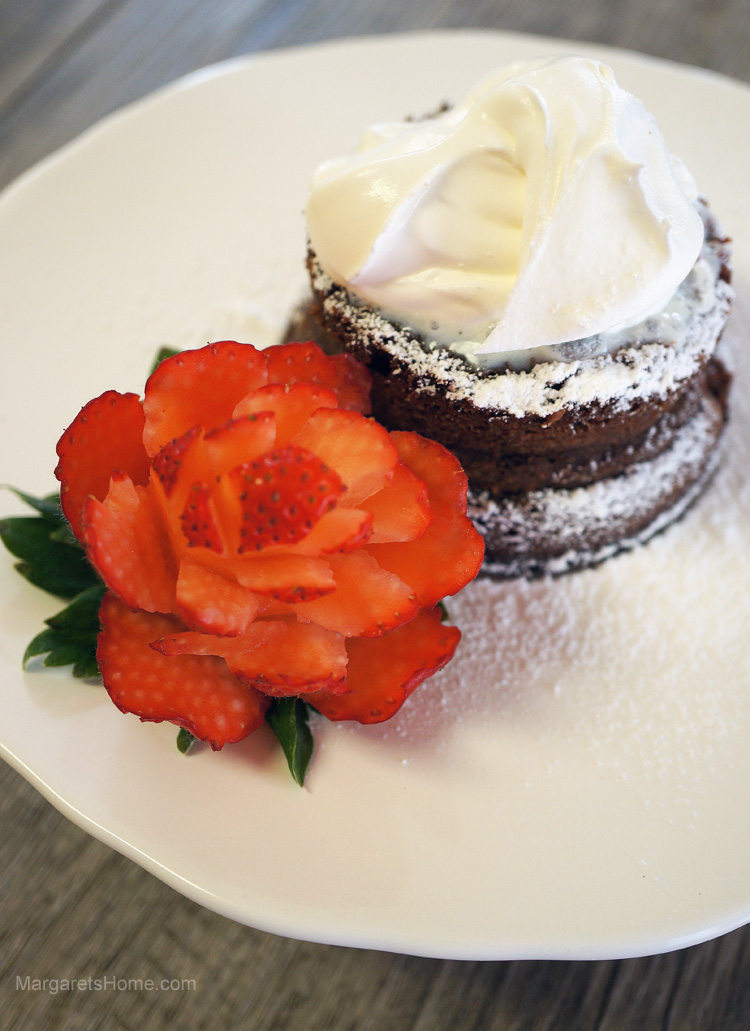
Happy Valentine’s Day! Bake this easy, decadent Molten Chocolate Cake and you’re bound to impress your sweetheart. This cake has several names – chocolate fondant pudding, chocolate lava cake, and chocolate moelleux. The French call it chocolate mi-cuit (semi-cooked) which, I think, perfectly describes this cake.

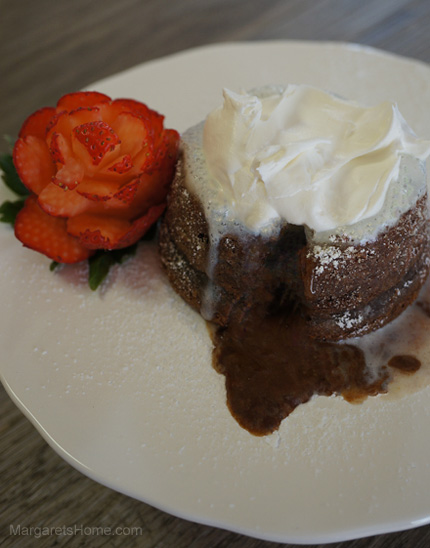
The molten chocolate cake was born out of a chocolate accident in the kitchen when its creator master chef Jean-Georges Vongerichten pulled an under-baked cake out of the oven. Served right out of the oven, these individual sized chocolate cakes release their ooey-gooey melted chocolate centers with your first bite. With a scoop of ice-cream, crème fraîche, or whipped cream it’s the perfect Valentine’s Day treat.

Molten Chocolate Cake
Adapted from Food & Wine by Jean-Georges Vongerichten
Prep time: 15 minutes
Baking time: 12 minutes
Serves: 4

1 stick softened unsalted butter, plus 1 teaspoon melted butter for brushing ramekins
1 cup semi-sweet chocolate chips
2 eggs
2 egg yolks
¼ cup granulated white sugar
Pinch of salt
1 teaspoon vanilla essence
2 tablespoons all-purpose flour, plus 2 teaspoons for dusting ramekins
Confectioners’ sugar for dusting, optional
Whipped cream or ice-cream and strawberries as garnish, optional

Place rack in the center of the oven and preheat to 400 degrees F. Butter and flour four 6-ounce ramekins. Gently tap and remove excess flour and set the ramekins on a baking sheet. You can also use molds, custard cups or even muffin tins instead of ramekins.

In a double boiler, oven simmering water, melt butter with chocolate chips. Stir until the chocolate chips and butter melt and turn smooth. Remove from heat and set aside.

In a medium bowl, beat whole eggs, the two yolks, sugar, and salt with a hand mixer, on high speed, for about four minutes or until the mixture turns thick and pale in color. Add the vanilla essence and beat just until it is incorporated. Using a spatula gently fold the chocolate mixture and flour into the egg mixture.

Spoon the batter into the prepared ramekins and bake for 12 minutes, or until the sides of the cake are firm but the centers are still wobbly and soft. Let the cake cool in the ramekins for one minute. You can serve the cakes in their ramekins or you can run a knife around the edge of each cake and then invert them onto serving plates. Gently remove the ramekins. Sprinkle the tops of each warm cake with confectioners’ sugar and serve with a dollop of whipped cream or ice cream. I’ve decorated my cake with a beautifully carved strawberry rose.

Note:
I used Ghirardelli premium baking semi-sweet chocolate chips.
– You can make the batter several hours in advance. Butter and flour your ramekins, pour the batter, cover with plastic wrap, and refrigerate until you are ready to bake. Bring to room temperature before you bake.
– Oven temperatures vary so check the cake after they have been in the oven for 10 minutes. The sides should be set but the centers should be wobbly and soft. This is important to get the perfect molten chocolate cake. It took 12 minutes in my oven.

Molten Chocolate Cake4

Broccoli and Cheddar Cheese Soup

Broccoli Cheddar Soup2

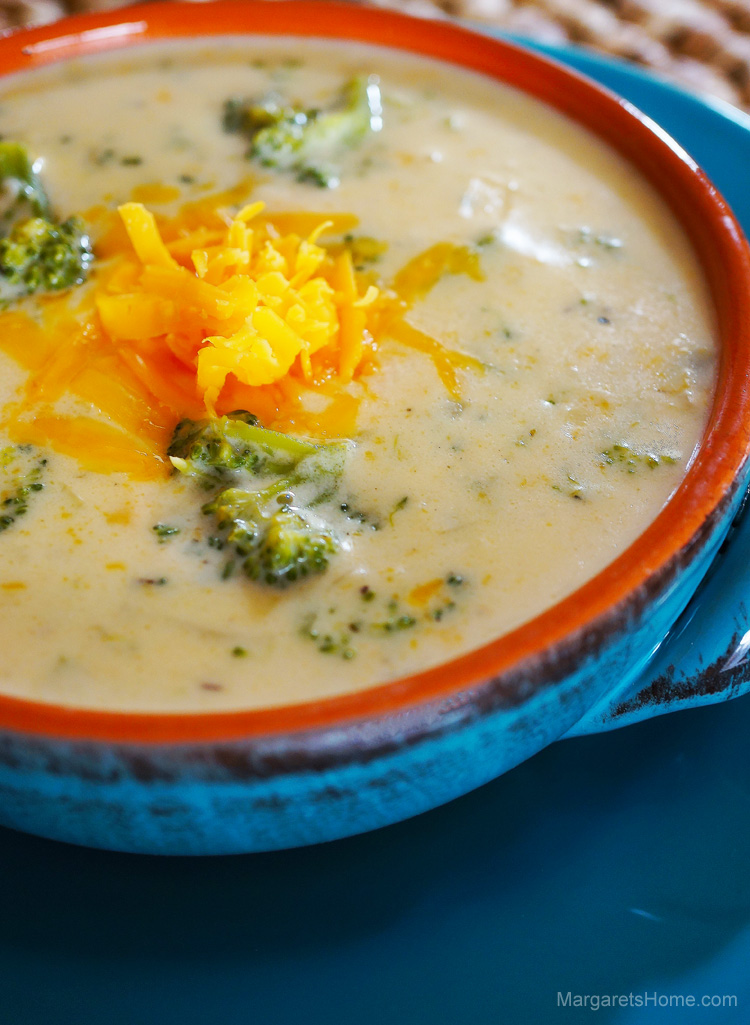
Broccoli and cheddar cheese soup has always been a favorite of mine. It’s a comforting soup with all the creamy richness of cheddar cheese and broccoli. I still remember the first time I ordered it in a restaurant in California. I was hooked and I knew I had to learn how to make it.

You don’t need a whole lot of ingredients and it takes about 30 minutes to make from start to finish. Making the soup begins with a simple roux, like they make in restaurants. I’ve used whole milk, heavy cream, mild cheddar cheese, and vegetable stock. You could switch the mild cheddar for sharp cheddar cheese, if you please.

For a lighter version, you could use oilive oil, evaporated fat-free milk, reduced fat half and half, and reduced fat cheddar cheese. Also, make sure that you use low-sodium vegetable stock or make your stock from scratch using my vegetable stock recipe. I’ve also seen recipes using unsweetened almond or coconut milk instead of milk and heavy cream.

Well, here’s how you make my version of broccoli and cheddar cheese soup. I had it for lunch today, with a piece of whole wheat bread. I really enjoyed it and I hope you will too.

Broccoli and Cheddar Cheese Soup
Prep time: 10 minutes
Cooking time: 20 minutes
Serves: 4-6

3 tablespoons butter
2 cups finely chopped onion
1 tablespoon finely chopped garlic
¼ teaspoon dried thyme
6 tablespoons all-purpose flour
5 cups whole milk
2 cups vegetable stock, (or chicken stock)
½ cup heavy cream
1 teaspoon salt
1 teaspoon freshly ground pepper
3 cups broccoli florets, (1 pound; I used some of the tender stems as well)
2 cups grated mild cheddar cheese, (8 ounces; set aside ¼ cup to garnish the soup)

Melt butter in a large saucepan over medium-high heat. Add onions and cook, stirring frequently, until they turn soft. It will take about three minutes. Add garlic, thyme, and flour. Stir constantly and cook for one minute. While whisking, slowly pour in the milk, vegetable stock and heavy cream. Add salt and pepper. Stir constantly and cook until the mixture begins to bubble. Reduce the heat to medium-low and add the broccoli. Cook for ten minutes, stirring once in a while, to make sure it is not catching to the bottom of the pan. Off the heat and add cheese. Stir until all the cheese is melted. Garnish each bowl of soup with a little grated cheese.

Note:  You could serve the soup as is or you could puree the soup in a blender, heat it up again, and then serve. I used a potato masher to mash half of the soup and I left the other half chunky. If the soup is too thick you can thin it down with vegetable stock or water.

Chicken Cutlets

Chicken Cutlets1

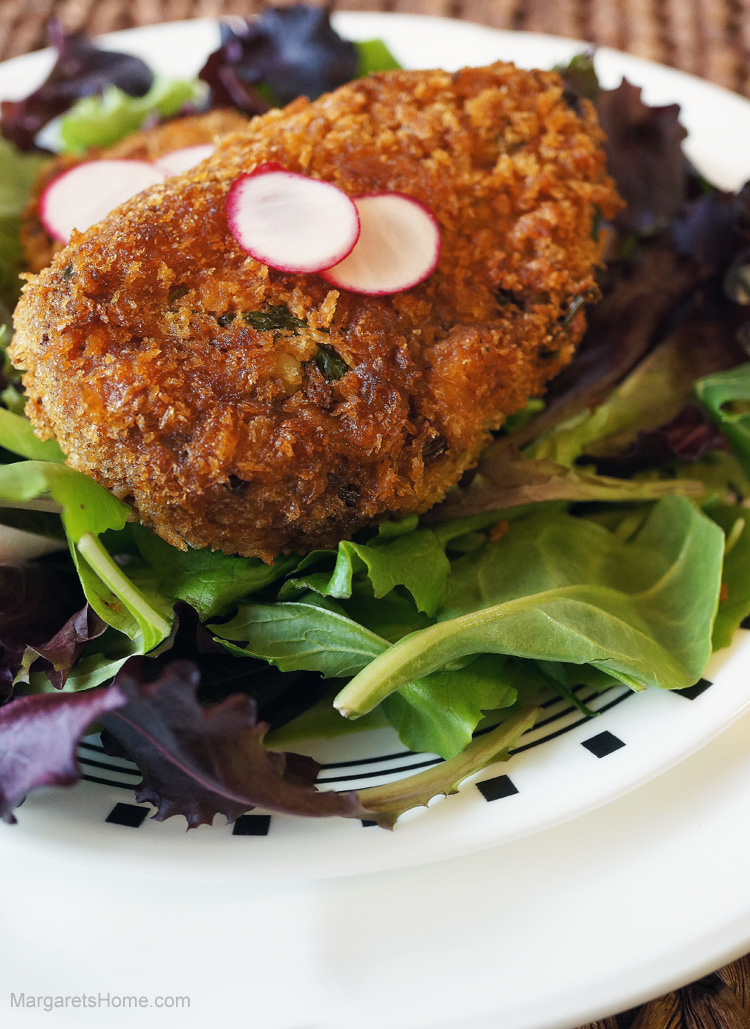
I remember going to restaurants in India many years ago and ordering chicken or vegetable cutlets and soup instead of the typical masala dosa. It was a great alternative when I didn’t feel like having Indian food. It was often listed on the menu under the Western items section. Well, now we have “Indianized” the cutlet so much that it isn’t considered so much of a Western item on the menu in India any more.

I often use leftovers to make cutlets and my children think I’ve created something new and awesome. When they were young, I would put lots of vegetables into my cutlets and they had no idea! They loved them anyway. What I’m trying to say, is that once you understand the basics of cutlet making, you don’t need a recipe. You can make almost anything into a cutlet. This recipe is one of my favorites. Enjoy!

Chicken and Potato Cutlets
Prep time: 35 minutes (includes time to cook chicken)
Cooking time: 25 minutes
Makes: 15

2 large chicken breasts
½ teaspoon whole black pepper
1½ teaspoons salt
2 large potatoes, boiled and mashed
1 teaspoon cumin seeds
3 teaspoons coriander seeds
2-3 teaspoons red chilli flakes, (depending on heat and your preference)
1 tablespoon kasoori methi, crushed
1 large onion, finely chopped
1 small bunch cilantro, finely chopped
½ teaspoon freshly crushed black pepper
1 cup Panko bread crumbs
2 eggs
Oil for shallow frying

Cook chicken in three cups of water, whole black pepper, and half a teaspoon of salt. The chicken should be cooked well enough so that it falls off the bone easily. It will take about 25-30 minutes over medium-high heat. Cool, shred the meat and put into a large mixing bowl.

Lightly roast cumin and coriander seeds and crush them to a coarse powder.

Add mashed potatoes, the lightly roasted and crushed cumin and coriander powder, chilli flakes, kasoori methi, onions, and cilantro into the large mixing bowl along with the shredded chicken. Add salt and pepper. Mix well. Taste to make sure there is enough salt. Shape into cutlets – either round or oval. Line them on a baking tray.

Heat a large frying pan over medium-high heat. Add oil for shallow frying. There should be enough oil in the pan so that when you put the cutlets in, the oil should come at least half way up the sides of the cutlets.

Beat eggs in a small bowl, and spread the panko crumbs on a plate. Dip each cutlet into the egg and then coat them in breadcrumbs. Add them to the hot oil and fry until golden brown on both sides. Drain on paper towels.


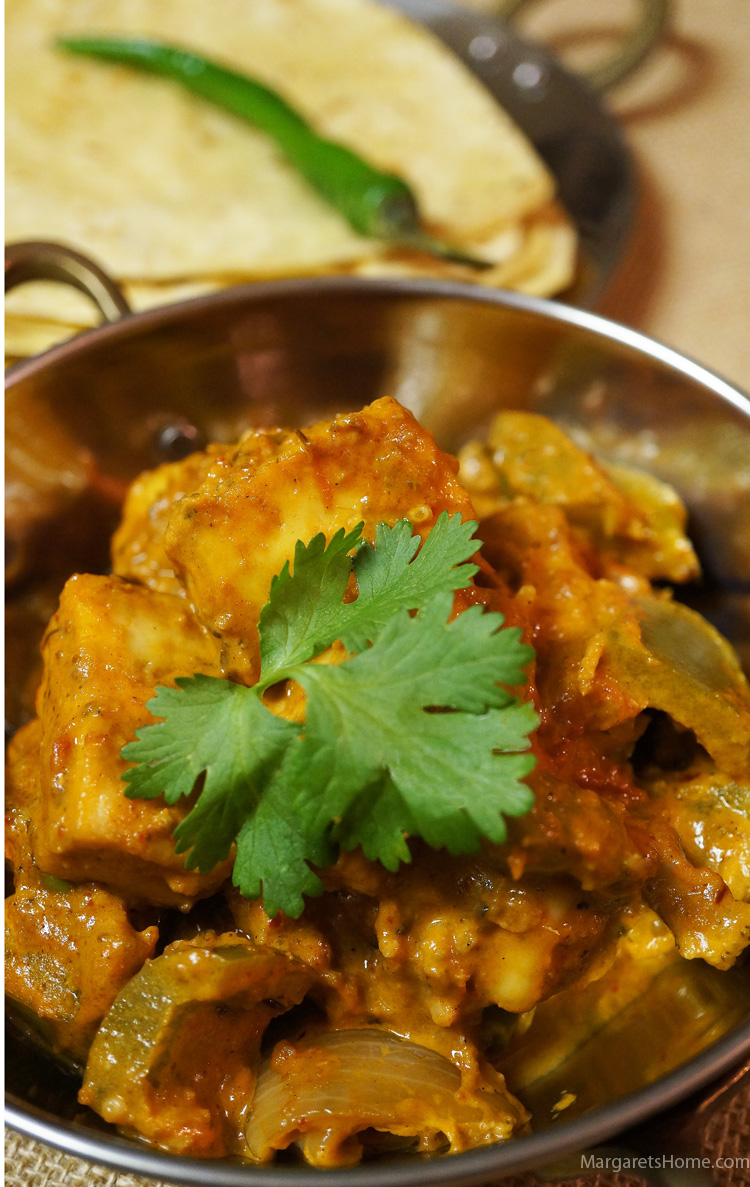
Kadai Paneer – Paneer, Bell Pepper, and Onion cooked in a Kadai

Kadai Paneer2

A kadai, sometimes spelled karahi, is a must in every Indian kitchen. In fact, most homes have several. One to cook vegetables in, one to cook sweets in, and one for deep frying. A kadai is a thick, circular, deep cooking vessel, traditionally made from cast iron or copper. It is used in kitchens in India, Pakistan, Bangladesh, and Nepal. It looks like a wok but it has steeper sides with two handles. Dishes typically made in a kadai have Afghan and Persian origins.

Don’t worry if you don’t own a kadai, you can still make this dish in a regular non-stick pot or wok. The paneer I buy is not as fresh and soft as the paneer we get in India. Hence, the extra step of soaking the pieces of paneer in hot water. If you get fresh paneer or if you make your own, you can skip this step. Kasoori methi is dry fenugreek leaves, which you can buy at an Indian grocery store. North Indians like the slight crunch of the kadai spice mix, but if you are not used to that, you can grind the spices to a powder. What makes my Kadai Paneer distinct is the kadai spice mix. Try it out once, and I think you’ll be hooked.

Kadai Paneer – Paneer, Bell Pepper, and Onion cooked in a Kadai
Prep time: 8 minutes
Cooking time: 25 minutes
Serves: 6

4 whole dry Kashmiri red chillies
1 teaspoon fennel seeds
2 teaspoons cumin seeds
4 tablespoons coriander seeds
1 teaspoon whole black pepper corns
14 ounces paneer, (400 grams)
3 cups water
3 tablespoons oil
1-inch piece ginger, grated
6 cloves of garlic, grated
8 Roma tomatoes, diced
2 tablespoons tomato paste
Salt
1 small onion, cut into wedges and petals separated
1 green bell pepper, cut into large cubes
1 teaspoon kasoori methi, (dry fenugreek leaves)
1 teaspoon garam masala, (preferably my garam masala)
3 tablespoons heavy whipping cream
1 green chillie, finely sliced, (optional)
1 tablespoon cilantro, finely chopped

To make the special kadai spice mix, roast dry Kashmiri red chillies, fennel seeds, 1 teaspoon cumin seeds, coriander seeds, and whole black pepper in a small non-stick frying pan over low heat, until they smell fragrant. Cool and grind to a coarse powder. I use a coffee grinder to do this. You could also use a mortar and pestle.

Cut paneer into pieces. For this recipe, I cut my paneer into small rectangular pieces. Heat three cups of water in a saucepan.  When the water boils, off the heat, and put panner pieces into the hot water. Allow it to soften while you continue with the next step. If you are using fresh or home-made paneer you can skip this step.

Heat oil in a kadai or wok over medium-high heat. When it shimmers, add one teaspoon of cumin seeds and wait until they splutter. Next add the grated ginger and garlic. Sauté for five seconds and then add tomatoes, tomato paste, and salt. Let the tomatoes cook for six to seven minutes or until the oil separates. Drain the paneer pieces and then add them to the dish. Reserve the water. Add one tablespoon of the ground kadai spice mix, capsicum, and onion. Mix well, add quarter cup of the reserved water, and let the vegetables cook for two minutes. You want the bell pepper and onion to have a crunch to them. Add crushed kasoori methi, the rest of the ground kadai spice mix, garam masala, and cream. Stir gently so paneer and vegetables are well coated with the creamy-tangy sauce. Garnish with sliced green chillies and chopped cilantro. Kadai paneer goes well with naan, roti or rice.

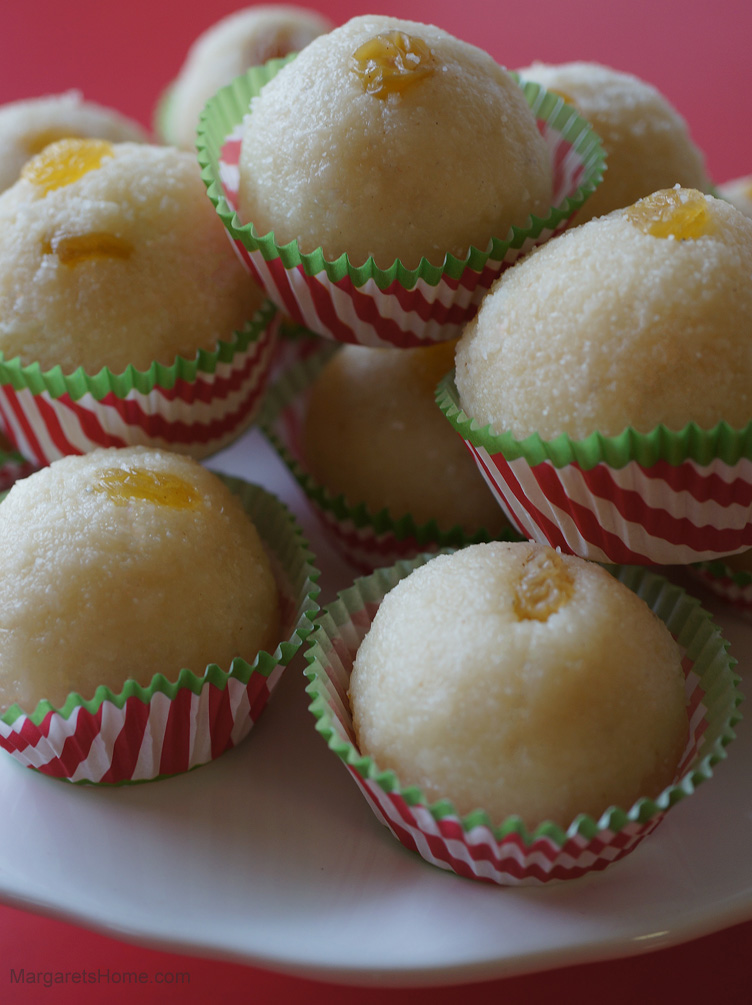
Raghavdas Ladoo – Semolina Ladoo

Sooji Ladoos3

Happy Holidays to all my readers and Facebook friends! I love the month of December. It’s a month of lights, snow, parties, baking, and making Indian sweets and goodies to share with family and friends. Here is an easy recipe for Raghavdas Ladoo to add to your collection. They are made out of semolina and desiccated coconut.

Last year I shared recipes for Doughnuts, Karanjis, Almond Brittle, Rose Cookies, and Namkeen. I hope you used those recipes to make your celebrations a sweet success this year.

Raghavdas Ladoos
Prep time: 20 minutes
Cooking time: 10 minutes
Makes: 25 ladoos

1 cup desiccated coconut, (or coconut powder)
2 cups fine semolina
½ cup ghee
3 tablespoons golden raisins
½ teaspoon green cardamom powder
1 cup sugar
½ cup water

Dry roast the desiccated coconut in a wok, over medium-low heat. Roast until it begins to turn light golden in color, remove from heat and transfer it to a bowl. Make sure that the coconut doesn’t turn brown.

Let the wok cool down and then wipe it clean with a paper towel. Heat the wok over medium heat. Add ghee and the semolina. Cook till light pinkish and fragrant. You don’t want the semolina to turn brown. Remove from heat and add coconut, two tablespoon of raisins, and the cardamom powder. Mix well. Keep the rest of the raisins to decorate the ladoos.

Place a non-stick pan on medium heat. Add sugar and water and cook until it turns to a syrup of one-thread consistency. You have to watch and test the syrup frequently. Turn off the heat and pour the hot syrup into the wok with the semolina, coconut and cardamom powder. Mix well. Cover with a lid and let it rest for 15 minutes. The semolina will cook and the mixture will cool down. If it hardens, don’t panic, just sprinkle a tablespoon or two of hot water over the mixture.

Start making the ladoos while the mixture is still warm. Grease your palms with a little ghee. Take a lemon size portion of the mixture and shape them into ladoos. Garnish each ladoo with a raisin. As you make them, line them in a tray and let them cool. You can go back and make them perfectly round. Cool completely before you store them in an air tight container. They are fun and easy to make.